Photoshop Pen Tool is the most powerful tool in Adobe Photoshop and Illustrator. It allows us to create various shapes and paths. For a smooth selection pen tool works uniquely. In this tutorial, we are going to discuss everything about Photoshop Pen Tool. First, we will learn about the pen tool. After that, we will show you how to use it in Photoshop. Let’s start learning the great pen tool.
What is Photoshop Pen Tool?
Photoshop pen tool works through vector mathematics. It is used to create smooth-edged selections of an object. The pen tool is not a type of tool like another selection tool. It always creates a vector path when used. Normally brush tool, pencil tool and other selection tool use pixels in Photoshop, but paths created by pen tool is either work Paths or shape Paths.
What are the uses of Photoshop Pen Tool?
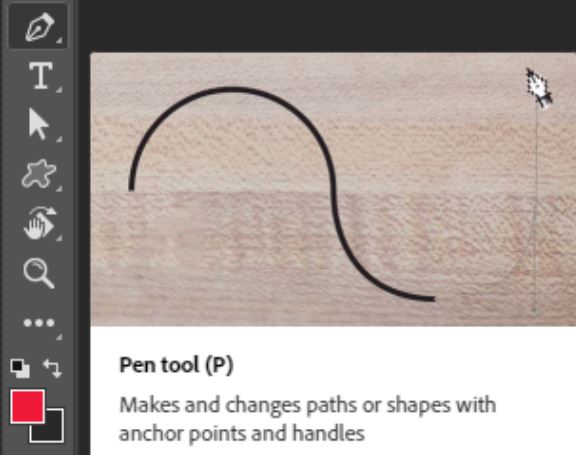
Photoshop Pen Tool allows us to create paths and shapes. Then we can change, save, and reuse them later. It helps us to Remove Background from any image perfectly. It is the ultimate tool; graphic designers use to cut out an image from the Background. You can also select a portion of a product image to change the color. Pen Tool also allows you to create custom shapes to display certain parts of an image. After creating the shapes with Photoshop pen tool, you can manipulate the shapes as you want.
To perform all these important tasks, we need the pen tool. So, as a graphic designer, we should master the Photoshop Pen tool from the beginning.
How to select the Pen Tool in Photoshop?
The pen tool is located in the lower half of the Toolbar section in Photoshop. You can use the shortcut “P” from the keyboard to select the pen tool. But if you click and hold on the Pen Tool in the Toolbar, you will find six different Pen Tool options. They are:
- Pen Tool
- Freeform Pen Tool
- Curvature Pen Tool
- Add Anchor Point Tool
- Delete Anchor Point Tool
- Convert point Tool
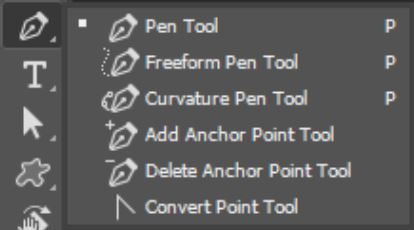
Photoshop Pen Tool options
Now that we have learned that there are six types of Pen Tool. So, let’s see what they do. The first three tools are to create paths. The standard pen tool allows you to create paths by creating an anchor point.
With the freeform pen tool, you can make paths by clicking and dragging the mouse. But it doesn’t give an accurate path all the time.
Many objects include big curves in the photo. So, to select big curves, you can use the curvature tool. Another pen tool for making selection is the magnetic pen tool. It works almost as magnetic lasso tool but creates vector paths. When you activate the freeform pen tool, you will see an option for magnetic pen tool on the options bar. If you activate the magnetic option, then you can make the path more easily with Photoshop pen tool.

The other three options in Photoshop pen tool are for modifying the path. You can add, delete or convert the anchor points with these options.
In the Photoshop option bar, you can set either Path or Shape. If you select an object with the path option, you will find your path in the paths panel. But if you choose the shape, it makes another Shape Path that shows up in both Paths Panel and the Layers Panel. You can also change the settings for the shape. From the option bar, you will have access to set up stroke color, thickness and shape color.

When using the path option, you will see two overlapping squares icon. If you click the icon, you can choose to combine shapes option. It also works for shapes.
How to create a path using the Photoshop Pen Tool?
To create a path, we will use the standard Pen tool. It will allow us to make a smooth path. Now, we are going to make a path of a coffee mug. First, open the image in Adobe Photoshop then select the standard Pen tool. You can also use the shortcut P for selecting the pen tool. After that, choose the path option from the option bar of Photoshop. Now start creating the path. Try to start creating an anchor point from a smooth edge. Use Alt+Scroll wheel to zoom the image for making exact anchor points.
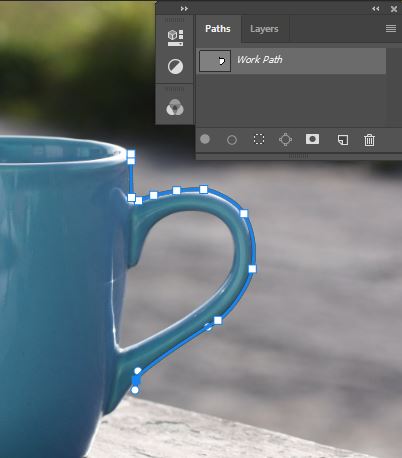
When you are going to make a path for a curved area, use Ctrl and drag the mouse. Then use the Alt key to bend the handles for adjusting the angles.
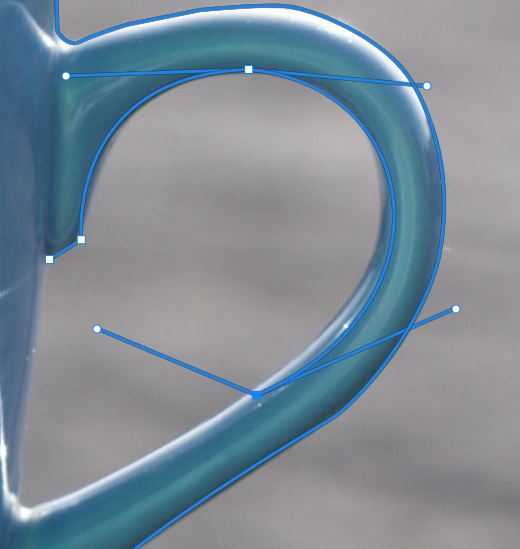
Now close the path by switching over the first anchor point. To do that, click when you see a circle on the right side of the pen tool. After that, we will have the complete path as below.
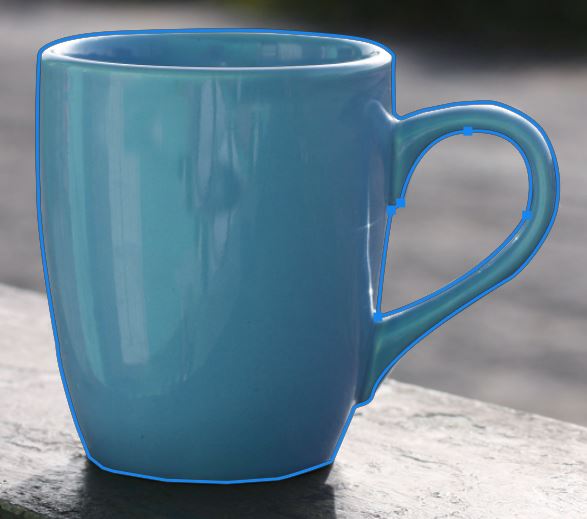
How to save the path?
Without saving the path, you could have lost your hard work when you create other paths. So, save your path by going to the panel of paths. There you will find a new working path. Double-click on the work path and rename it to save the path.
Creating a selection from a path
After completing the path, now it’s time to make a selection from the path. Choose the path from the Paths panel. Then click on the icon from the bottom of the panel. The icon looks like a dot pattern circle.
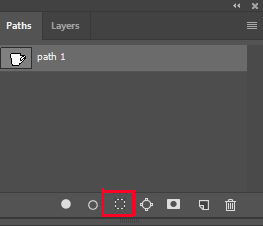
You can also select the path by choosing the select option from the option bar beside the make option. When clicking the select option, a pop-up dialogue box will appear. Now keep the feather radius 0 if you want to isolate an object with the path. Also, remember to check the Anti-Alise option.
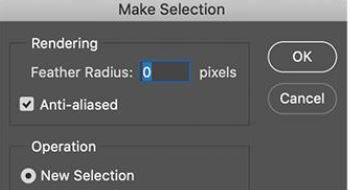
Now the selection is complete. Once making the selection, now you can isolate the object from its background and change the color of the object.
Removing the Background with the selection
Now that the selection is made, you can remove the Background in two different ways. You can remove the Background by copying the selection into another layer, or you can create a layer mask to do that. Now will create a layer mask to remove the Background of the mug.
First, we have to locate the Layer Mask icon from the layer panel. You will find the layer mask icon in both paths panel and layer panel. It is rectangular with a black circle in it. Click on the icon to create a layer mask. The Background will be removed when you click on the icon.
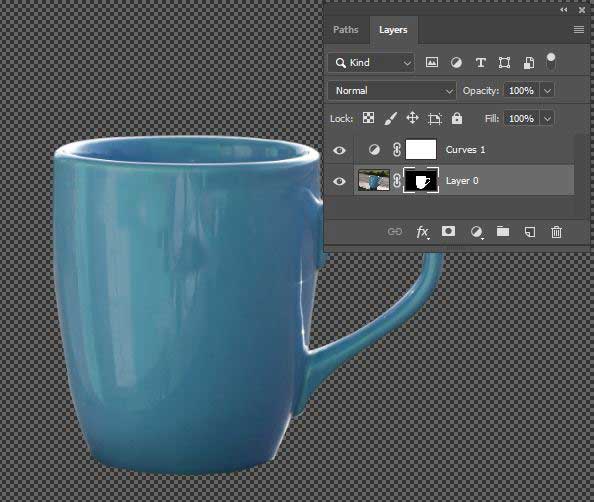
Changing the background color for the object
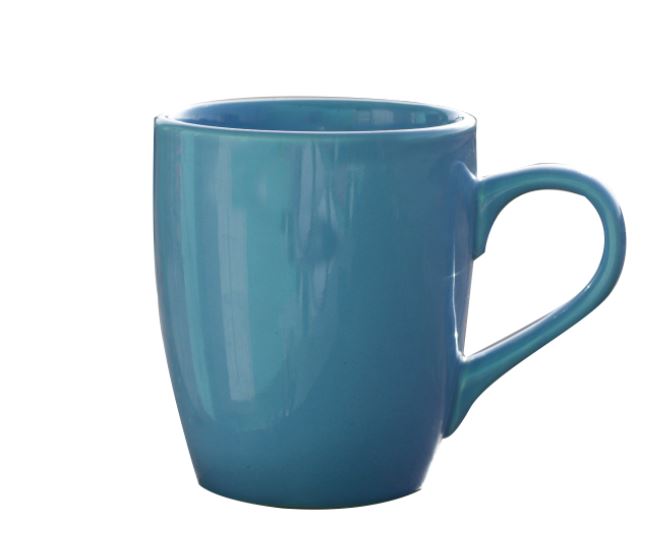
Now go to the layer panel again and click on the new adjustment layer icon then choose “solid color” from the option. Then the color picker box will be open. In this case, we want to add a white background for the mug. So, we are going to use a white color. Now see the final result below.
If you don’t want to go through all the complications by yourself, that’s ok. But if you need Background remove service, you can always outsource background removal from us. Our expert graphic designers use the unique techniques of Photoshop pen tool to provide high-quality background remove service.
Conclusion
With the Photoshop Pen Tool, we can do a lot more than just selecting. We can make various shapes with this amazing tool. The beginner designer shouldn’t be discouraged at first as it takes some time to master the pen tool. With a little practice, you can be an expert at using Photoshop Pen Tool.
Yes, Photoshop supports stylus for using the pen tool. You can use a stylus instead of using the mouse to make a more accurate path.
You can use the ‘Delete Anchor Point Tool’ to remove an anchor point. You can find this tool by clicking and holding on the Pen Tool in the Toolbar. Then if you click on a point with the mouse, it will be removed.


