Photoshop clipping mask is a non-destructive process of controlling layer visibility in Photoshop. Adobe Photoshop provides five different methods of masking. Among them, Clipping Mask is the easiest.
Every one of them has both advantages and disadvantages. But today we will explore every aspect of Photoshop clipping mask. Read the full article to learn how to use and create a clipping mask. See also how to make image masking in Photoshop from here.
What Is Photoshop Clipping Mask?
Photoshop clipping masks are like layer masks. But there are differences between clipping masks and layer masks. A layer mask works with the black and white to control different parts of the layer. But a clipping mask controls the visibility of a layer using the content and transparency of any layer. After all, the clipping mask is a unique and non-destructive way to control the visibility of a layer.
What does Photoshop Clipping Mask do?
If you want to erase any object or the background from your photo, you could use Photoshop’s Eraser tool. But the eraser tool has some limitations. It is also a destructive way. If you use the eraser tool, you can’t edit your picture later. It changes the photo permanently. You won’t be able to undo if you erase too much of the top image.
Many of us might choose Photoshop layer mask. With the layer mask, we can make a quick selection and crop the top image into the bottom one. But the issue with a layer mask is it needs brushwork and feathering. It also needs expertise and professional level editing. But you can avoid all this issue by using Photoshop clipping mask.
Creating Photoshop Clipping Mask
To apply a clipping mask, we need a group of a layer. We need at least two layers to create a Photoshop clipping mask. So, let’s see how to make a clipping mask step by step.
Step 1:
Open the image that you want to mask in Adobe Photoshop. It will automatically create a background layer for the image.
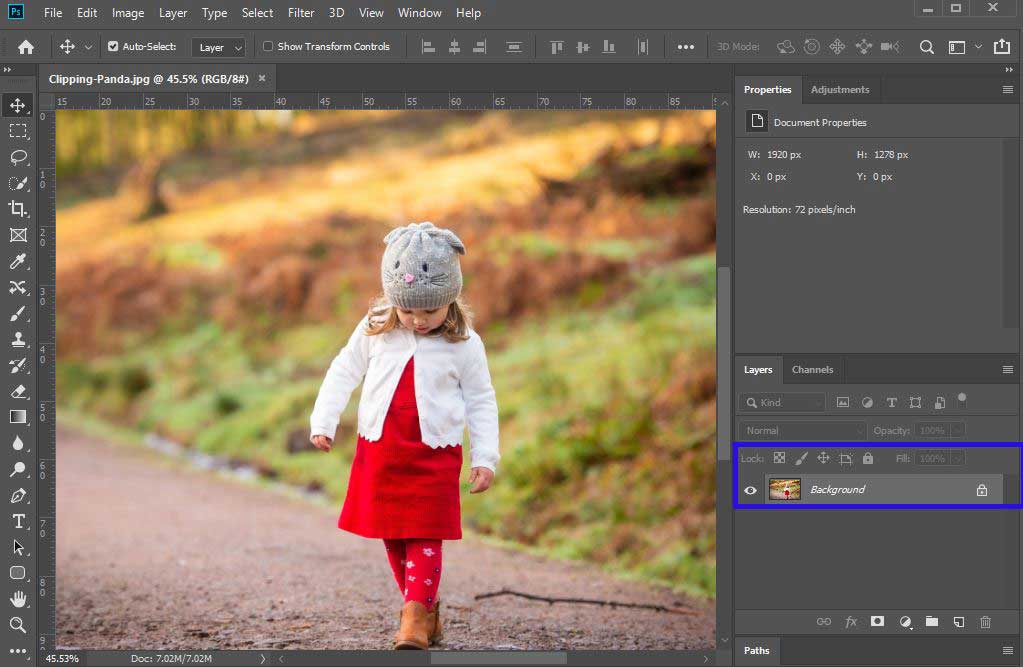
At first, the background layer will be locked. So you have to unlock it.
Unlock the background layer by clicking on the lock icon. By default, the layer will convert into “Layer 0”. You can change the layer name if you want. But I’m keeping the name as it is.
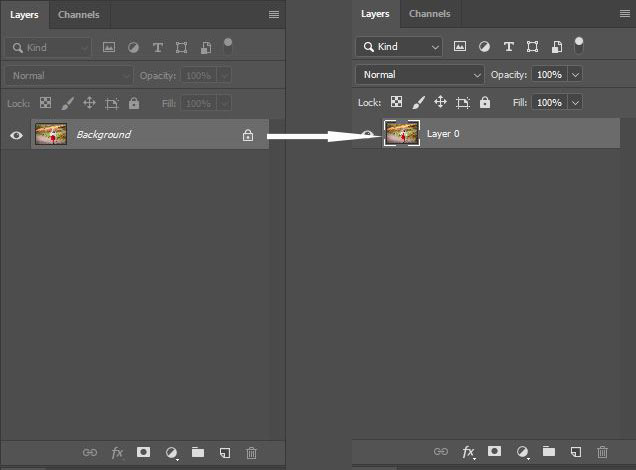
Step 2:
Now create a new layer by clicking the “create a new layer” icon from the bottom of the layer panel. You can also drag the Layer 0 in that icon for creating Layer 1. Keep the Layer 0 on top of the Layer 1.
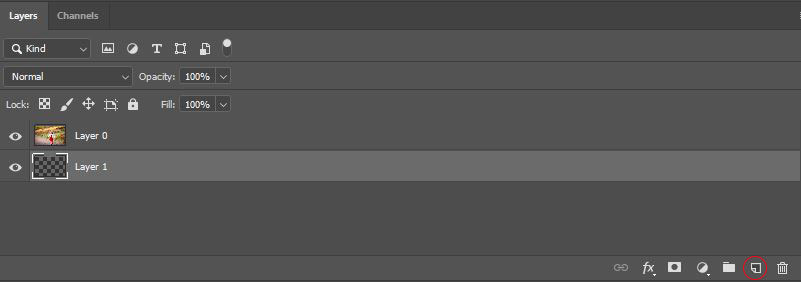
Step 3:
Now it’s time to make a selection. With selecting Layer 1, Choose a selection tool. You can choose any selection tool to perform this. In this process, we will use the rectangle marquee tool from the toolbar.
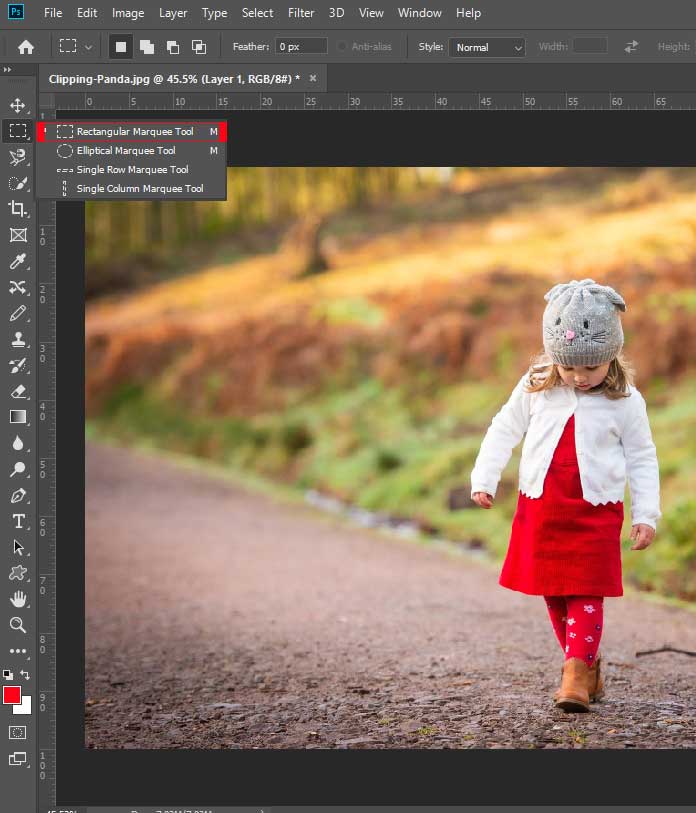
Step 4:
Now select the part that you want to mask with from the photo. Hide the layer 0 by clicking the visibility icon. Now you will able to see your selection from the Layer 1.
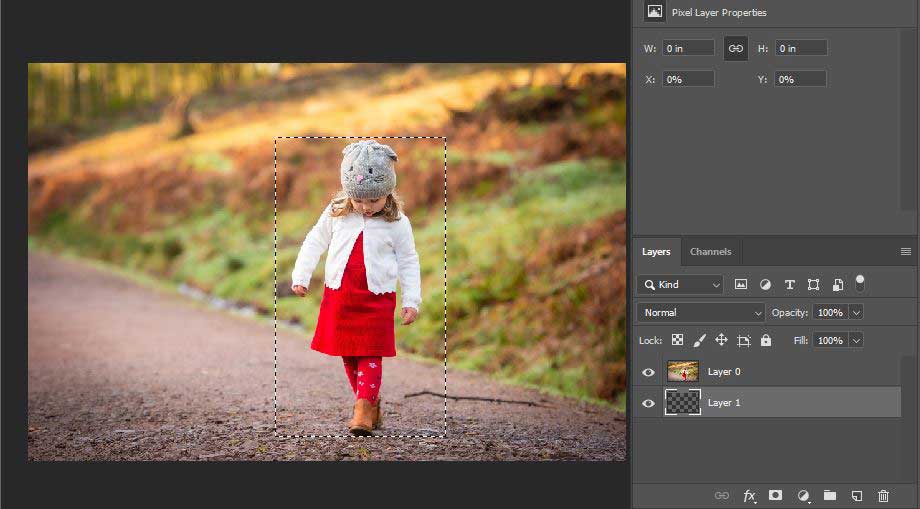
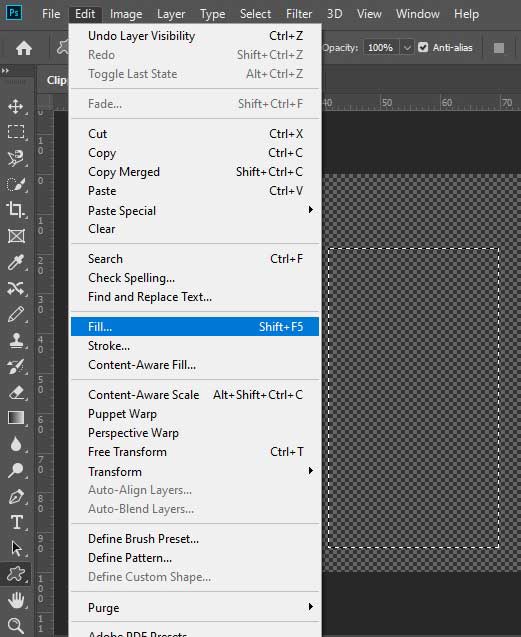
Step 5:
Now fill the selection by selecting the Fill option from the edit menu. Go to edit menu then choose Fill. You can make the selection with the shortcut Shift+F5.
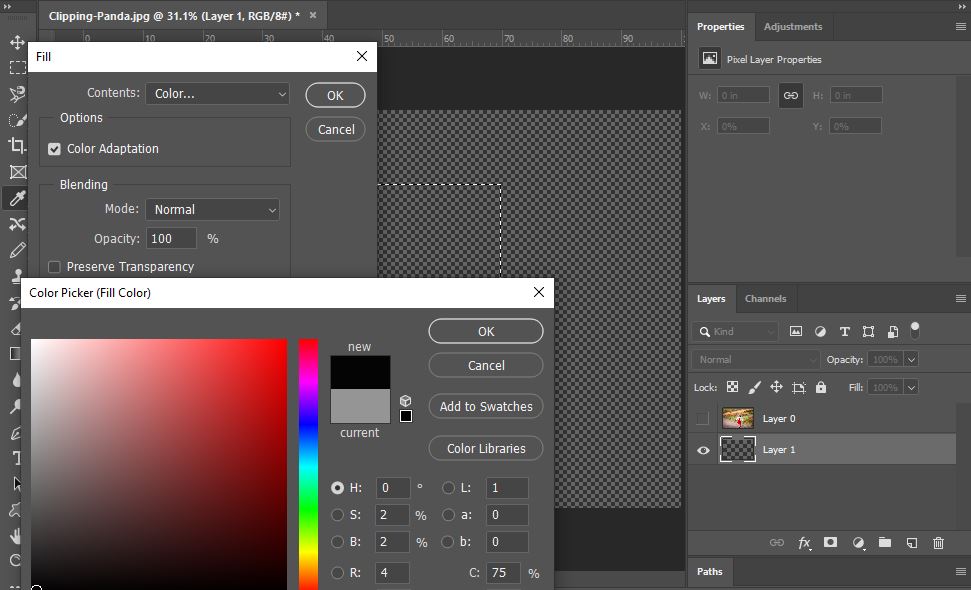
Now fill the layer with any color you want. We are going to use black color.
If you deselect, the black color will help you to see the selection clearly. After filling, you will see the selection as below.
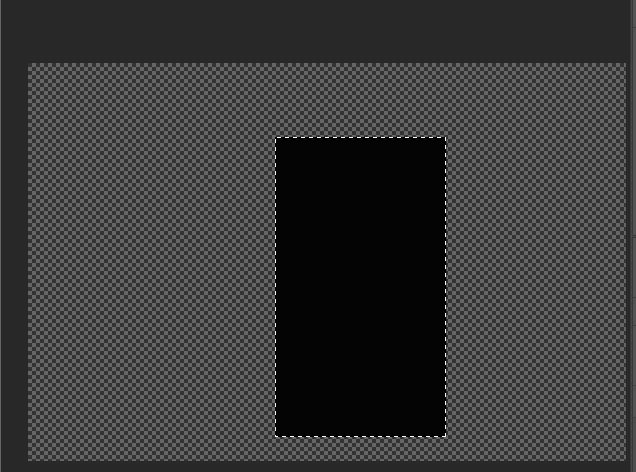
Now you can deselect the layer. Go to Select menu from the option bar of Photoshop then choose the deselect option.
Step 6:
Now we have to go back to Layer 0 to make a Photoshop clipping mask. Select the Layer 0. Make the Layer 0 visible with the visibility icon. With selecting Layer 0, go to layer option from the option bar. Then choose “Create Clipping Mask”. You can also do this with the shortcut Alt+Ctrl+G.
There is another way of creating a clipping mask. Press and hold Alt key then bring the cursor between the two layers. When cursor changes, click to create a Photoshop clipping mask.
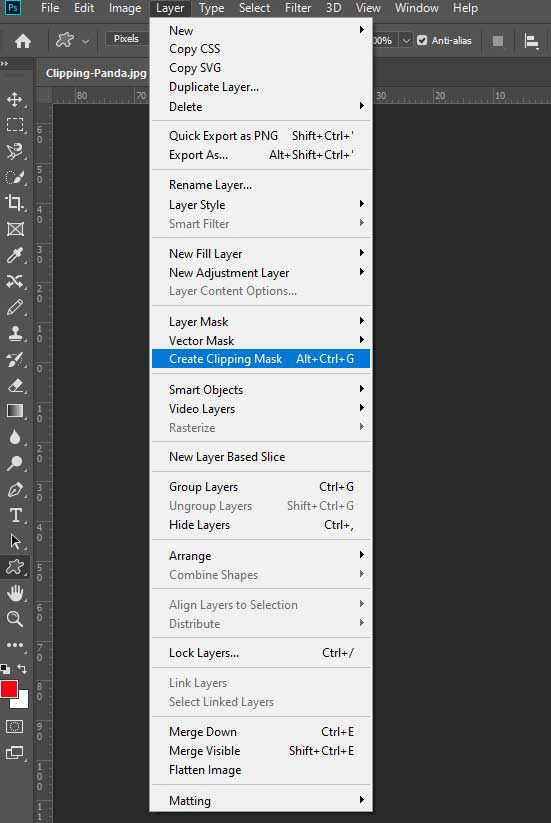
After doing all the process, the primary stage of clipping mask will start. Now you will see the image as below.
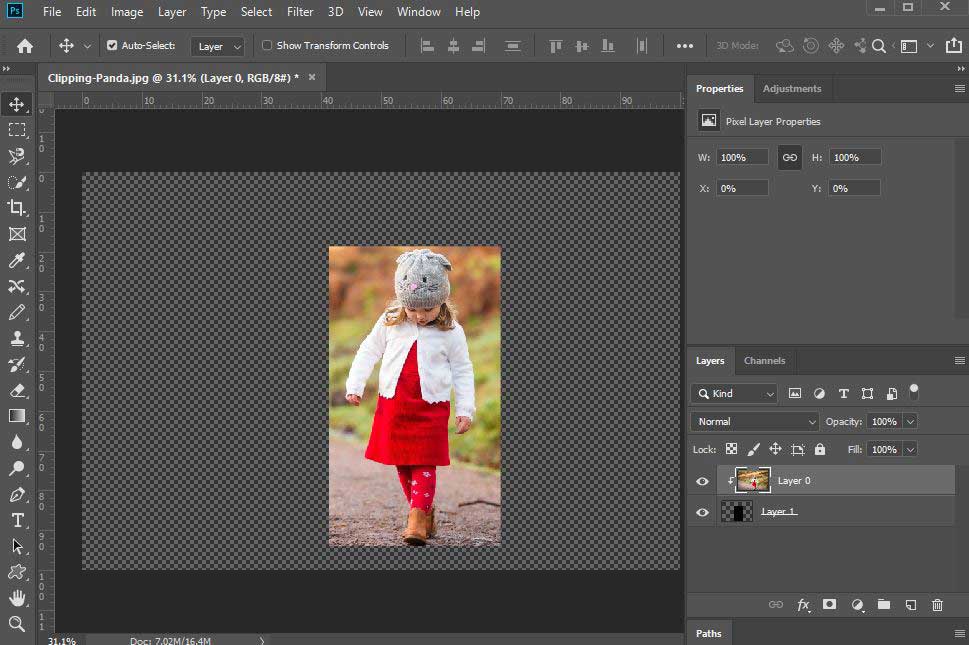
Layer 1 will contain the image for the background. You can move and drag the image for adjusting in the mask. Choose the move tool with selecting the layer 0. Now move and drag the image inside the mask until you are happy with it.
Finally, we created a Photoshop clipping mask. But there are many things we can do with the clipping mask. If you want to create frames or typography, you can do all the things with Photoshop clipping mask. You can also change the photo background.
Let’s see how to change the background of the photo with Photoshop clipping mask.
Changing background with Photoshop Clipping mask
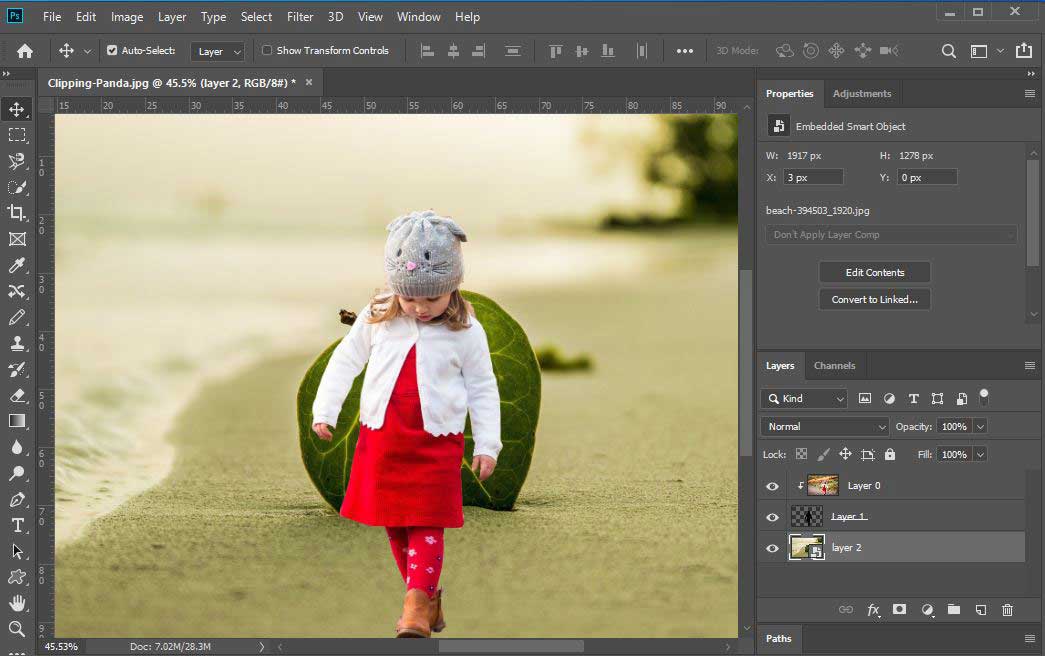
The photo we are using is a child walking on the road. Now we will change its background with a sea beach.
Let’s start the process.
Step 1:
Open the image in Photoshop then create a new layer. Keep Layer 1, under the photo layer.
Step 2:
Select Layer 1. Choose the magnetic lasso tool from the toolbar. Then make a smooth selection around the child. Keep the visibility of layer 0 on.
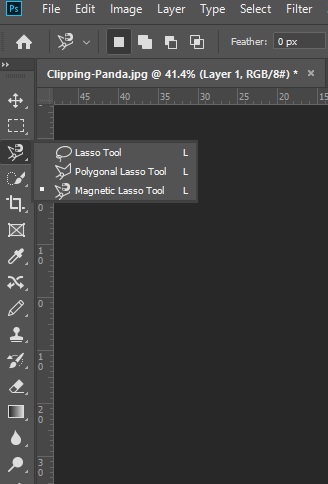
Step 3:
Now fill the selection as before then deselect it and covert the layer 0 into a clipping mask. After that, you will see the photo background will be removed.
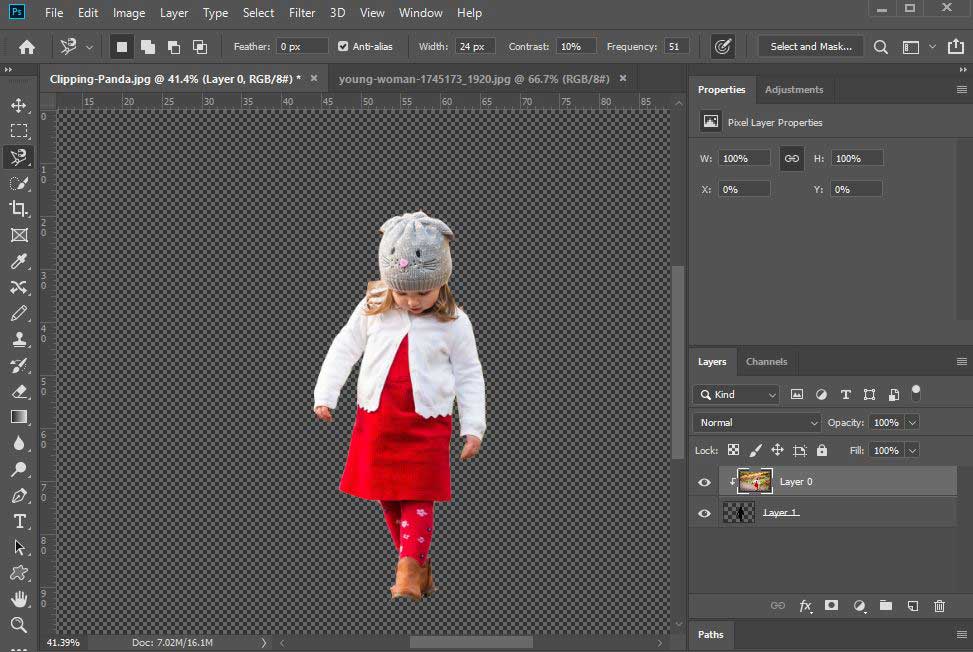
Step 4:
Open the background image in Photoshop and name it as Layer 2. Keep the Layer 2 under all the layers.
Step 5:
Now adjust the background with the child’s image. Thus, you can change any background with Photoshop clipping mask.
Photoshop Clipping Mask with Typography
Making unique and attractive typography mask is possible with Photoshop clipping mask. You can design unique font styles with the image.
Let’s see how to use Photoshop clipping masks to design amazing typography.
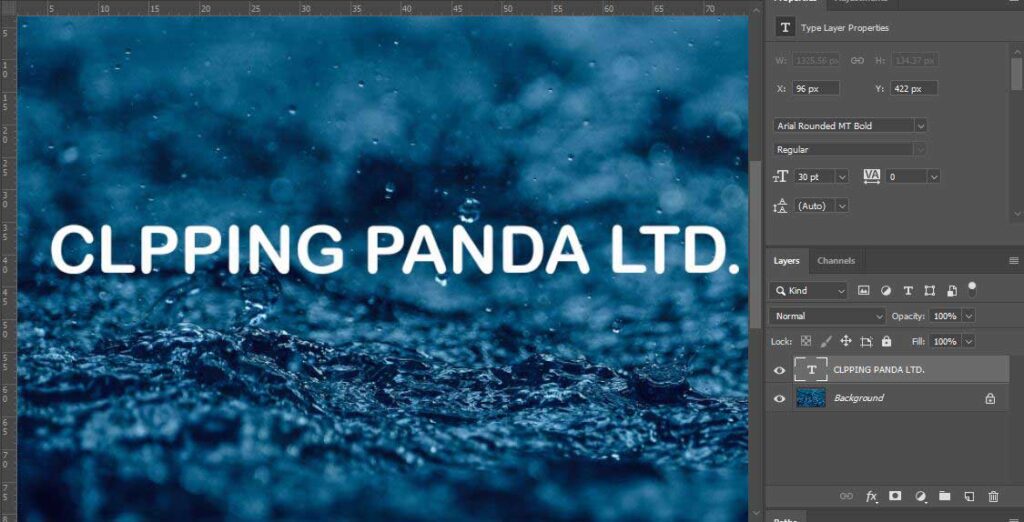
Step 1:
First, open a photo in Photoshop. Choose a font that you want to mask. Now write a text and place the text layer under the image layer.
Step 2:
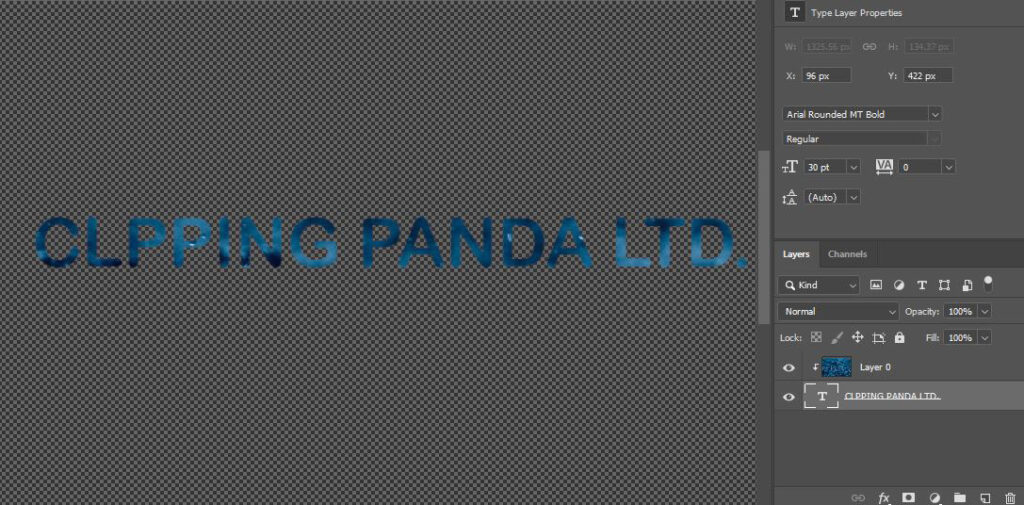
Now create a clipping mask of the image layer following the same process as you did before. Now drag and adjust the positions for designing the Typography.
Conclusion
The clipping mask provides a nice illusion of one image with another. Beside background remove and typography, you can do more with different shapes. The main process of making a clipping mask includes making a shape that you’ll use to cut your top layer. Whatever it is, you can play with the images using the clipping mask. As a non-destructive process, it is the best and easy technique among all the method in Photoshop. Let us know if you have any questions about Photoshop clipping mask.
A layer mask provides more control over a single layer’s pixels. But clipping mask hide areas of a layer based on a selection.
You can go to layer option from the option bar and choose “create a clipping mask”. But the shortcut for making clipping mask is Alt+Ctrl+G.

