The Photoshop face swap is an amazing technique for completely altering a model’s face. It is the best technique for commercial photography, especially in the e-commerce business.
Today, we will show you how to make face swaps in Photoshop. In previous versions, it was tricky, but in the newer versions, it’s easy, and anyone can do it with some practice. If you need an advanced face swap at an affordable price, contact us. So, without further discussion, let’s see how to make a Photoshop face swap.
Criteria for Photoshop Face Swap
There are some conditions you must ensure before making a face swap. You can’t face-swap a black face with a white body perfectly. So, ensure both images have the same criteria before making a Photoshop face swap. Here are some conditions that you have to maintain.
- Choose images with the same face angles. The angle ratio maintenance is the first thing you should focus on.
- Choose similar or closer color depth.
- Make sure the resolution of the images is the same.
- Use a newer version of Photoshop to get an advantage.
Step-by-Step Editing Process:
We listed the steps to capture the whole process of making a Photoshop face swap. This will help you do the job perfectly. See the steps first.
- Opening both files in Photoshop
- Selecting the Face with Lasso tool
- Copy and paste the face to another one
- Making a selection of the photo that needs to be swapped
- Removing the face that you want to replace
- Using the blending option
- Editing and Retouching for the face-matching
- And Saving
You can download it from here if you need it. In this tutorial, we are going to use Adobe Photoshop CC to access advanced features.
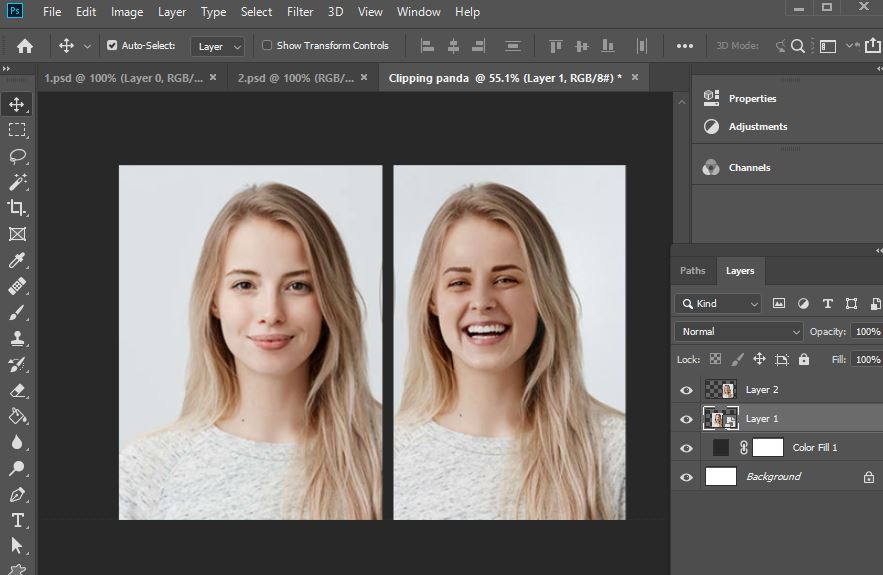
Step 1: Opening the Files in Photoshop
First, open both files in Photoshop. Compare their similarities. When you open them side by side, it’s easy to compare. Then, check the criteria from the above. If the photos do not match, choose different ones to make a Photoshop face swap.
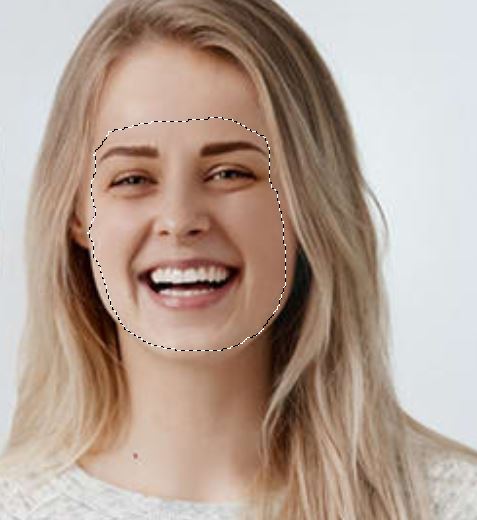
Step 2: Selecting the Face with the Lasso Tool
Before selecting the face, make sure both faces have the same look. If hair is in front of one face and another does not, they are not a perfect match for the swap. After doing everything right, make a perfect selection of the face.
There are other ways to make a selection. You can use the Photoshop pen tool, a quick selection tool instead of the lasso tool. Learn how to use the Photoshop Pen Tool.
We will use the lasso tool to make a freehand selection. Make the selection as large as it can replace the face. After drawing the selection, right-click inside the path. Then, choose the “Make Selection” option.
Step 3: Copy and paste the face to another one.
After making the selection, use Ctrl+C to copy the selection. Now go to the other image and press Ctrl+V to paste the face.
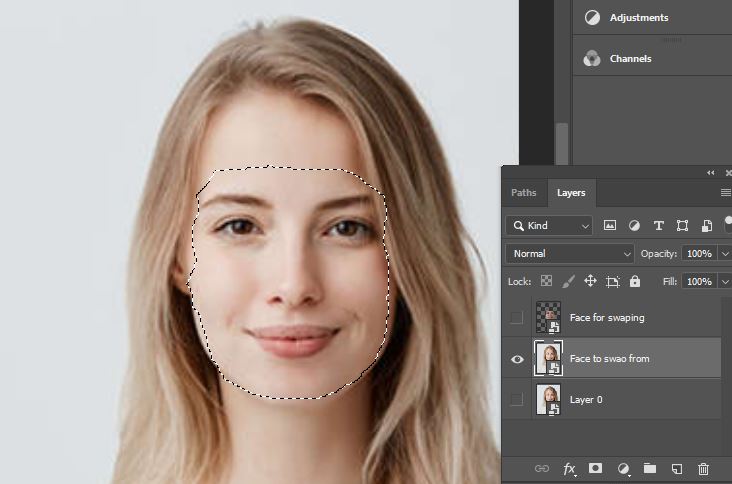
Step 4: Make a selection of the photo that needs to swap
After adjusting, name the copied layer “Face for Swap.” Then copy the background layer and name it “Face to swap from.”
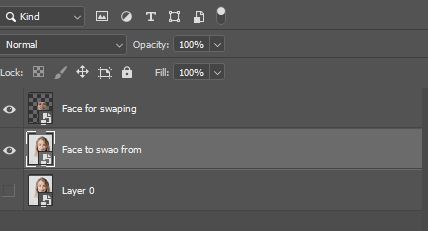
After doing that, hide the original background layer. Press Ctrl and click on ‘Face for swapping layer’. Now, a selection is made.
Step 5: Removing the Face that you want to replace
To remove the face you want to replace, first, hide the ‘Face for swapping’ layer. Now go to the menu and choose ‘Select’ then “Contract” from “Modify”. In the pop-up window, the pixels’ value is 10.

Now, make a layer mask and press Ctrl+I to inverse the mask. Then, it will remove the face. After removing, select the ‘Face for swapping’ layer. Keep the opacity to 100%, press Ctrl, and click on the layer image to create a selection. Then, make a layer mask again.
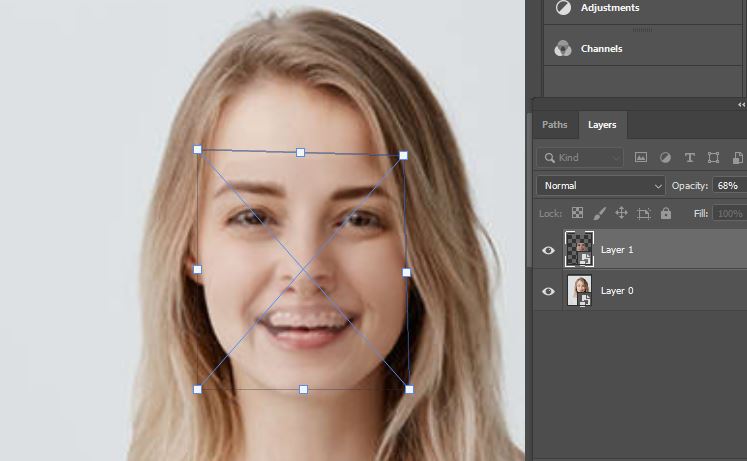
Step 6: Using the Blending Option
Before using the blending option, select both the ‘Face for swapping’ and ‘Face to swap from’ layers. To do that, first select one, then press Ctrl and click on the other layer. Now go to the ‘Edit’ menu and select ‘Auto-Blend Layers’.
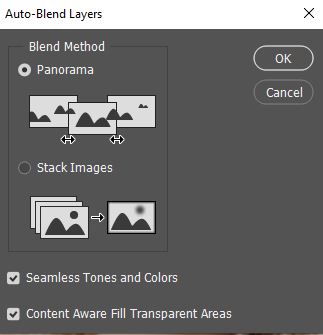
Now mark Panorama, Seamless Tones and Colors, and Content-Aware Fill. Then Press ‘OK.’ After that, Photoshop will do some calculations. It will use AI(Artificial intelligence) technology to merge both layers together. Now, edit and retouch the Photoshop face swap.
Step 7: Editing and Retouching for the Face Matching
Now, if you zoom the image, you will see there are some mismatches in the Photoshop face swap. Now retouch it to correct the mismatching. Take a soft brush tool with an 8-10% flow. Then, samples from the nearest colors and tones will be taken to fix the mismatching. Press & hold Alt+ Left click from a source area. Brush over the mismatched areas and make the perfect match. Remember not to use the same color in all the places. Use the ‘Blur Tool’ in some places to make it more perfect.
Now, look at the final result below.

Step 8: Save It
After completing the whole process, now save the file in any format you want.
Conclusion
It was easy to make a Photoshop face swap. Although there are other ways to replace the face in a photo, we think this simple process makes Photoshop face swap easier and is also the most convenient way to make a perfect Photoshop face swap.
Yes, you can make a better face swap in GIMP. Besides, there are many Android-based apps that can make amazing face swaps.
You can make a face swap for photo editing services. The cost of the Face Swap service depends on the image quality and subject. On average, it costs $2 per image.