Color Correction Photoshop is nothing new and very important for post-processing. To make the photo editing process easier, auto color correction Photoshop is now very popular among graphic designers.
So, today we are going to discuss auto color correction Photoshop. This is the most important and the easiest technique in Photoshop. Normally, not every image of yours requires color correction. But some photos that are not taken with proper color must need this color. In this tutorial, we will show you the power of Adobe Photoshop color correction. Let’s see how to correct photos color with auto color correction in Photoshop.
Step 1: Opening the image
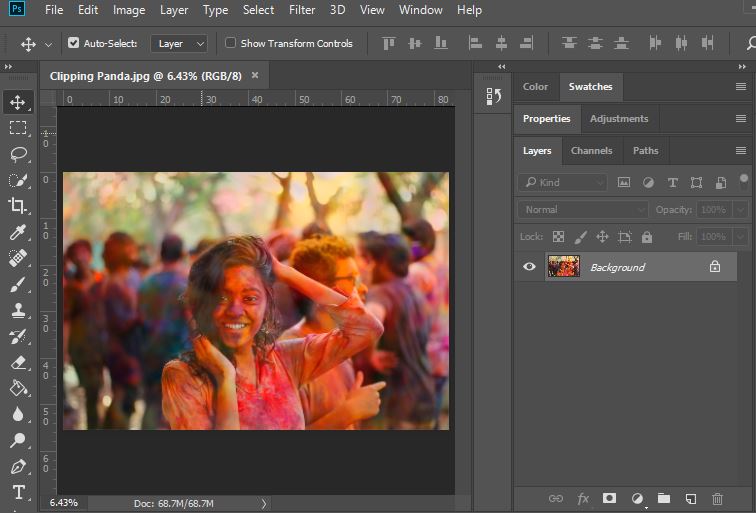
In this tutorial, we will use Adobe Photoshop CS6. You can use the newer version of Photoshop if you want. But we think the auto color correction technique works very well in the CS6 version. So, open the raw image that needs color correction. The image we are using has got a reddish tint. So, we will give it a natural color with color correction Photoshop.
Step 2: Opening Adjustment Curves
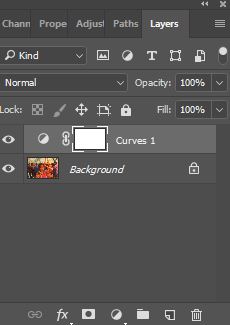
From the Layer panel, click on the adjustment layer icon, then choose “Curves” from the options. Another way to select the ‘Curves’ option is by going Layer> New Adjustment Layer > Curves. Now the color curve for the image will open.
Step 3: Setting the Grey Point
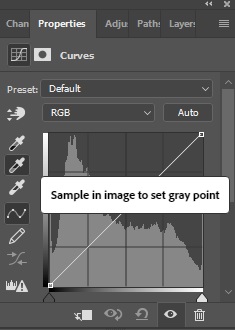
In the curve box, you will see three eyedropper tools on the left. Select “Sample in image to set grey point.” If you need to select a black point, choose the upper, and choose the lower one for white points. But we will use the middle one for this image.
Now, on the image, click with the eyedropper tool where it seems absolute grey. Check the differences by trying different areas. Keep trying until the whole image looks natural without a red tint.
Step 4: Creating Solid Color Adjustment Layer
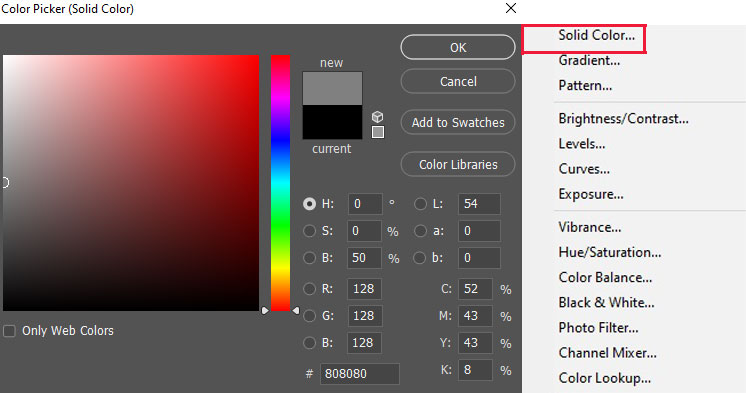
Now, we will create a solid color adjustment layer for choosing the exact grey point. Click on the adjustment layer icon to select “solid color” from the options. Now you will see the color picker tool. You can also create a solid color layer by going Layers > New Fill Layer > Solid Color. Now fill the color code with 50% grey. You use the color code #808080 for the exact grey.
Step 5: Creating a Threshold Layer
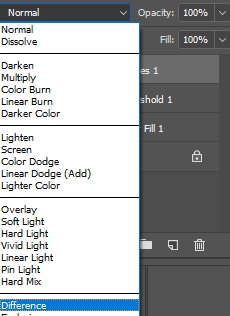
In this step, we will create a threshold layer. Click the adjustment layer icon, then choose ‘Threshold’ from the options. In the Threshold, properties decrease the level. We are using the level value 100 for this image, but you can give it 100-115 depending on its pixel. Then change the blending mode Normal to Difference. Now you can choose the darkest part of the image with the eyedropper.
Step 6: Making the Color Adjustment
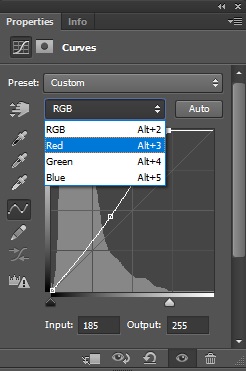
After choosing the darkest grey point, now turn off the visibility icon for both the solid and Threshold Layer. Then go to the curves layer and adjust the image color. In the properties, if you click on the Auto option, Photoshop will automatically adjust the color of the image. If you are not satisfied, then click on the RGB panel. Here you will find three different color options. For each color, you will see a different curve. Adjust every curve until you find the perfect color in the photo.
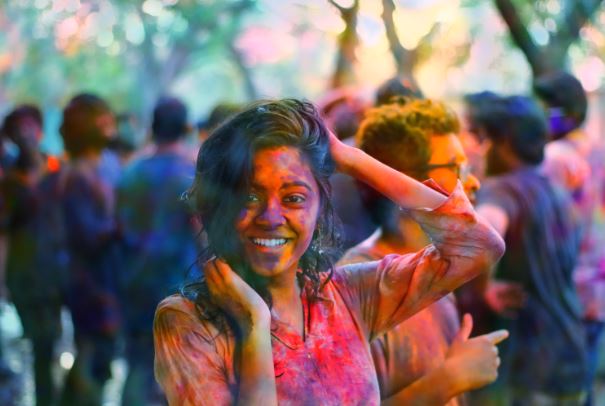
If you did all the steps carefully, now you should see the result. You can see the final result below that we use for this tutorial. To understand the Color Correction Photoshop, you need to practice the process again and again. But as an easy process, it won’t take much time to be an expert at it.
If you need any advanced color correction services, contact us without hesitation. We provide the best color correction services for photography Post-production.
Conclusion
Color Correction Photoshop may be tricky for some complex images. But with the proper techniques and practice, you can play with it. Automatic color correction Photoshop is vastly used for random images. But our expert designers use manual techniques for the perfect result. Let us know if you have further queries about color correction Photoshop.
If the images are complex, then it’s expensive. Color correction is extremely time-consuming and may damage your image.
We all know that the color of an image has a major impact on the viewer’s attention. So, color correction Photoshop helps to give natural color to a dull photo. Thus, it is very important for the photos that do not have the proper color tone.


