Adobe Speedgrade is another great software of Adobe Creative Cloud Suite. Creative Cloud has been providing us with a lot of creative tools. Adobe gave us Photoshop CC, Illustrator CC, Adobe Acrobat Pro DC, Premiere Pro, InDesign, After Effects, Lightroom CC, Premiere Rush, Adobe XD and other software. With all this creative software, we can perform amazing creative work. It is a color correction and grading software. Usually, Speedgrade is used in video footage for color correction. In our project work, we need Adobe Speedgrade at the beginning and in the end. Today we will discuss the basics of Speedgrade in this article. Please read the full article to learn about the basic workflow, uses, and great features. So, let’s see about the powerful grading software that makes your project consistent.
What is The Use of Adobe Speedgrade?
Adobe Speedgrade is a color grading application for making cinematic footage. We use it at the beginning and end of a project.
Features of Adobe Speedgrade
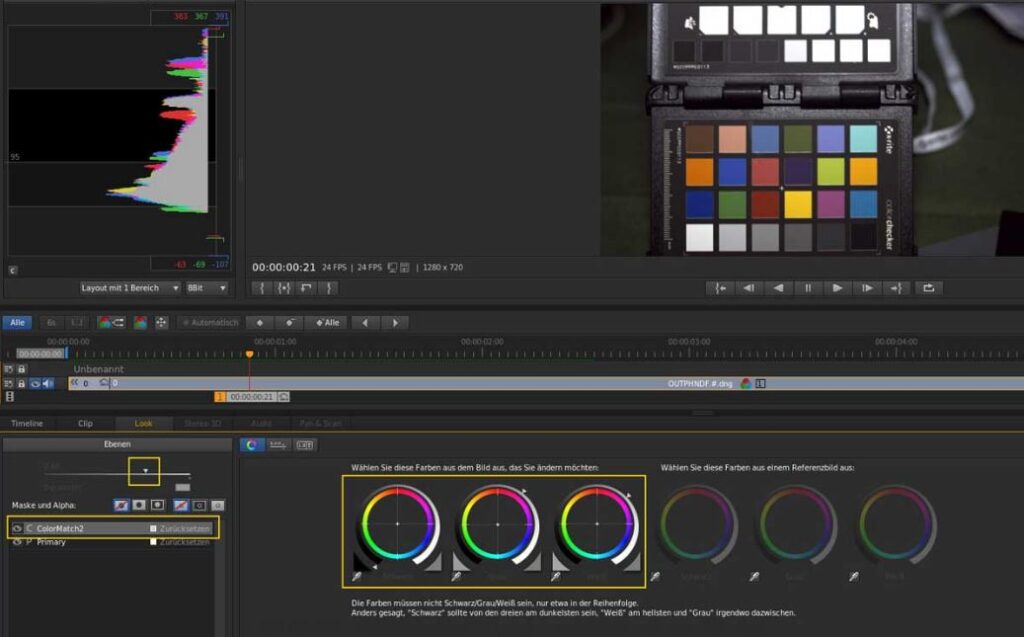
There are many features in Speedgrade for color grading. Now we will tell you about its most important features.
- Speedgrade allows us to combine grading layer adjustments into a grouped stack. We can also save this for further use.
- Speedgrade is also compatible with raw file formats.
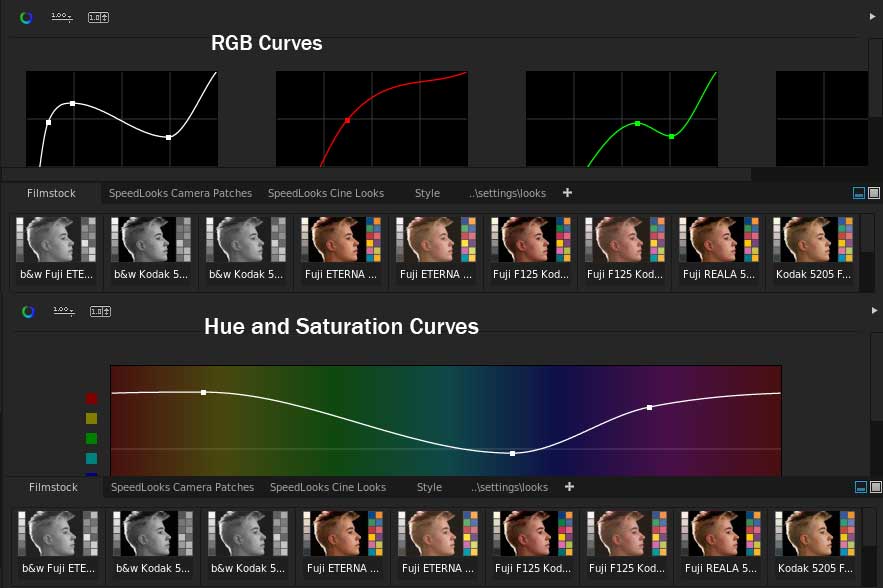
- It has the Speed looks preset color palettes that give you the look of 35mm film.
- It supports different color formats like RGB parade, Vector Scope, etc.
- Curve Adjustments is a great feature of Adobe Speedgrade. You can enhance or reduce any segment of the color spectrum with the RGB, Hue and Saturation Curves. See the Effects Panel to find this feature.
- With the Direct-link mode option, you can use Adobe Premiere Pro projects in it.
- The new version of adobe Speedgrade allows you to create multiple masks. You can add .look file to create multiple masks. In the previous versions, it was impossible.
- Color correction is layer based in Speedgrade like Photoshop. And it works as a 12-way color corrector.
- It has also a 3-way grading interface such as Lift, Gamma, and Gain. They control four ranges of correction (Overall, shadows, midrange, and highlights).
Basic Workflow of Adobe Speedgrade
The workflow of Speedgrade consists of three steps. They include Loading footage, color grading, and Render. Let’s see how you can work with Adobe Speedgrade.
Step 1: Loading Footage
You have to use the desktop view to browse the files. When browsing, you will see the thumbnails of the clips. You can manage many clips by sorting them with names, time code, resolution or date. You can also filter the clips with specific file formats.
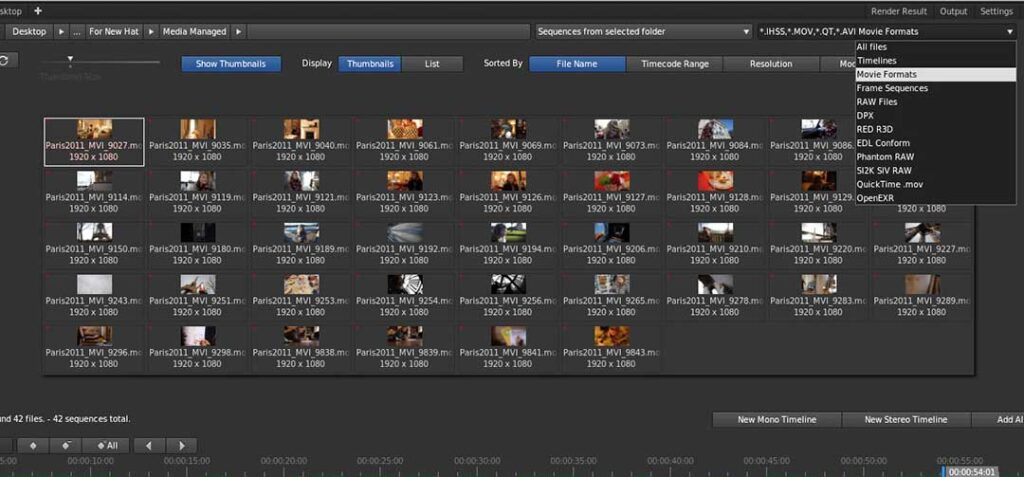
After finishing browsing, double click on any clips to add them to the timeline. You can load Edit Decision lists on the timeline to show color grade a sequence.
Step 2: Apply Color Grading
In this process, you can apply color correction to balance blacks and whites to match shots. You can apply primary color adjustments to the whole image. You can also apply secondary color adjustments by selecting color ranges. To ensure accurate color adjustments use waveform, histogram, and vectorscope.

Here, you can also use effects, filters and masks to design great look. You can mask individual layers and animate them by adding keyframes. Save the grades as a Look file by selecting the footage then click a Look File. Look file saves all the layers and settings of the grade.

Step 3: Rendering Out Content
To render out content, follow the process.
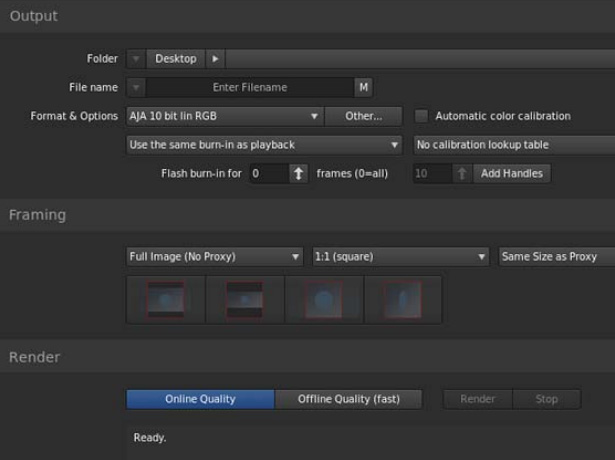
- Select the content which you want to render out on the timeline. Then click the Output tab to see the options in the Output Panel.
- Select the saving location and give a name for the content.
- Choose output format and input Burn-in info.
- You can choose the Online Quality or Offline Quality from the panel.
Premiere Pro Integration
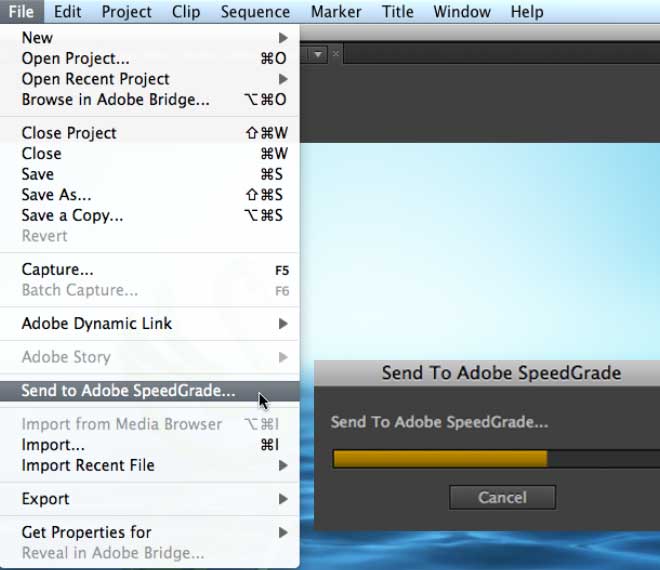
If you are using the Premiere Pro version, then you will find the Send to Speedgrade option. This feature contains all edit points. However, you can open separate clips in SpeedGrade. You will find this feature from the Premiere Pro CS6’s file menu.
Select the clip or sequence that you want to bring in Speedgrade. Select the Send to Adobe SpeedGrade option from the File menu. Thus, you can save a Speedgrade project file and open in Speedgrade.
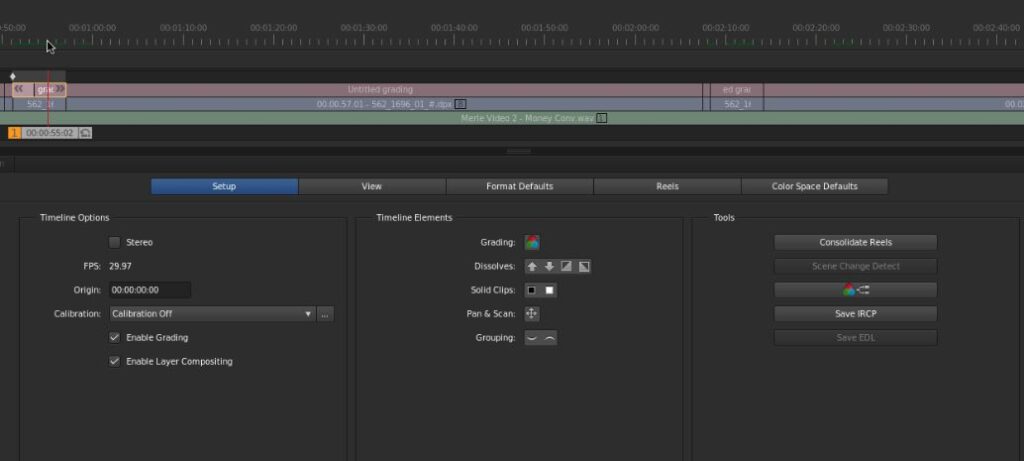
When opening the SpeedGrade project file, click and drag the Grading. You will find the icon from the Setup panel. It will allow you to add a Primary grading layer to the timeline.
How to Install Adobe Speedgrade?
Follow the instructions for downloading and installing Adobe Speedgrade on your computer.
- First, download the Adobe Creative Cloud app from the Adobe website. If you have already downloaded then sign in with your Creative Cloud account. If you don’t have an account, then create a new one.
- Then search scroll until you find Speedgrade software. Then click the download button to get a trial version of it. You can also buy it and get all the features.
- After downloading Speedgrade, install and launch it.
Conclusion
Now I’m sure you can understand the basics of Adobe Speedgrade. As a color correction software, it is a great tool for grading colors. It is an application for delivering a layer-based color correction. You can make consistent and attractive videos with this tool. Editors, filmmakers, colorists and photography post-production services depend greatly on Adobe Speedgrade.
SpeedGrade CC 2015 is not available to the new user. But users can continue to use it if they have an existing license.
Color grading is the process for creating a better appearance of an image.
RGB is an additive color system of red, green, and blue light. They create the colors that we perceive by stimulating the different types of cone cells. Actually, red, green, and blue light causes us to perceive different colors.

