Shooting the night sky and night photography is a popular trend among photographers nowadays. Since the improvements in digital cameras, it became a passion for beginners and professional photographers. The pitch-black sky at night to the naked eye can be stunning scenery in those powerful cameras.
So, in this guide, we have outlined the most unique tips and ideas for capturing starry sky during your night photography. By reading this article, you can photograph the various states of the night sky including The Milky Way, new moon, and more. Let’s begin and add some new skills to your photography experience.
Camera Settings for Shooting Starry Sky
In any photography, light is the most powerful and important part. Without light, you will be shooting only darkness. Night photography is a challenging fact as you have to capture photos with almost no lights. In this case, you may take advantage of the modern camera settings. To capture a photo at night, you may lose some image quality. To avoid that use a larger aperture and high ISO.
Night photography requires pro settings to capture enough light to properly expose the subject. As there is too little light at night, it means you have to open the aperture, raise the ISO, and use the long exposure time.
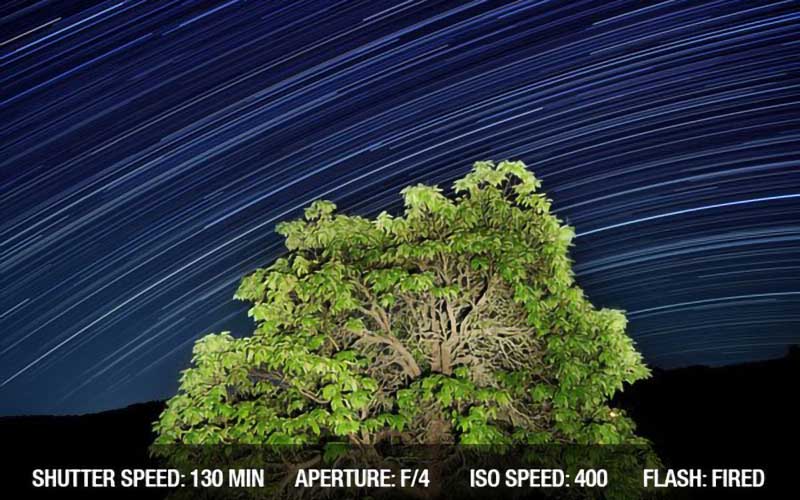
ISO and shutter speed
When photographing starry sky, the ISO keeps the main role as there are low lights at night. But in landscape photography in daylight, it is better to keep the ISO lower. Though it is normal to use an ISO of 3200 or 6400 at night.
Another important thing in starry sky photography is shutter speed. Adjusting the shutter speed is more challenging. Besides it depends on the focal length of your lens. But remember to keep the shutter speed slower than 30 seconds. You can follow the 500 Rule in this case and it is a good guideline when choosing starry sky photography.
In the case of using a crop sensor camera, you may need to calculate the equal focal length of a full-frame lens.
Don’t forget to use a tripod as it is essential for shooting starry sky in night photography.
Planning for Starry Sky Photography
Scouting is important as well as hard during the night. But it will be an advantage if you have become familiar with the area before shooting. Sometimes it cannot be possible. So, use an app that can navigate the moon, its position, as well as the time of sunrise, sunset, etc. The pre-preparation is all. The more you’ve prepared, the more chance you will have amazing shots.
Basic Ideas for Starry Sky Photography
When you are prepared to shoot stars and the natural sky, it is fair to assume that you want to see as many stars as possible. For getting the best view of the stars, you will need to set yourself at a place which is away from bigger cities and pollution.
There are some great websites and maps which will help you find areas with less light pollution. Try to travel a little further If you live close to a major city. There are also filters, such as NiSi’s Natural Night Filter which will make your job easier.
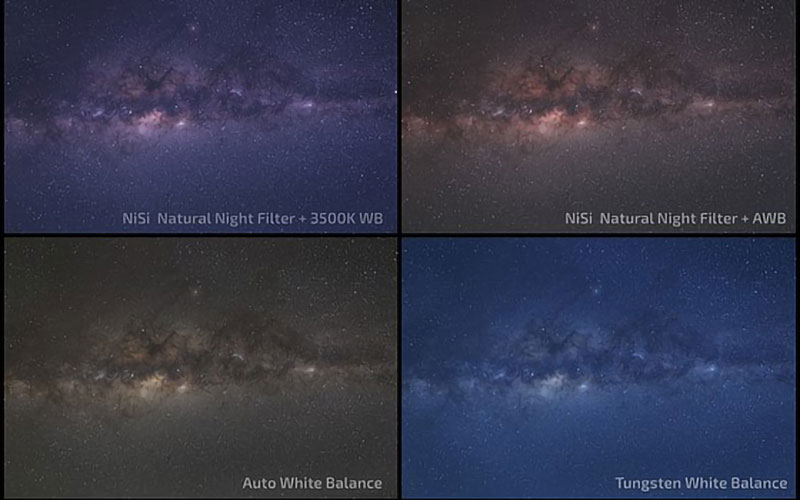
Capturing the Milky Way
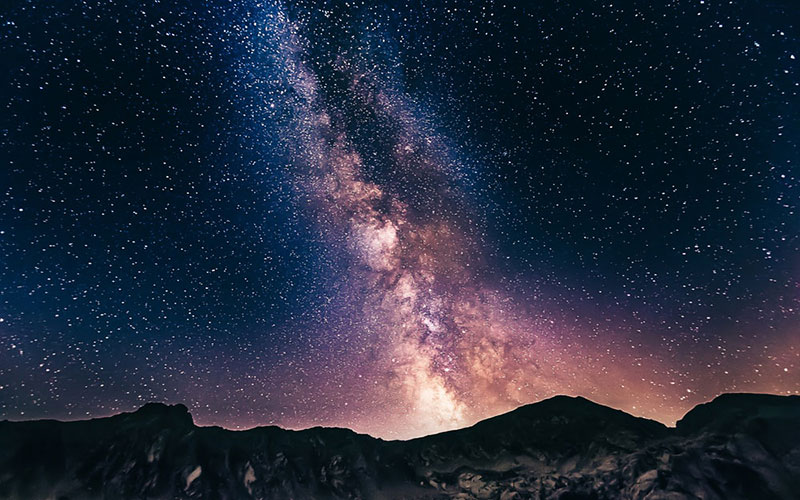
Northern Lights, dark and starry nights are scenes in Norway. The brightest part of The Milky Way that you see in most photos is not visible in Norway. We only see the edges of the milky way from earth.
Shooting the Milky Way is similar to night photography. You will need to use a larger aperture, high ISO, and a shutter speed of fewer than 30 seconds. This setting gives the highest amount of detail when shooting The Milky Way.
How to Shoot a Meteor Shower
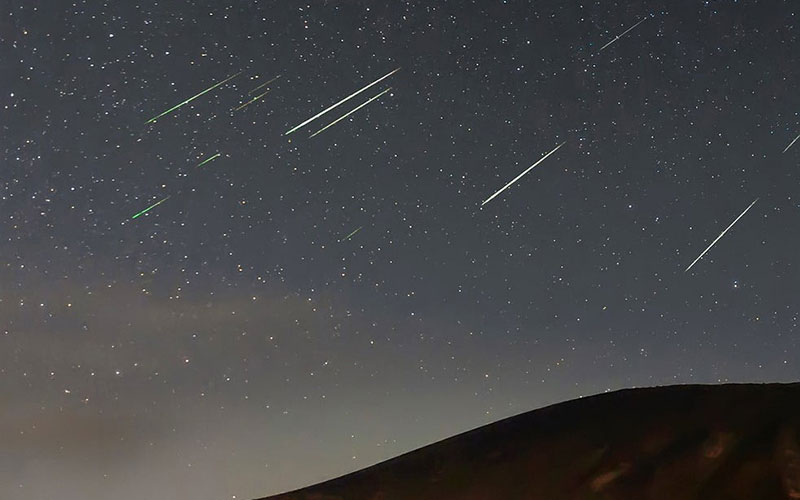
You will always dream of a clear sky when trying to capture a meteor shower. For example, you can think of the recent Perseids Meteor Shower. Many photographers took the shot of that incident as the sky was crystal clear. It is a magical moment being outside in the pitch black and looking up at dozens or even hundreds of shooting stars.
The chance for capturing such a magical moment comes once in a lifetime. Since most shooting stars last for only a second or two, it can be hard to capture them in an image. To capture as many stars as possible, set the camera to interval shooting and let it go continuously.
Shooting the Star Trails
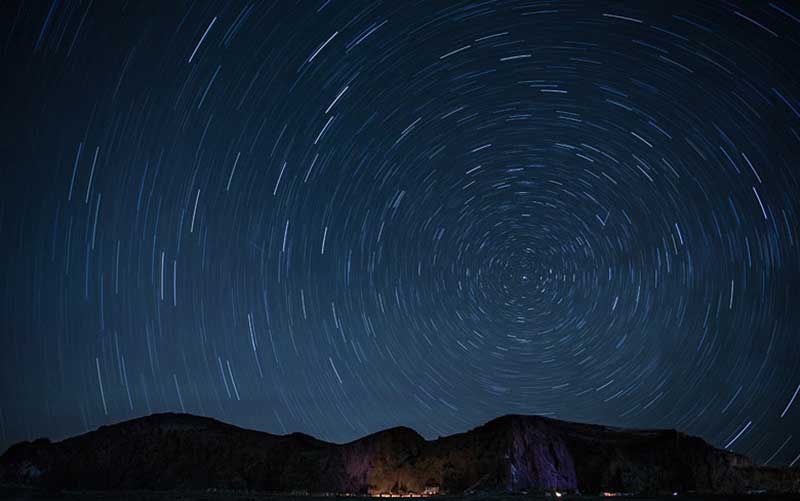
Because of the rotation of the earth, the camera can record movement in the stars if the shutter speed stays longer. Which creates a blurry and soft sky that is quite unusual to watch.
You can use it as an advantage instead of viewing it as a problem. Using a larger shutter speed of several minutes will let you capture star trails. The amazing star trails are also part of starry sky photography. It can be really interesting but make sure of the longer shutter speed. Otherwise, your photo will be blurry and unpleasant.
Capturing Full & Bright Moon Phases
When the moon is up and shining you can add many interesting images to your starry sky photography list. The moon is a bright source of light. So, you can get away with a lower ISO small aperture. Use the light of the moon and get advantages from the shadows in the landscape. The shadows create a fine reflection in a lake. Try to capture the moon when it has a low position in the sky. That’s why shooting at sunrise and sunset are the best period for landscape photography.
Conclusion
At this stage of the starry sky photography guide, I think it is pretty much clear to you. If you enjoyed this guide you may want to read our other photography guides too. Here is a list of the latest photography guides-
- Macro Photography Tips
- Best Couple Poses
- Shoe Photography Tips and Tricks
- Landscape Photography
- Black and White Photography Tips
- Car Photography
- Long Exposure photography
- Real Estate Photography
Many other photography guides will be posted here soon. So, stay with Clipping Panda Blog and keep reading.
Starry Night by Vincent Van Gogh is one of his greatest creations now. The painting depicts a tranquil night. So, the starry skies are special as they connect with our emotions.
A much more complicated and accurate rule for capturing sharp stars is known as the NPF rule.

