Photoshop Replace Color is a great color replacement feature in Adobe Photoshop. Among all the other ways, it is a unique and easy way to replace photo color. This feature will allow you to switch one set of color for another.
There are also other color changing tools, such as the color replacement tool, camera raw, etc.
After photo shooting, you may need these tools to fix your photo. All the tools are not enough for the perfect color correction. With this “Replace color” tool, you can change a photo’s color without any complication. If you need any advance Color Correction Service for your Post-production, contact us.
Today, we will show you how to change the color of an image perfectly with Photoshop Replace Color.
Changing colors with Photoshop Replace Color
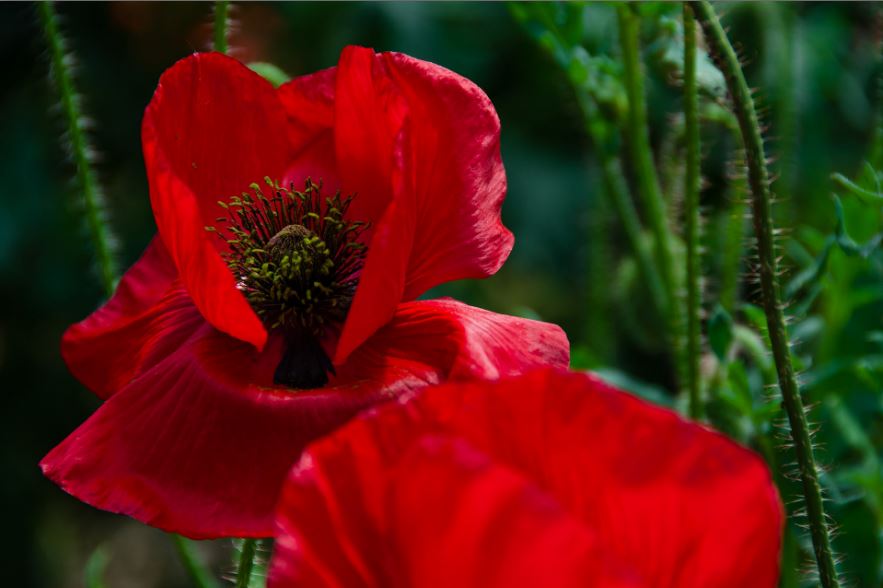
To changing color with this specific option, we will use a colorful image of a flower. You can use any photo that you need to change or fix the color.
Step 1:
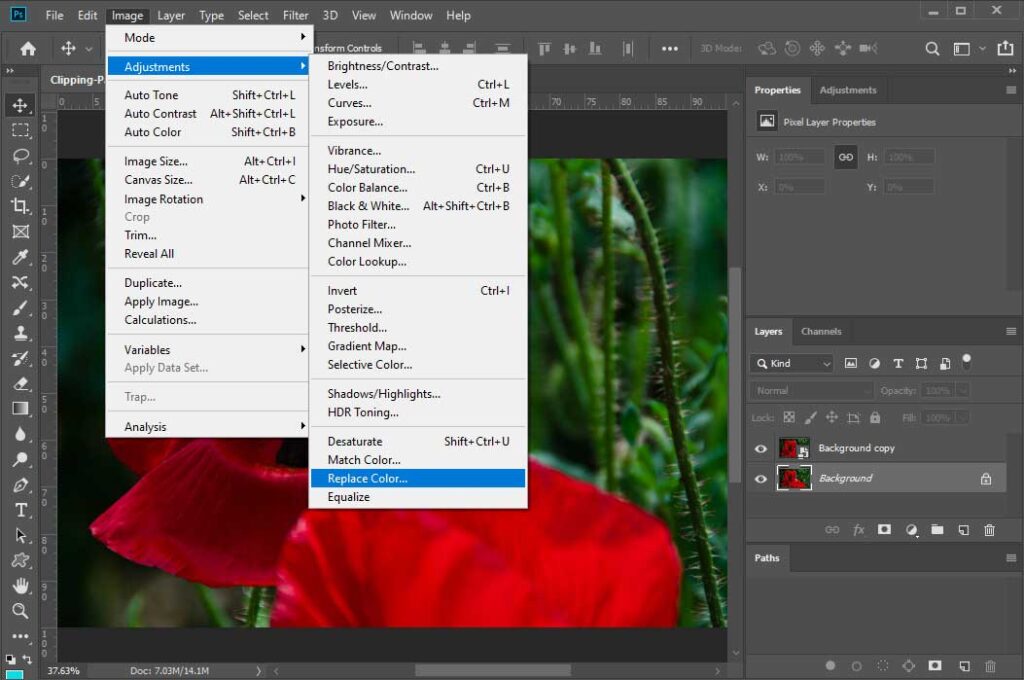
First, open the image in Adobe Photoshop. Then go to “Image” from the top bar of Photoshop. There you will see the adjustment option. Choose “Replace color” from there.
Step 2:
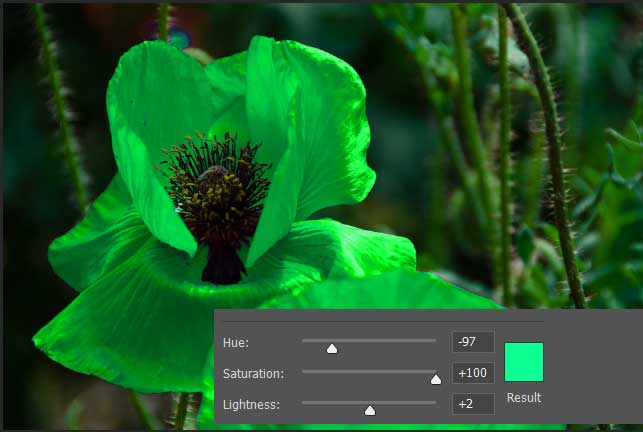
After selecting the Photoshop Replace color option, a new pop-up window will be open. In the pop-up window, you will find all the necessary tools to change colors. You will see a color dropper tool, fuzziness option, an x-ray of the image, hue-saturation, etc.
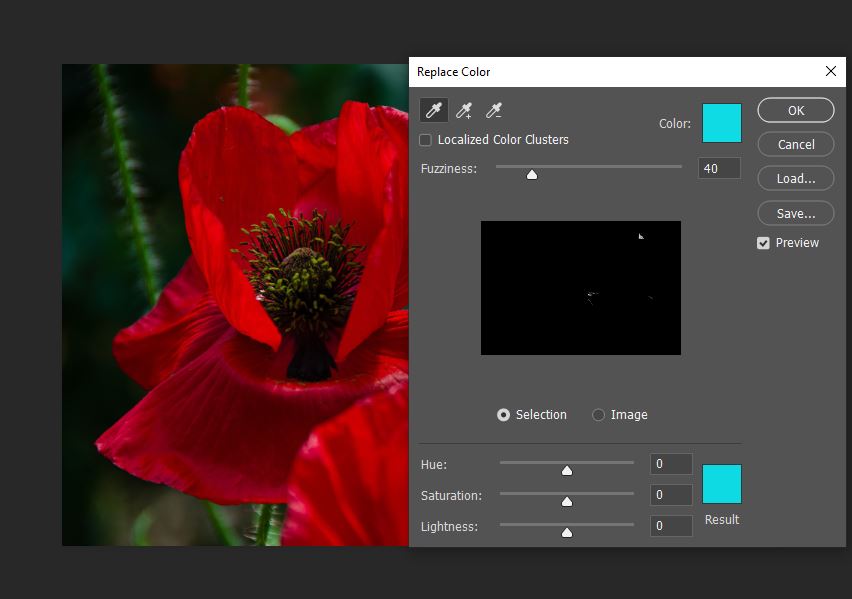
Let’s see the functions of these tools.
Color Dropper
With the dropper tool in Photoshop to replace color, you can pick a color from the image to change. There are three types of dropper tool. The first one allows you to choose a color for replacing.
With the second one, you can add color to the sample area. Suppose you first pick a color with the dropper tool, but it missed some parts. So, you can add the missing colors to your selection with the adding dropper tool.
The third one is for subtracting the color. When you add extra colors to the sample area, you can subtract them with this tool. You will see the color that you picked from the image beside them.
Fuzziness
Fuzziness makes your selection smooth. Sliding the fuzziness bar right and left, you can adjust the selection. You can also see the selection preview under the fuzziness.
Hue, Saturation, and Lightness
Hue changes the color. If you slide the hue bar, it will change the image color. On the other hand, saturation allows you to control the intensity of the color. You can increase or decrease the color intensity with this bar. And the lightness is for adjusting the light in the photo.
Step 3:
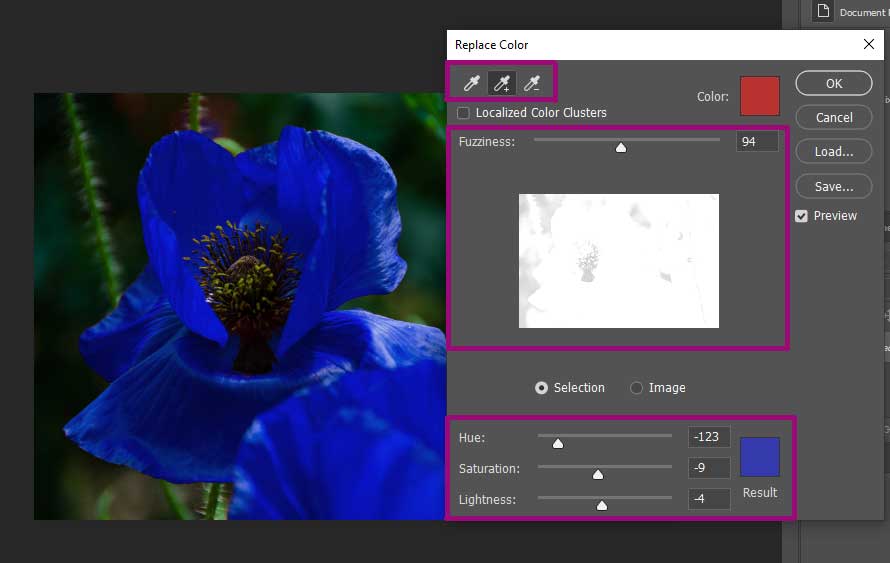
Now that you know how the tools work, it’s time to replace the desired color. After selecting the main color of the flower, now select the result color from the box. It is the color that you want to replace with the existing color.
Adjust the fuzziness and range. Now you will see that it didn’t pick all the parts correctly. So, use the add or subtract dropper tool for the perfect selection.
Step 4:
Now adjust the Hue, Saturation, and lightness from the Photoshop Replace Color panel.
When you are happy with the result, press ok. Now it’s all done.
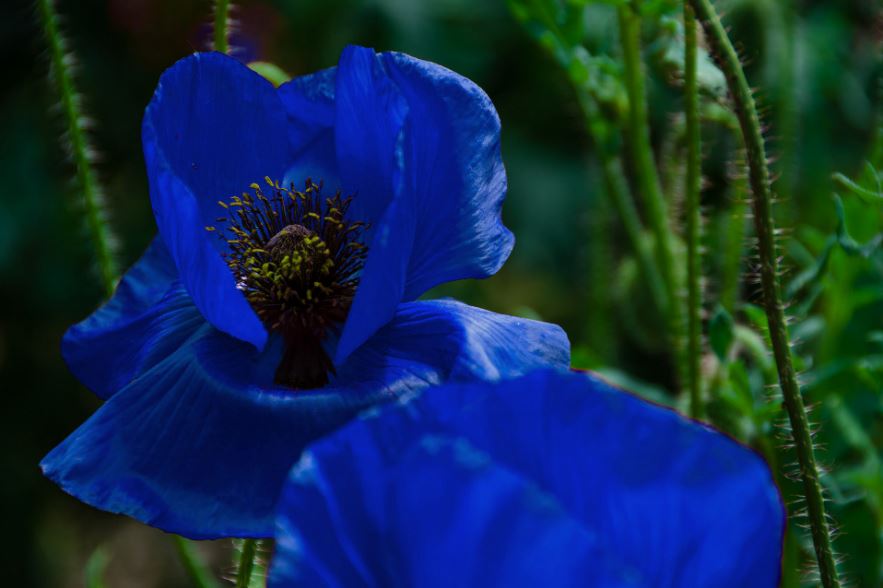
The photo we choose for this tutorial was a red flower. Now see the result below. We changed the red color into blue with Photoshop replace color tool.
Conclusion
You may need to change or readjust fuzziness for having perfect coverage. If you did all the process perfectly, you will the perfect result. It is the easiest process in adobe Photoshop for changing the color. You can replace any color on your own with “Photoshop replace color.”
Color intensity is the amount of purity in color. We can also measure the brightness or dullness of color with it. We can adjust the image’s color intensity from the saturation option.
Post-production is all the editing stages of production after shooting or recording. It is a part of filmmaking, video production, and photography.
You can find the color adjustment tool from the brush tool option in the toolbar. The brush tool contains four different tools. The third one is the color adjustment tool.