Showing many stories together can be possible only through photo collage. Occasions like birthdays, weddings, parties need making a collage to cover all the stories. It can be done with event photos, real estate shots, or a family photo shooting.
But the question is how to make photo collages? Well, with Photoshop you can easily make a photo collage. In this case, the toughest job is to select the perfect shots for photo collage. In this tutorial, I will show you how to make a collage in Photoshop in the right way. Follow the steps to learn the technique and become an expert at photo collaging.
Step 1: Opening Selected Photos in Photoshop
Open all the shots of special moments in Photoshop. You can make a collage with as many photos as you want. But remember that too many photos can make the collage dull. So, avoid using random photos and select the best ones you want to keep in the collage. Fewer photos make it possible for the viewers to see every detail of each photo.
Step 2: Adding Photos in the New Canvas
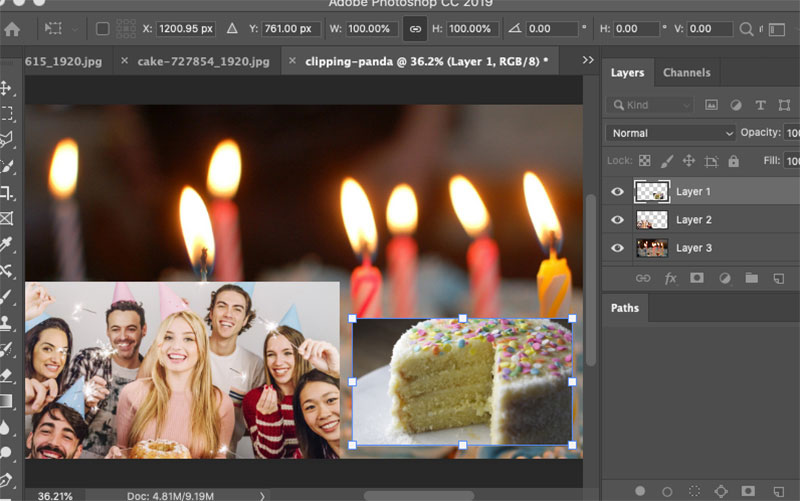
Go to the photos that you opened before and press Ctrl+A to select. You can use the marquee tool for selecting. Now press Ctrl+C to copy the photo. Then go to the new document or canvas and press Ctrl+V to paste the photo. This process will allow you to bring the photos into the new document’s layer.
After bringing the photos, now re-adjust them by resizing size and resolution. You can press Ctrl+T to transform the images.
By pressing the Shift key, you can re-scale them until they are small enough to comfortably move around. Don’t forget to convert the images into Smart Object before bringing them into a new layer.
Step 3: Creating Layout
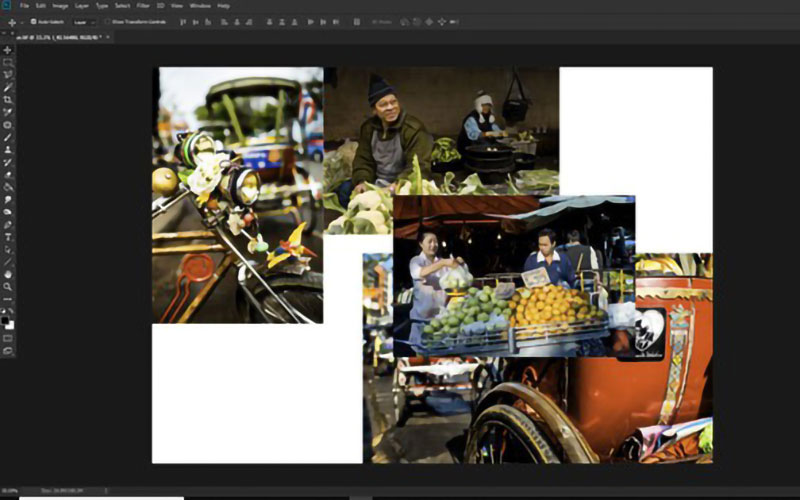
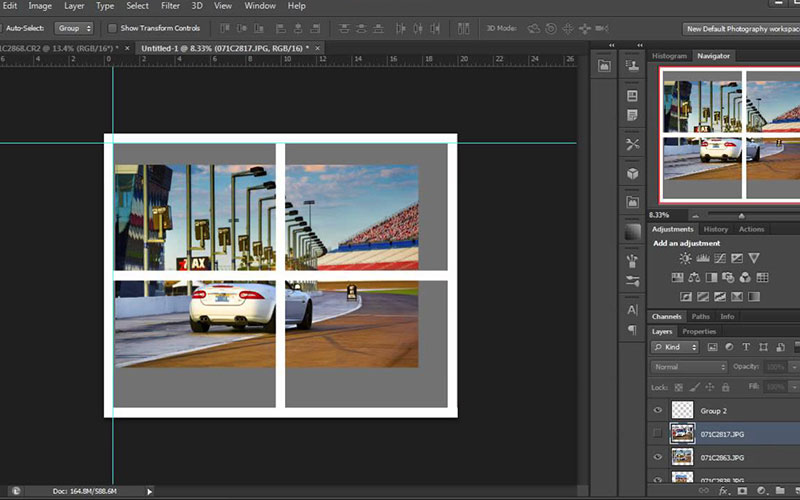
After adding all the photos in the collage, then create a layout for them. Now you can shift the photos around for telling your story best. You can also follow a different pattern such as a puzzle. It completely depends on your choice of how you want them to be presented.
Step 4: Image Spacing
Create a thin white border between images to give visual space after resizing them properly. It is an optional thing to do in a photo collage. The amount of white space would be the preference of your choice.
For image spacing, select the image layer and move by using the arrow keys. Now add a white or black border around each image.
Step 5: Merging All Layers
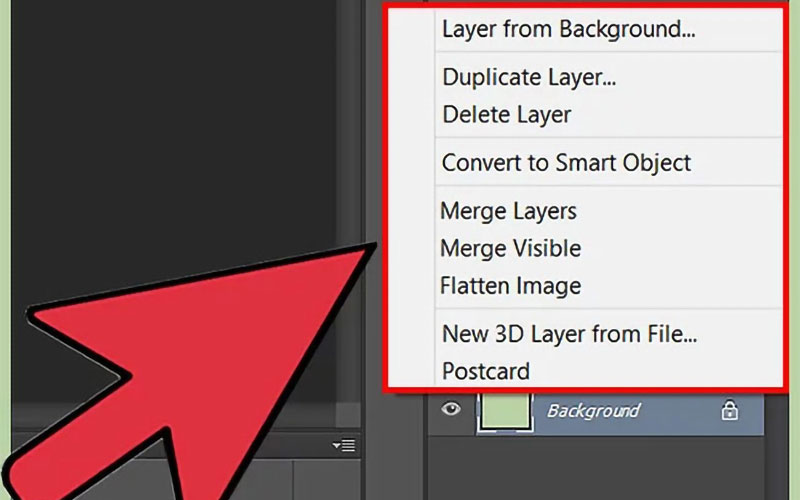
Once you have created a border around the images now merge all the layers. Press Ctrl+Shift+E to merge all the layers. You can learn more about how to merge layers in Photoshop from here. In this how to make a collage in Photoshop tutorial, now will see how to crop the final image.
Step 6: Cropping the Final Image
Crop extra white space if any around edges. The white space border may very narrow on the collages. So, don’t forget to measure them. Try to make it even around all the edges.
Step 7: Resizing Photos for Online
If you want to post your collage on social media then you need to ensure that fits social media criteria. So, you may need to resize the collage for online usage. Experts suggest saving the collage in JPEG format in this case.
To your collage social media-friendly press Altr+Ctrl+I. Different social media requires different sizes of photos. For average using save it at 1000 pixels on the short edge and 150ppi.
Step 8: Adding Watermark to Collage
In the final step of the tutorial ‘how to make a collage in Photoshop’, you will learn how to add a watermark. Adding a watermark in the collage is not required. But you can add one for keeping your signature or your brand name as a creator of the collage. After adding a watermark merge all layers and save it as JPEG once again. Now your collage is ready to post online platform.
Conclusion
Making a collage in Photoshop may seem tough at first for beginners. But after practicing sometimes, it will be no longer a hard job. Once you learn the process, you’ll see that the steps are quite simple and easy. Follow the instructions from this how to make a collage in Photoshop guide and do it by yourself. You can create all sorts of unique collages and don’t have to worry about seeing another version of it. Start making amazing collages. Let us know if you have any queries about how to make a collage in Photoshop.
Use the Lasso Tool to select an object the copy the object by pressing Ctrl+C. Now paste it by pressing Ctrl+V. It will be paste on a fresh new layer.
If you merged some layers, you can then unmerge them. Just use Ctrl+Z to unmerge layers or choose Edit>Undo Merge Layers.