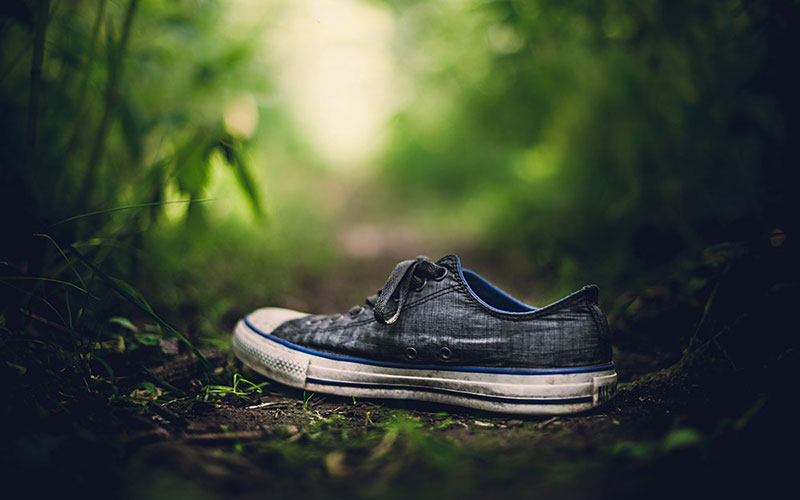
The photos with a sharply focused subject and with a blurry background appear more stunning than the other ones. Usually, this can be achieved 100% by camera settings. A proper lens and perfect composing are enough for getting a blurry background. The blurred background is also known as a shallow depth of field. But in portrait photography, one must apply a lot of techniques and creativity to achieve a perfect blurred background. In this guide, I will show you how to create soft and stunning blurred backgrounds in the photo. Let’s learn from camera settings to various photography techniques to get a blurred background in portraits.
You will need a Camera With a Larger Sensor
In this case, you can use either a mirrorless or a DSLR camera. Learn the differences between a mirrorless and DSLR camera from our latest article ‘mirrorless vs DSLR’ here.
The easier way to get a blurred background is using a larger camera sensor. To make it more available to the users, smartphone companies making software for phone camera portraits mode. Though it is not original, it’s a fake effect. But to make a real and amazing blurred background needs a real camera with a larger sensor.
Here, you can also use a full-frame camera to get the most background blur.
Using Wide Aperture to Achieve Blurred Background
The size of the camera aperture controls the depth of field. If you use a larger aperture, a smaller amount of images will be in focus. So, use a lower number of f/stops such as f/2 to f/4 and get the most stunning effect. While using the f/stops number, you should remember that f-stop numbers work in reverse. If you use a lower number you will get a larger opening of the aperture.
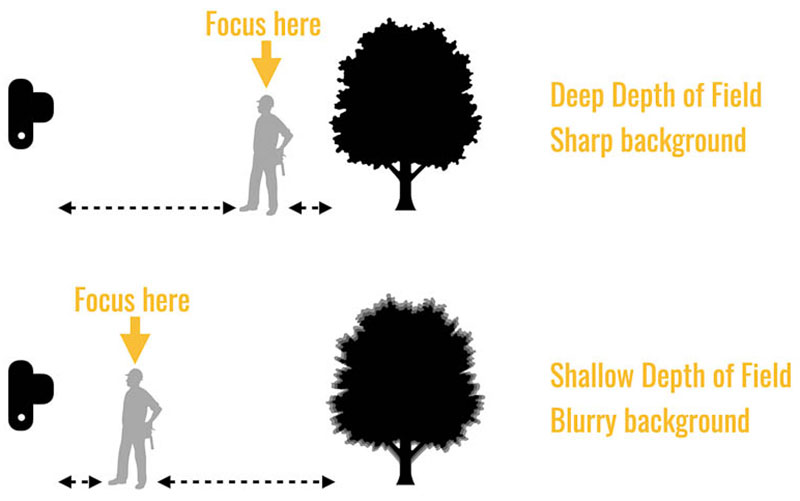
Distance to the Subject
Using a wider aperture is not the only way to achieve blurry background. Another great way is getting close to the subject. You can use this technique when you want to make your background totally off. Shooting just from 8-10 feet away from your subject is the easier way to create a shallow depth of field. You can also increase the distance between the subject and the background gradually to achieve various effects.
Controlling the Amount of Zoom
Professional photographers often use telephoto lenses instead of wide-angle lenses. Because, if you zoom in the telephoto lens to 100 mm to 200 mm, the shallow depth of the field becomes more stunning. Using 300mm might be a little excessive for portrait photography. However, for wildlife and travel photography you can increase it.
Try to use a standard 50mm lens with an aperture of around f1.8. 50mm lenses are available for every DSLR and can provide a greater blurred background than a kit lens.
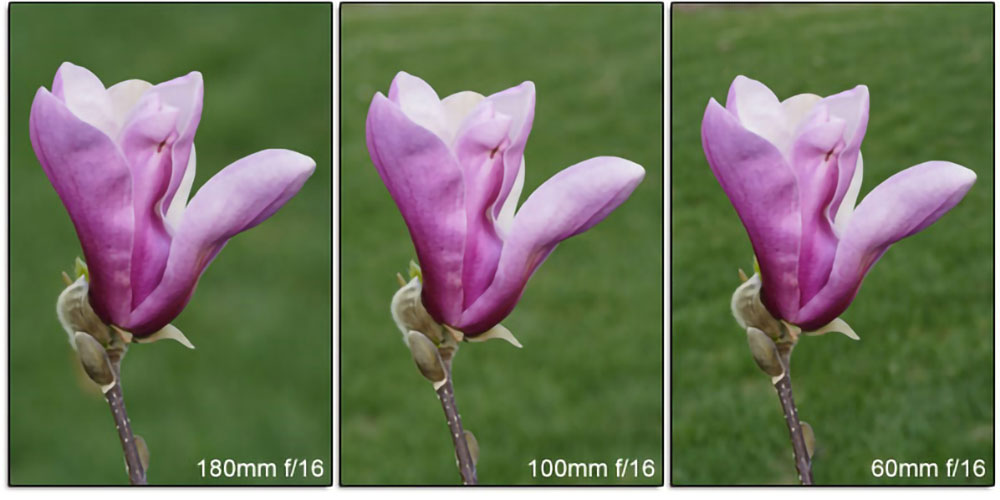
Using a Longer Focal Length
A longer focal length will compress the subject. Using a longer focal length, you can create a blurred background. Because it will help you create a shallow depth of field. Normally, a smaller focal length makes most of the object in focus in the photo.
2 Essential Camera Settings to Achieve Blurred Background
There are two greate ways for achieving a blurred background. If you are an expert in controlling your camera settings, then it is even easier for you. With a little practice any photographer can handle these 2 settings in their camera.
One is using the macro settings and another one is using aperture priority mode.
Using Camera’s Macro Settings to Achieve Blurry Background
Selecting a wide aperture and a fast shutter speed in the macro settings will automatically give you a blurred background. While using the macro or super macro mode always turn off the flash.
In this case, you can also use another trick. When you zooming in, get close to the subject. Keep the distance closer than the background is.
Using the Aperture Priority Mode
In most digital cameras, there is a semi-automatic mode called Aperture priority mode. The aperture’s f-number also controls the shutter speed and ISO settings.
Choosing the aperture priority mode and selecting a wide aperture will make the background blurry. It means you have to choose the smallest f-number in this mode.
Post-Production Techniques to Get Blurred Background
When and in which photo you will need a blurred background you never know. So, photographers often apply a blur effect to the photo after the shooting. Mainly in Adobe Photoshop, experts make a blur effect in the post-production process. It is a common method and very useful when a photographer can’t make a shallow depth of field.
To apply a blur effect in Photoshop, experts use Gaussian Blur and Layer Masks techniques. By following the steps you can apply those techniques too.
- Open the image and create a duplicate layer in Photoshop.
- Apply a Gaussian blur effect to the new image layer.
- Now create a layer mask.
- Use a brush tool with black color and paint it over the photo to remove blur.
- Now work to refine the edges of the layer mask.
Conclusion
As long as you understand how to control your camera settings and compose the shots, making a blurred background is not tough. You can combine all the techniques for creating blurred backgrounds. Practice more on how to create a shallow depth of field and it will be easier for you. If you need any help in post-production, in this case, team Clipping Panda is always ready. Let us know any queries you have in mind in making a blurry background in the photo.
Bokeh is an effect in photography. By creating a bokeh effect, you can keep the subject in focus while the background goes out of focus. And the camera’s portrait mode helps to create a bokeh effect.