In this Photoshop tutorial, you’ll learn how to fix or remove a moiré pattern in Photoshop. I’ll explain everything in detail so that everyone can fix the moiré in Photoshop, even those who have opened Photoshop for the first time.
What You’ll Learn in This Moiré Removal Photoshop Tutorial
- What is moiré?
- Why does a moiré pattern appear in photos?
- How to remove a moiré pattern in Photoshop
What You’ll Need
Download the resource/sample image to practice or recreate the above design.
What Is Moiré?
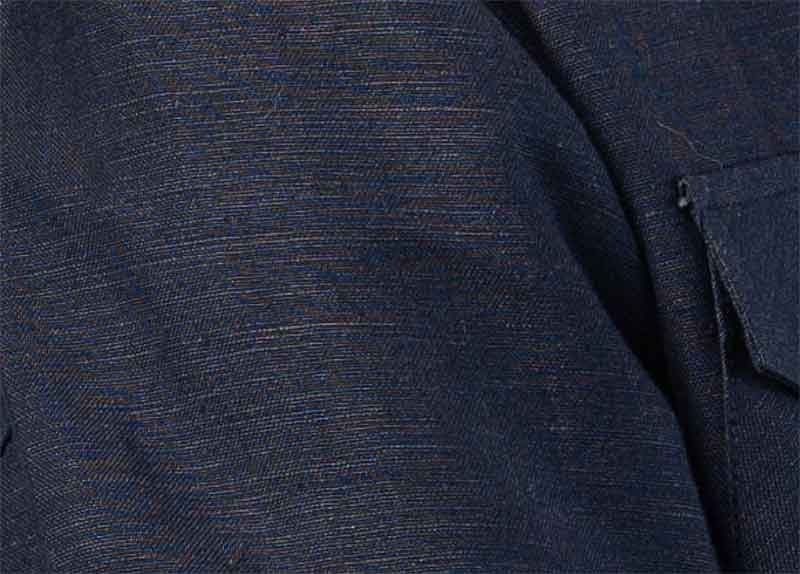
The moire pattern is a photography phenomenon that can be beautiful and unwanted, depending on the context. It is an effect caused by interference between two patterns or grids, creating a new pattern. Moire has been used creatively in the art for centuries, but it can also cause problems for photographers if not correctly managed. Understanding what moire is, how to avoid it, and how to use it as a creative tool are all essential elements of a successful photographer’s artistic arsenal. The pattern usually looks like the image below:
Why Does a Moiré Pattern Appear?
The moire patterns appear due to the optical illusion created by the lines forming together. As the grids or lines come together this way, they produce a ripple effect which can create interesting illusions and effects depending on the thickness and position of the lines. In Photography, we found moiré patterns in shirts, pants, ties, etc.
How to Avoid Moiré
Taking great photos is an art form that requires skill and creativity. However, one common mistake many photographers make is moiré, which can ruin the quality of your images. Moiré results from interference between lines in an image – it looks like a wavy pattern or rainbow colors.
Fortunately, there are several steps you can take to avoid moire in photography. Start by choosing lenses with higher resolution capabilities that can reduce the likelihood of moire occurring when multiple line grids interact. Additionally, try adjusting the camera lens angle or moving objects closer together or further apart from each other until you achieve a look without any noticeable interference effects in your shot.
How to Remove Moiré in Photoshop
In this section, we will fix or remove the moiré pattern in Photoshop. The moiré in our example photo is pretty high, so to make sure we don’t miss removing any moiré, we will fix the moiré pattern quickly.
We will show you two easy and quick methods to remove moiré patterns in Photoshop.
- Moire Reduction Using Camera Raw Filter
- Moire Remove Using Color Replacement Tool
Method 1 (Fastest Way): Moire Reduction Using Camera Raw Filter
The fastest way to remove moiré using camera raw filter.
Step: 1
Open the images in photoshop and duplicate the Background remove by pressing “Command + J.” Rename it to Layer 1 to “Camera Raw.“
Step 2:
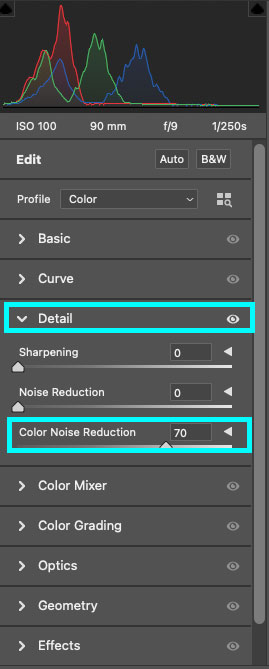
Just go to the Filter>camera raw filter>Detail. Then You see “Color Noice Reduction” and set the value between 60 to 70. In this way, you can fix the moiré quickly.
Method 2: Remove moire using Color Replacement Tools
Same as the previous, duplicate the Background remove by pressing “Command + J.” Rename it to Layer 1 to “Color Replacement.”
Before using the color replacement tools, you must select the cloth’s original color. Generally, we see moiré patterns in shirts, ties, pants, etc. Then select the brush tool by pressing “B” and choose the color replacement brush tool.

Zoom the images and apply the brush tool; you will see the moiré pattern is gone.
You Made It!
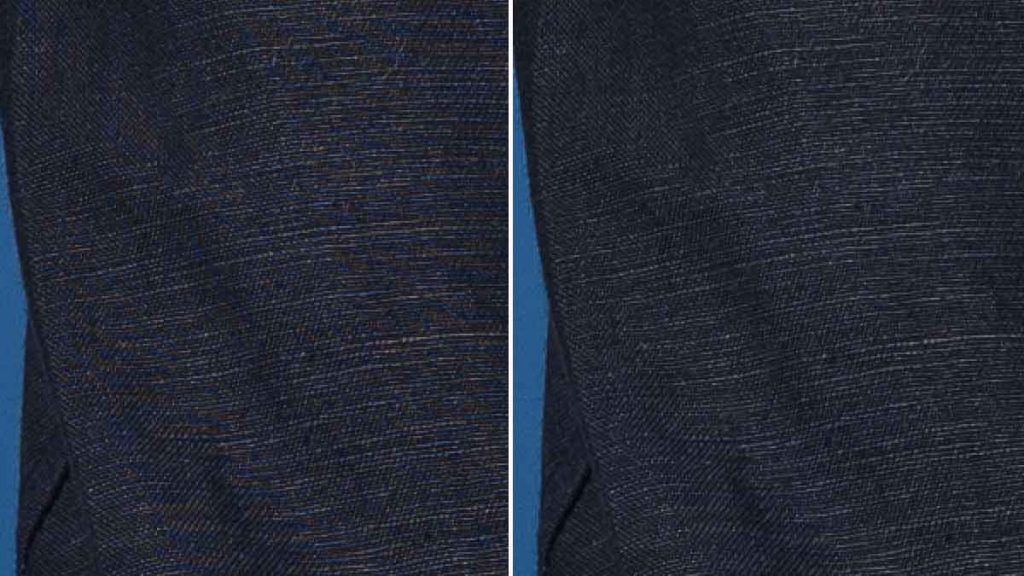
Well done. Now you know how to fix Moiré in Photoshop. Here is our final moire removal result in Photoshop:
