Every photographer has faced lighting problems once in life. Unbalanced and bad lightings cause low quality and grainy photos. But there are some special techniques for setting up the proper lighting. Learning the techniques for setting up studio lighting can fix all the problems you will face in photography. Fortunately, it is not very difficult to work if you follow the instructions of experts. The main goal of this article is to help you understand the basic techniques for using studio lighting equipment and terms from the experts.
Some terms are used in different perspectives among photographers. Whatever it is, lets us start to discuss different types of lighting first.
Strobe Light
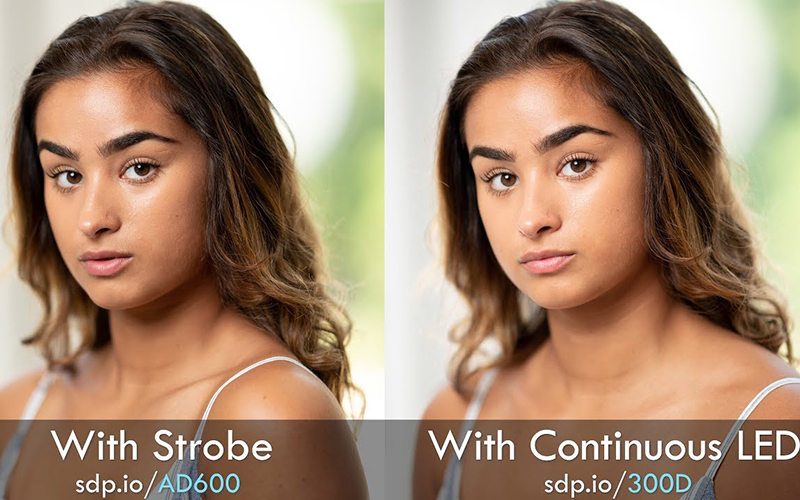
Studio strobe light considered as a is a whole flash unit. Many photographers call them a monobloc or mono-light. In this case, power output varies between models. Many cheaper strobes offer powers like third-party flashgun.
Continuous Light
Continuous lights also serve similar functions as strobe lights without flash. They are high-powered lights that can be fitted with modifiers. Continuous lights still have their quality in still photography as well as recording video. You will find a lot of LED lights in the marketplace nowadays and they are the best option for studio lighting.
Flashgun
If you need a hot shoe mount for placing on top of your camera then you may need to use Flashguns. These are portable and offer high-power outputs. Though flashguns have limitations in size and power, they are still an extremely useful tool in photography.
The Importance of Studio Lighting in Photography
No matter how sharp a photo you take; you need proper studio lighting to convince the clients. The most important thing is that you should understand your camera’s limitations instead of using the latest one to capture amazing photos. Suppose, you have a camera that can’t handle low light situations then schedule your photo sessions for daylight.
In this case, you should be careful about camera settings. Even in daylight photos can turn out poorly if you’re not using the right camera settings. Learn how ISO, shutter speed, and aperture work together to get the proper exposure. After mastering the camera exposure focus on how light interacts with the subjects.
Best Lighting for Shooting Photos
The golden hour of a day is the time when the sun is rising or setting. You will get the best natural light during the golden hour. This is the soft light produced naturally.
Golden hour produces diffused lights and your subject’s face will appear much better than the directional light. If you fail to get the golden hour then use the next best thing is to choose a location with shade.
Different Types of Indoor Studio Lighting
Studio lighting kits can be complicated if you do not know them well. You can use every continuous lighting kit to light up a specific part of your subject. You can also add different effects using indoor studio lighting properly.
Now I will explain some common types of equipment and lighting techniques for indoor lighting.
Key Light
Use a key light if you could use only one artificial light source. This key light is very important even you use multi light sources. For continuous lighting, the key light does most or all of the work to lit up the subject’s face. You can place it on one side and pointed it directly at your subject.
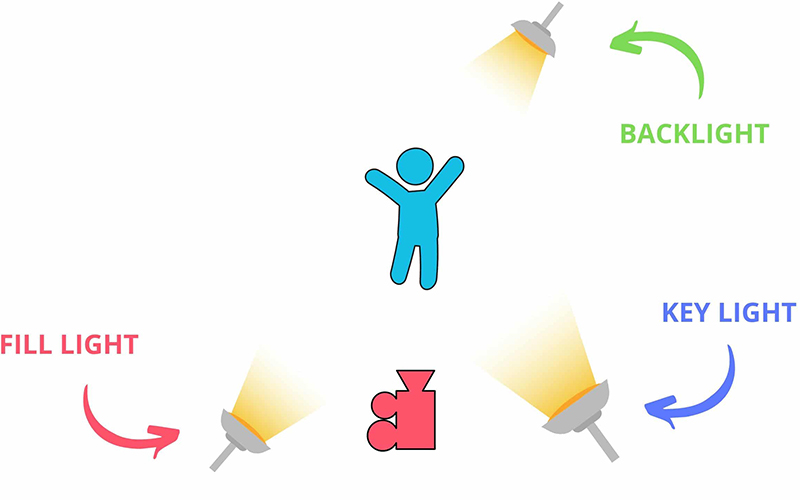
Fill Light
This light is used along with the key light. It brightens the shadows cast on your subject using key light. Fill light works as the key light has the same brightness. If you want a little bit of shadow on your subject’s face you will need one.
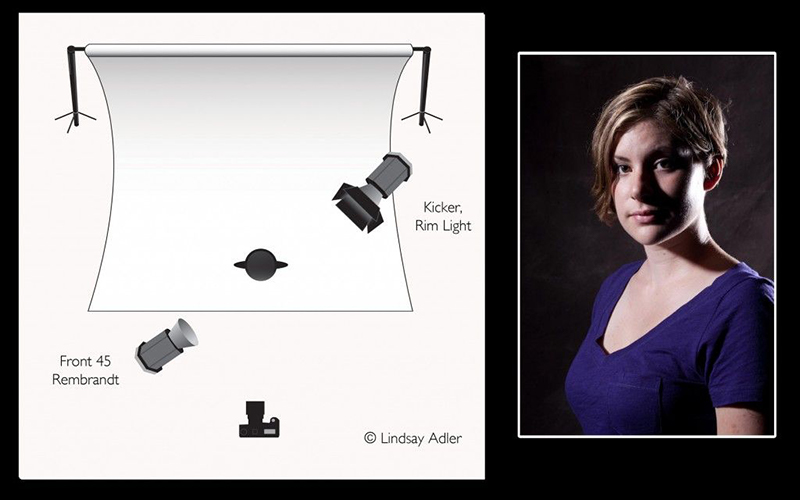
Kicker
Kicker has different names depending on if your subject is a human or an object. But they serve the same perspective. The kicker is meant to only fall upon a small part of your subject. The hair of your subject is a perfect example of this. If you want to hit a slightly larger area, move your light further away from your subject. Use the kicker from a higher position than the key light.
Background Light
Sometimes your background can turn out too dark if you use many lights on your subject. In this case, the background light can help you solve the problem. Background lights can eliminate shadows on the subject’s backdrop.
Learn also different lighting techniques such as Split Lighting, Rembrandt Lighting, Loop Lighting, Butterfly Lighting, and Broad or Short Lighting from our latest portrait lighting guide.
Conclusion
The important thing about photography is that you have a variety of lighting. Different lighting can give us such diverse looks with our subjects. Studio lighting is also most important and learning the techniques will be useful even for natural light photographers. It might help keep you in business during your slow winter season photography. Let us know if you have any queries about studio lighting. Contact us to get our expert’s help to fix lighting in your photos.
The most portable solution is an umbrella since it can break down to a small and thin size. But softboxes are great for replicating window light.
Big size softboxes are great for photographing a full-length body. 90cm Easy Open Softbox is the most commonly used size.

