- Open your image or documents in Photoshop
- Click the “Image” option from the top at Photoshop Menu Bar
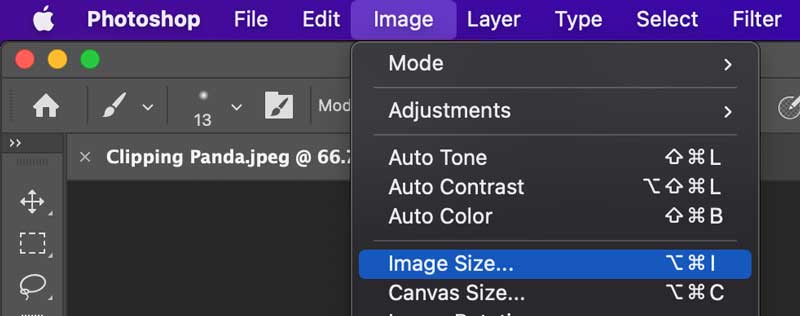
- Select “Image” Size or use keyboard shortcuts ⌘ + ⌥ + I for Mac Ctrl + Alt + I for Windows.
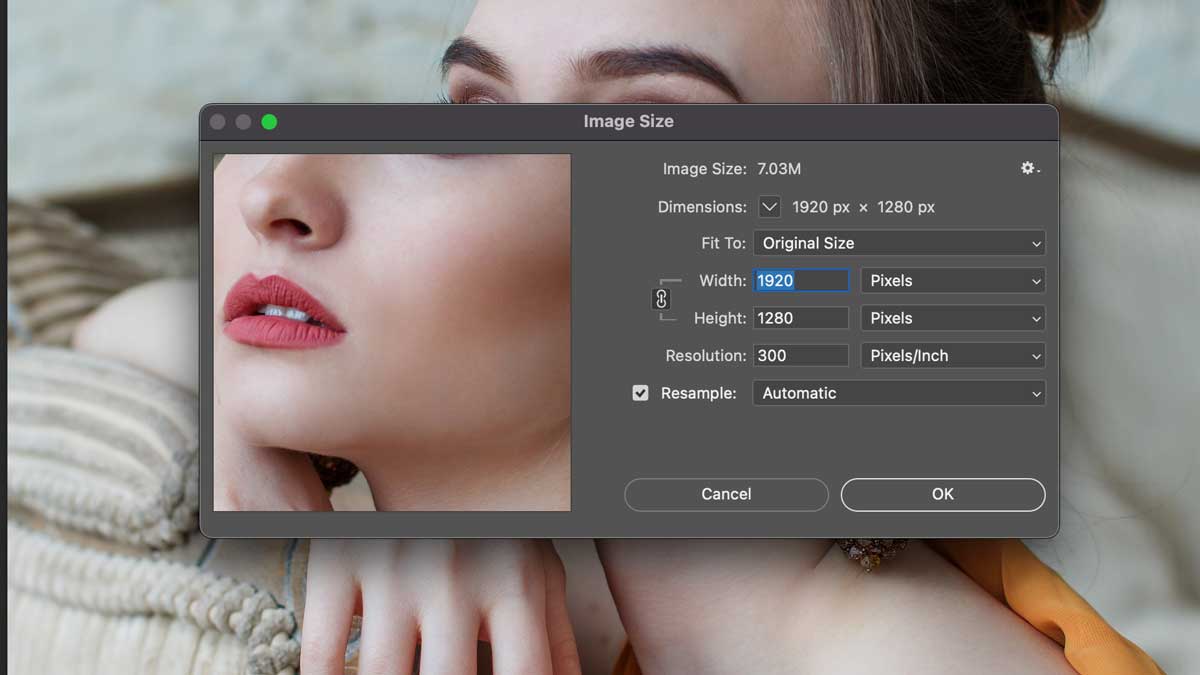
- A new window will open and select your image size
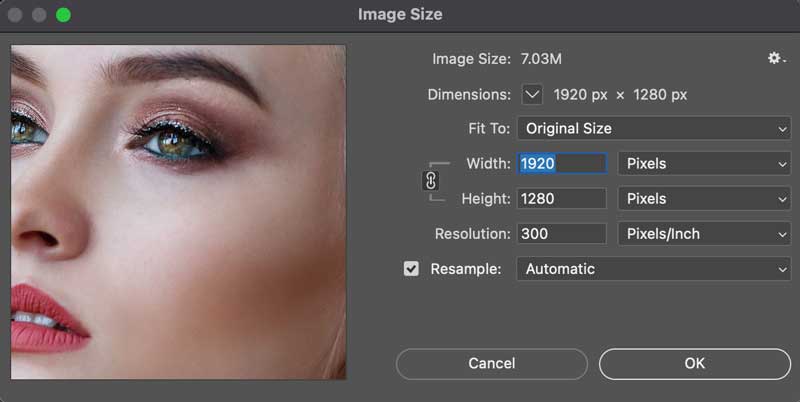
- Input desire value Width and Height and press Enter.
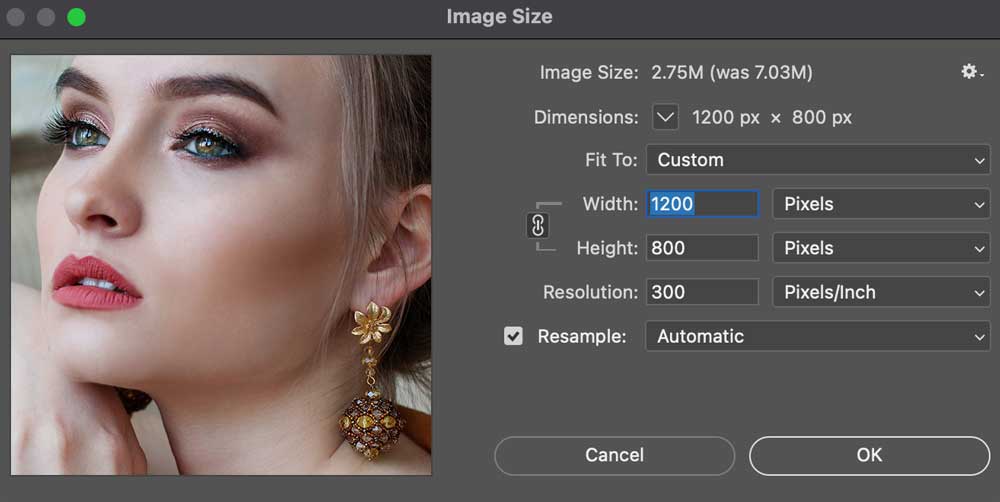
- That’s it.
How to Reduce File Size in Photoshop Without Losing Quality
- Open Image or Documents in Photoshop
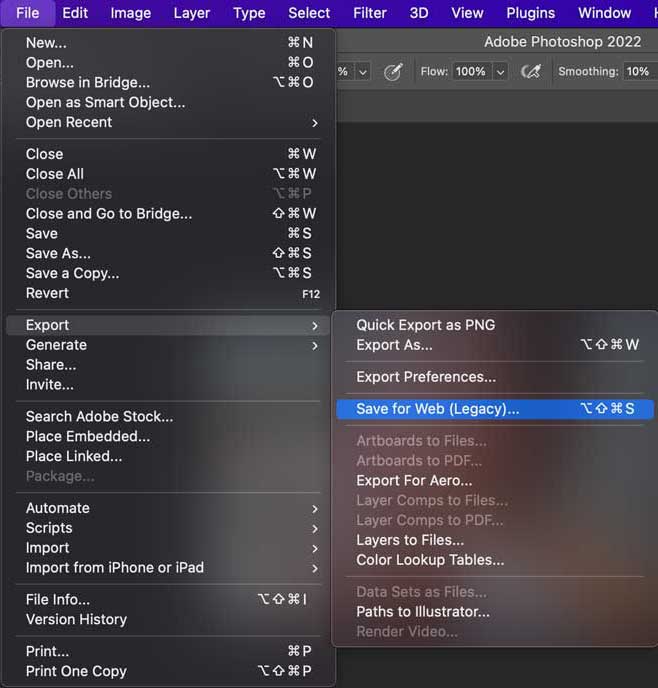
- Go to the “File” option from the top bar.
- Click “Export” then “Save for Web (Legacy).”
- A new window will popup.
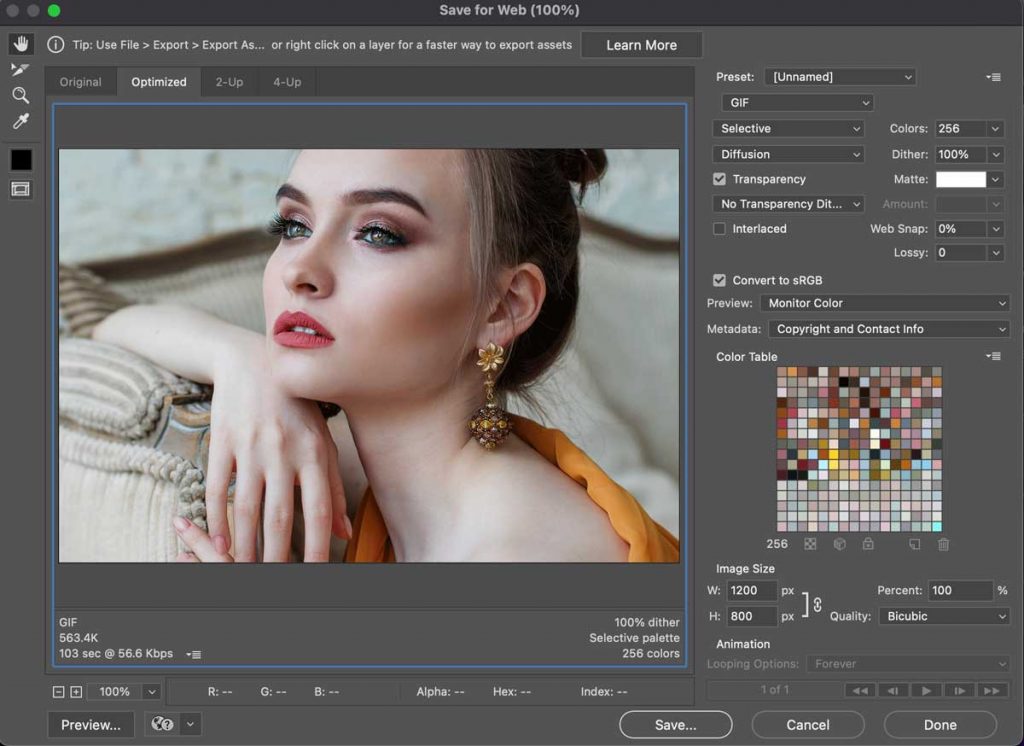
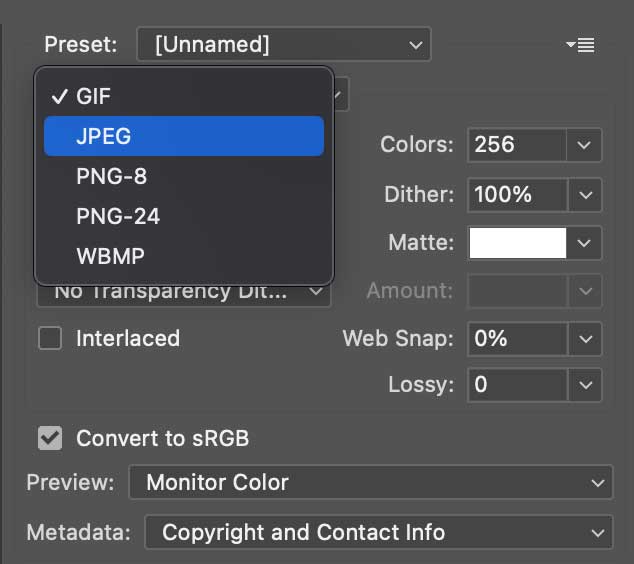
- Change Image Format Gif to JPEG
- In Maximum Quality, the image file size will be 524.8 Kb.
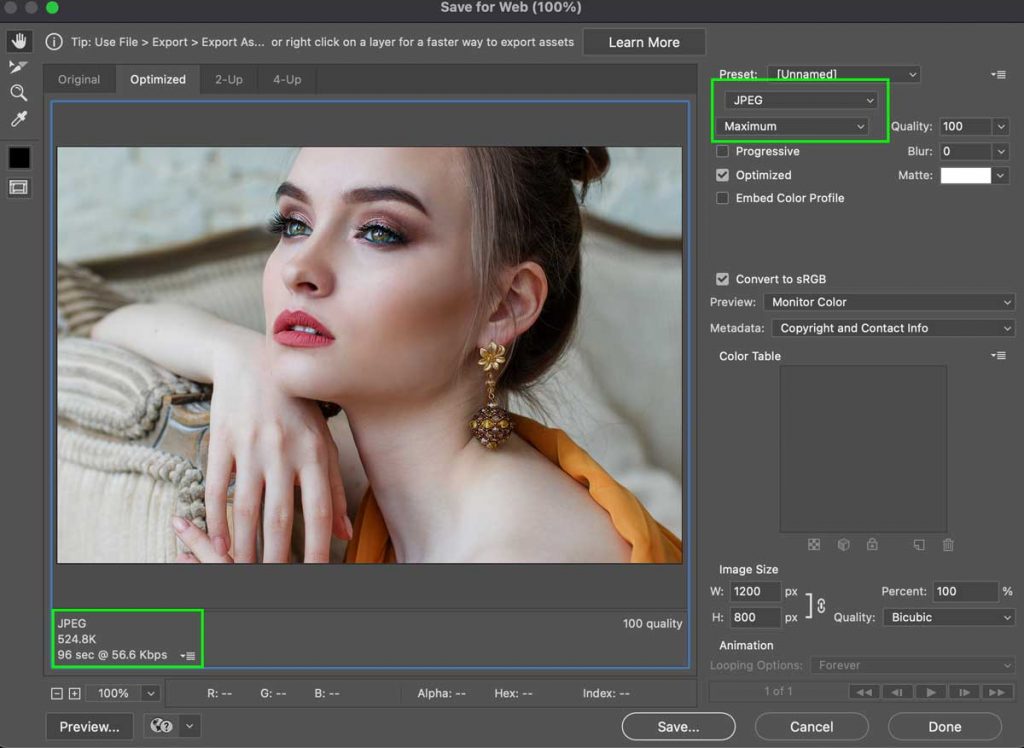
- Select the Medium quality and now file size 57.4 Kb.
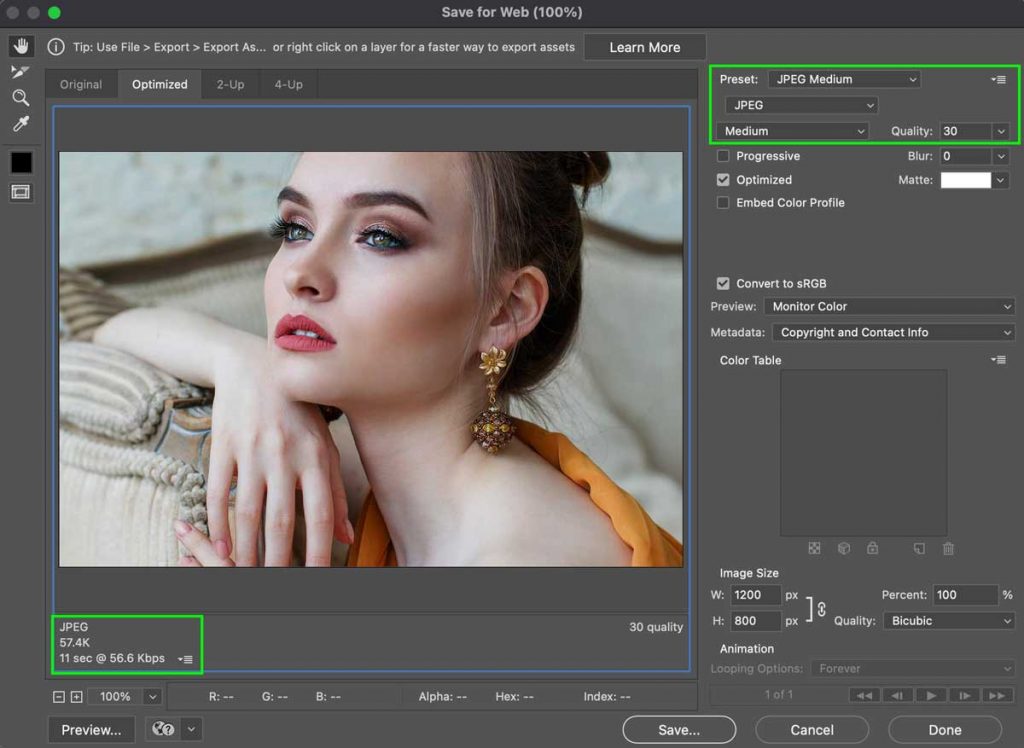
Press Enter and save the file.
Why We Resize Image and Reduce File Size?
- We resize images because of eCommerce; Social Platform requires a specific or have optimized image size. For example, Facebook Cover size 820 by 312 pixels tall and LinkedIn Cover photo size 1584 by 396 pixels.
2. We reduce image file size because of the faster loading speed. Google Page Speed helps the website to rank and deliver web content fast.
For more details: Understanding Image Resolution

