If you are a graphic designer, then you know very well about Adobe’s software. There is 50+ software in the Adobe platform. But only 10-12 software is trendy among graphic designers. Photoshop CC, Illustrator CC, Adobe Acrobat Pro DC, Premiere Pro, InDesign, After Effects, Lightroom CC, Premiere Rush, Adobe XD.
All are unique in their own performance. They allow you to create, edit, and organize your digital assets. But most of them need a subscription. Adobe allows you to buy only one software or the whole Creative cloud suite. But there is some free adobe software to manage your fantastic creations. Adobe Bridge is one of them.
So, today we will talk about Adobe Bridge. We will see what Adobe Bridge can offer you.
What is Adobe Bridge?
Adobe launched Bridge in 2005. It is one of Adobe Creative Cloud’s software to organize all the digital files. Though it seems like a file browser, it can do way more than a file browser. Graphic designers call it a digital asset or media manager.
Adobe Bridge is a powerful application to manage all digital files. Not only photos and videos, you can manage and organize all the documents also on your computer. You can open images in Photoshop from Bridge. Before editing pictures in photoshop, Bridge allows us to select the perfect photo.
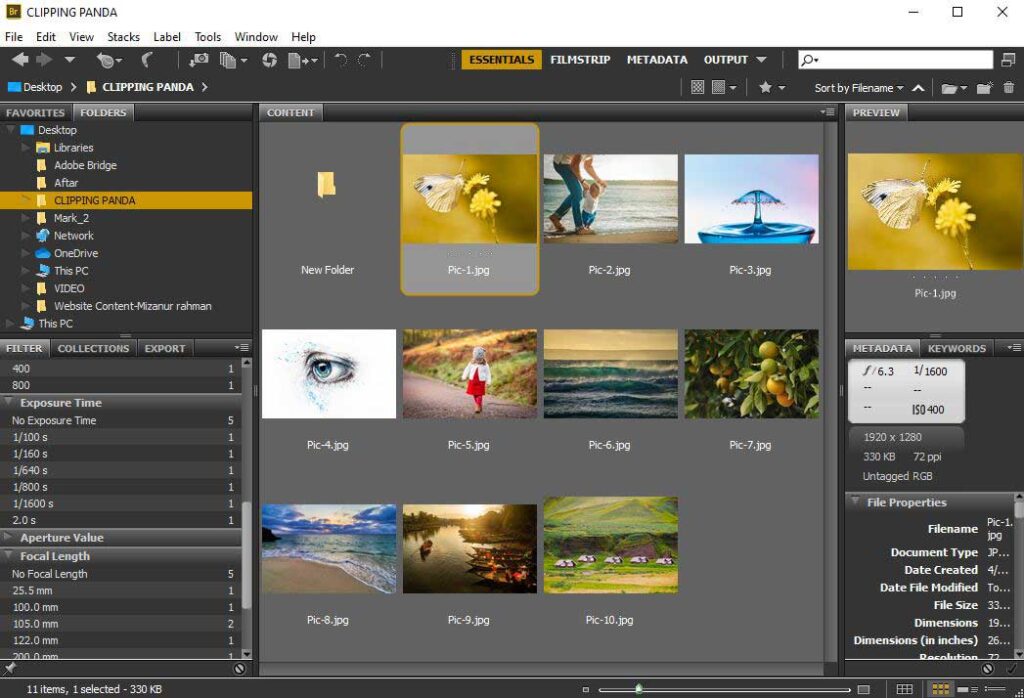
The Best Features of Adobe Bridge
Many of us think that Adobe Bridge is an alternative to Lightroom CC. Lightroom is also a file organizing software. But it has other features for basic image editing. And Adobe Bridge is a media manager. For managing all your files in one place, this software has many excellent features. Let’s know about the best functions of Adobe Bridge.
- As a media browser, Adobe Bridge is the most comfortable software. You don’t have to give extra effort to import any files. It imports all the files from your PC drive. You can access all your files by browsing the folders from the Folders menu.
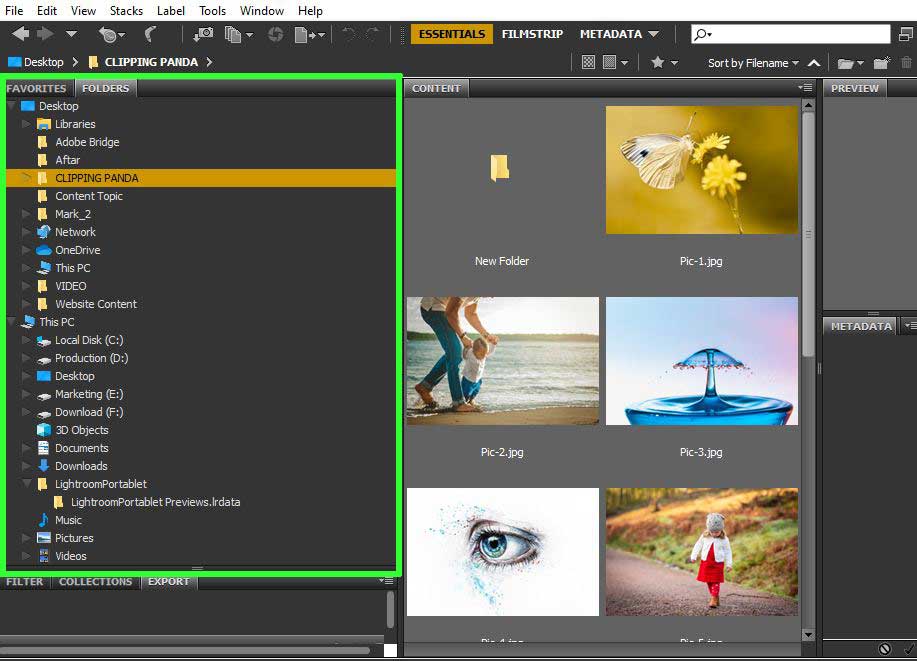
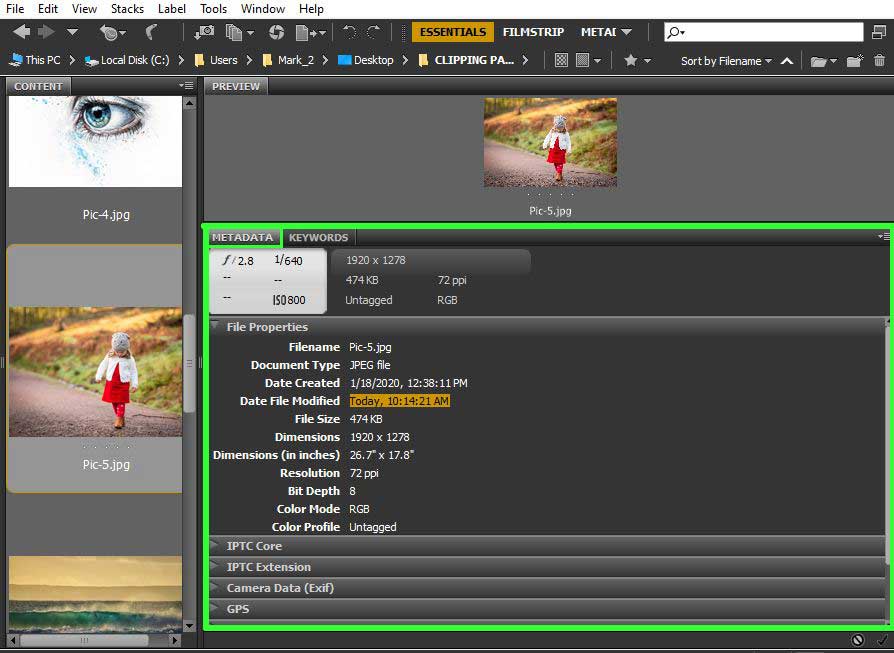
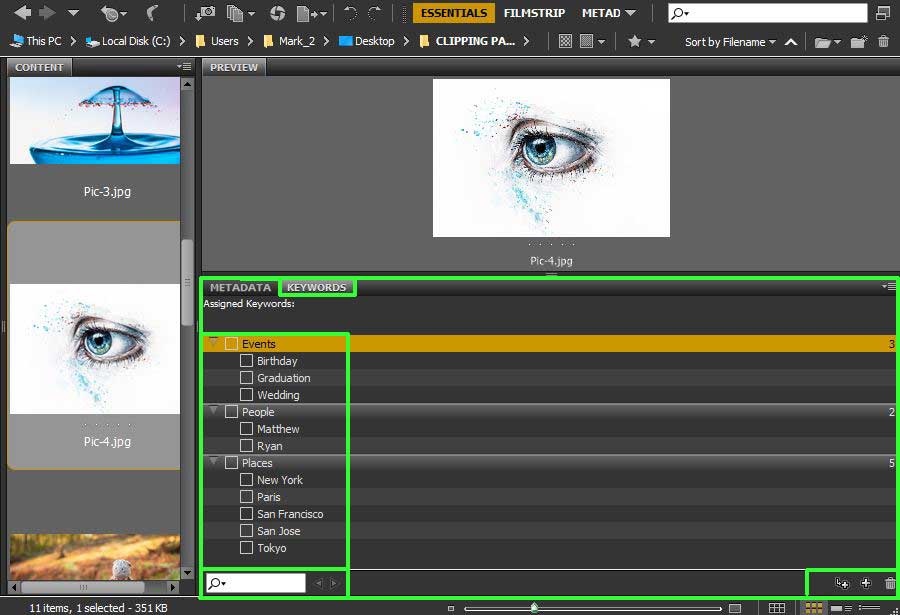
- If you select an image or video file in Adobe Bridge, it will show you all the file information. You will find them in the Metadata section. Thus, you will see the file properties, such as file type, size, time & date, etc.
- In the keyword section, you can input file-related information. To do this, you have to mark different categories for the file. By default, you will find different categories in the keyword section. But you can add a new category or delete any category if you want. To add different categories, you can search them in the search box on the left corner.
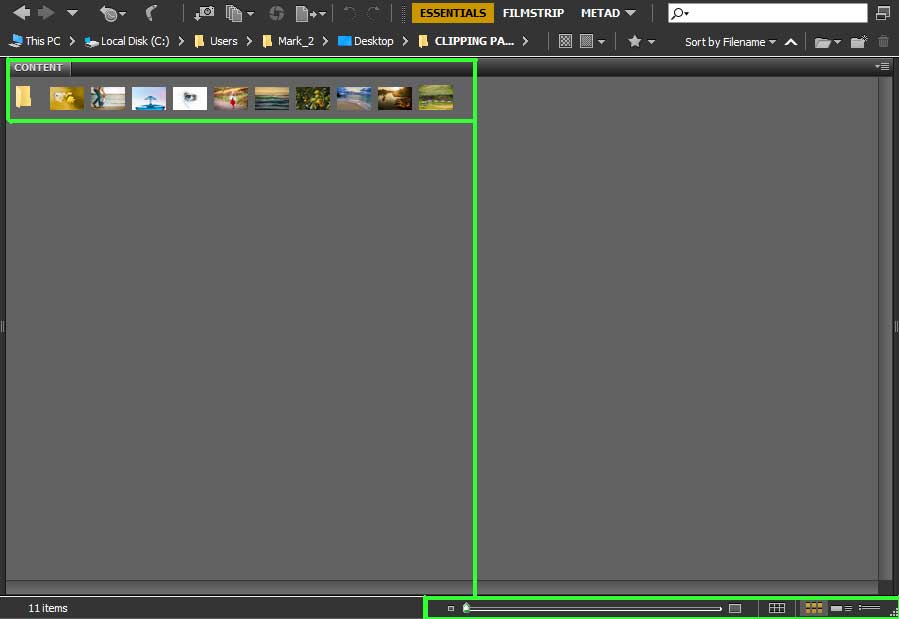
- You can increase or decrease file preview size with the thumbnail slider. It is at the bottom of Adobe bridge.
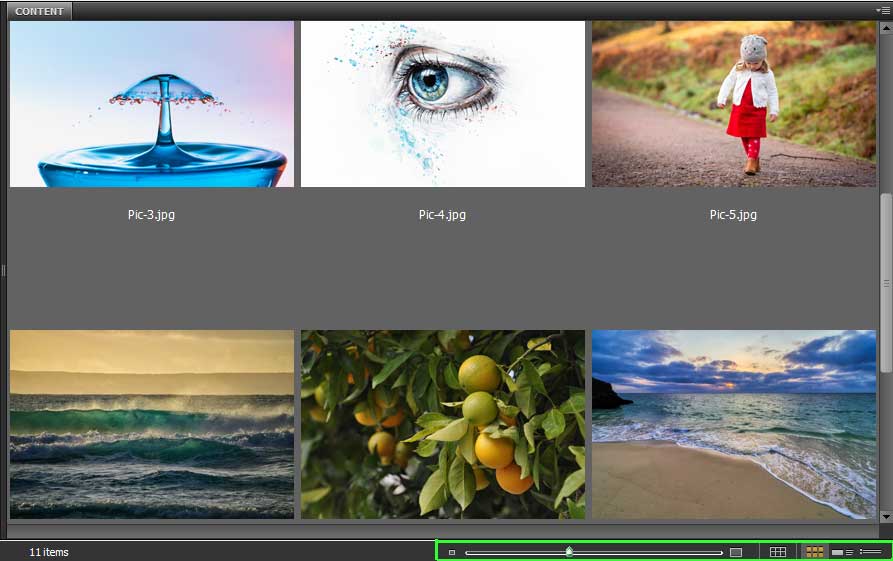
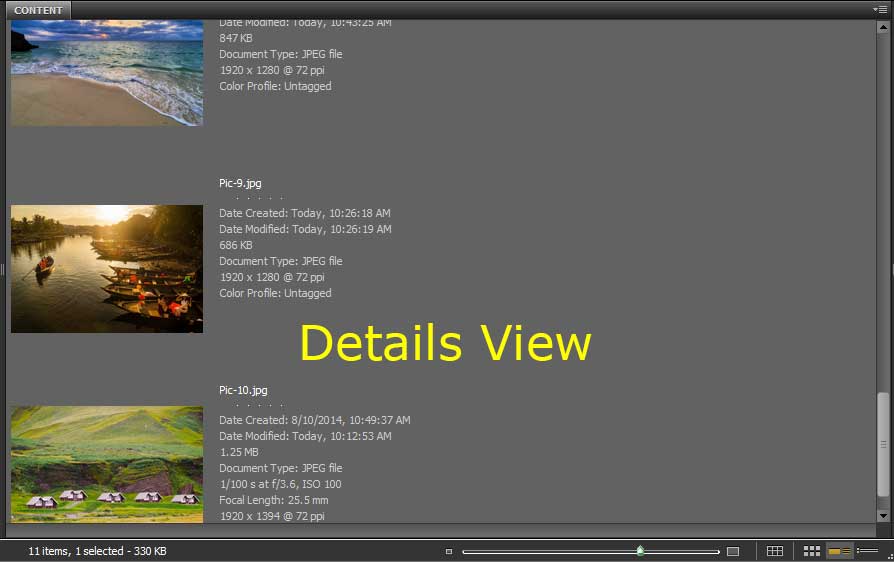
You will find more options for content appearance beside the slider. Those options will allow you to set the contents as a list, details view, thumbnail, and grid view.
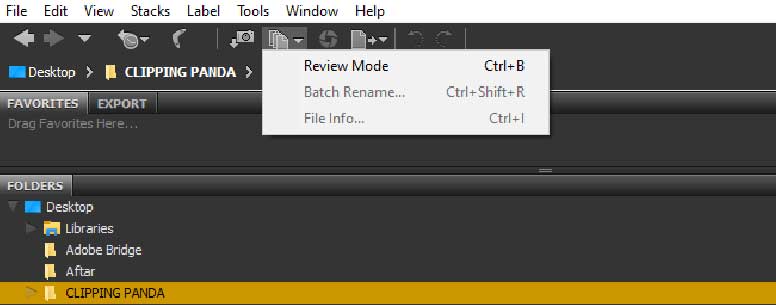
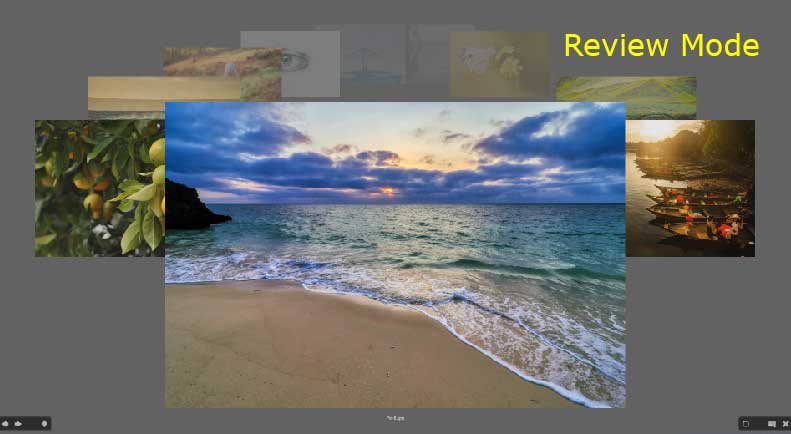
- Adobe Bridge has another amazing feature for file selecting, which is the Review Mode. Review mode will allow you to see all the files on the big screen at once. There you can see and choose files one by one with the arrow keys at the bottom.
Unique Tools and Other Options
Adobe Bridge contains some unique tools for organizing the files. These tools made file management easier. Using the tools is also a very easy process. So, let’s see how Adobe Bridge’s tools work.
- Filmstrip
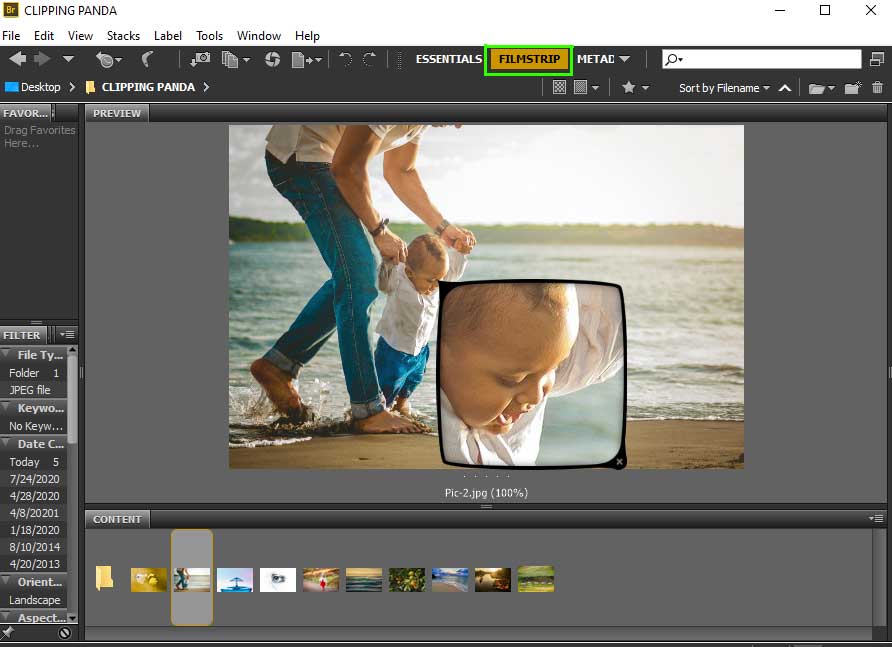
On the right side of Adobe Bridge, there is a Filmstrip option. If you click the option, a loupe tool will be open in your selected photo. This loupe tool works as a magnifying glass or a zoom tool. Wherever you point the loupe tool in the photo, it will zoom that point of the picture. Thus, with the Filmstrip option, you can see every part of the image.
- Get Photos from Camera
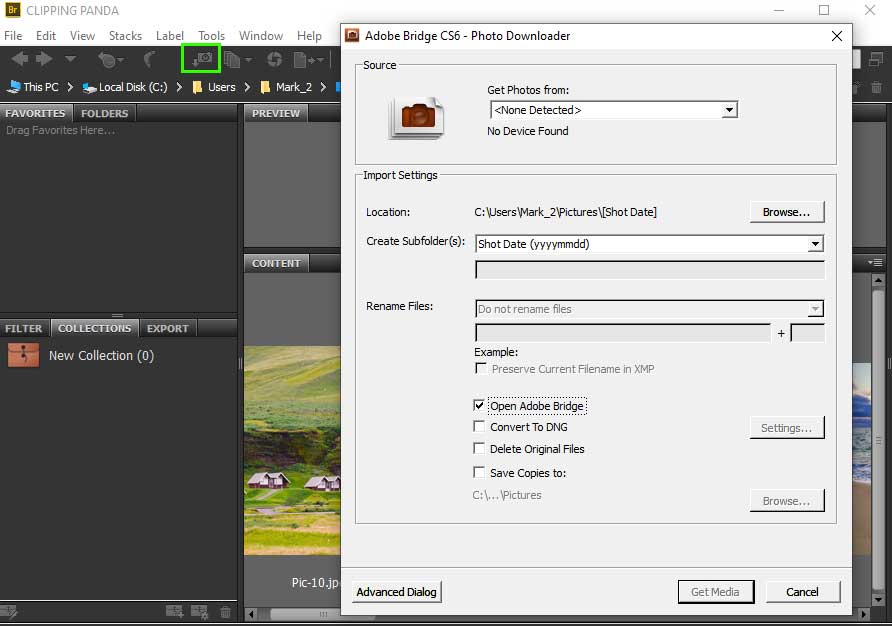
It is a photo downloader option from your camera. You should see a camera icon with a downloading sign on the left side’s Adobe Bridge path panel. If you click the icon, a new window will be open for the Adobe bridge downloader. In the new window, you will find many options. But you should connect your camera device with your PC first. You can choose the saving location, create subfolders, and rename files. You can do all this from the import settings.
- Batch Rename
Batch rename is another excellent tool for renaming many files. To find this option, first, go to tools then select the Batch Rename. You can open this function by using the shortcut Ctrl+Shift+R. Now a new window will be open for renaming your files.
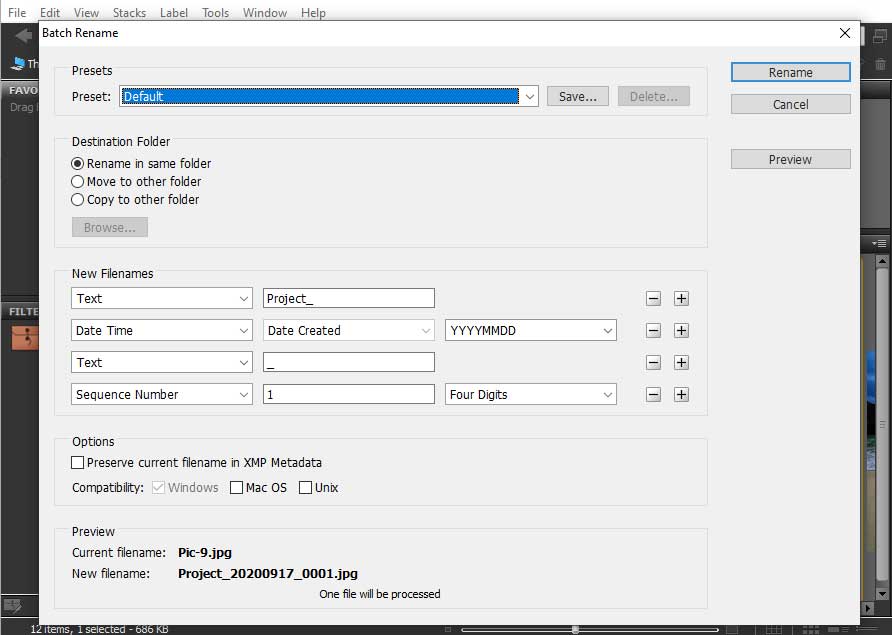
- Creating and editing Metadata
In Adobe Bridge, you can create and edit your own Metadata for any file. You will find four different metadata options in the tool option. You can create a new metadata template and edit existing metadata. Another two options is for appending and replacing Metadata.
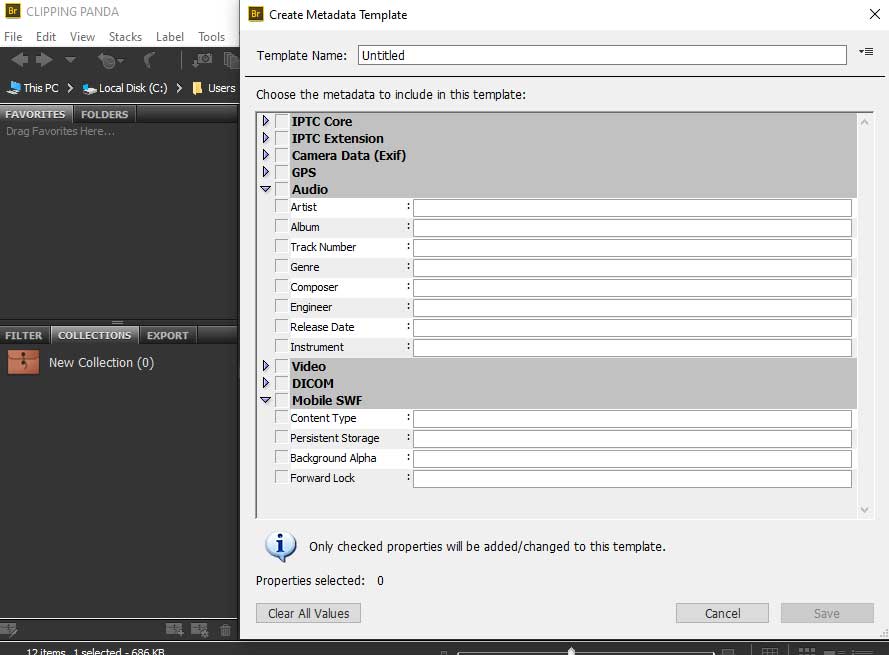
- Sorting Files
You should see this option under the search box in the right corner of Adobe Bridge’s path bar. With this option, you can arrange and sort all the files by file name, type, date, etc.
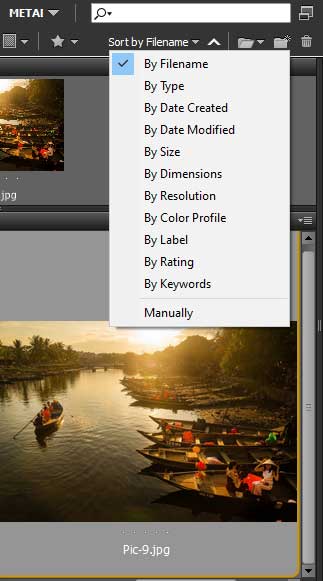
- Photoshop Options
Adobe bridge serves Photoshop in many ways. It makes designing and editing easier in photoshop for graphic designers. With the Photoshop options in Adobe Bridge, you can send a photo in Photoshop for a specific edit option. Such as image processing, lens correction, loading into layers, etc.
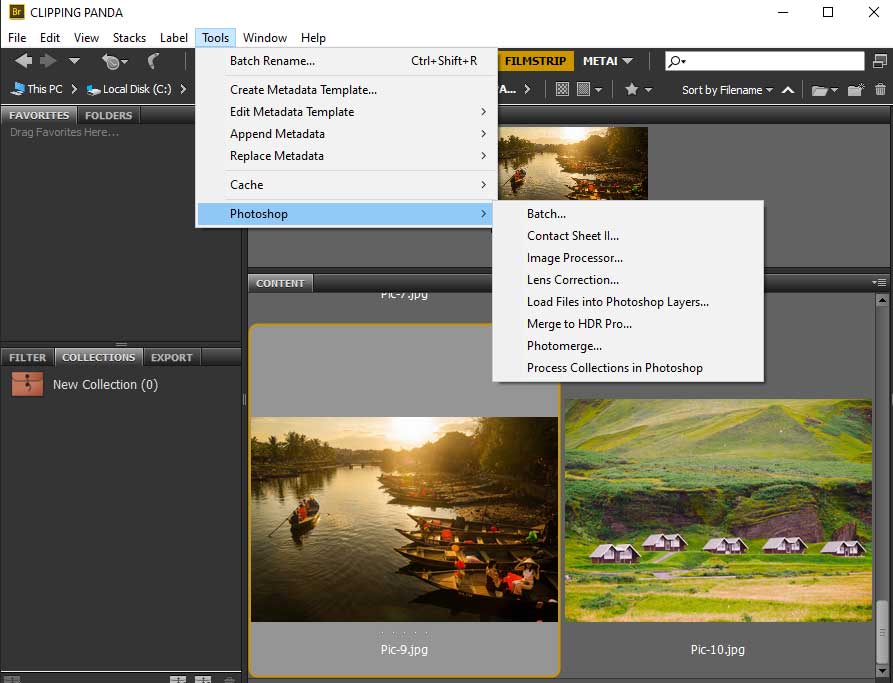
- Back to Bridge from Photoshop
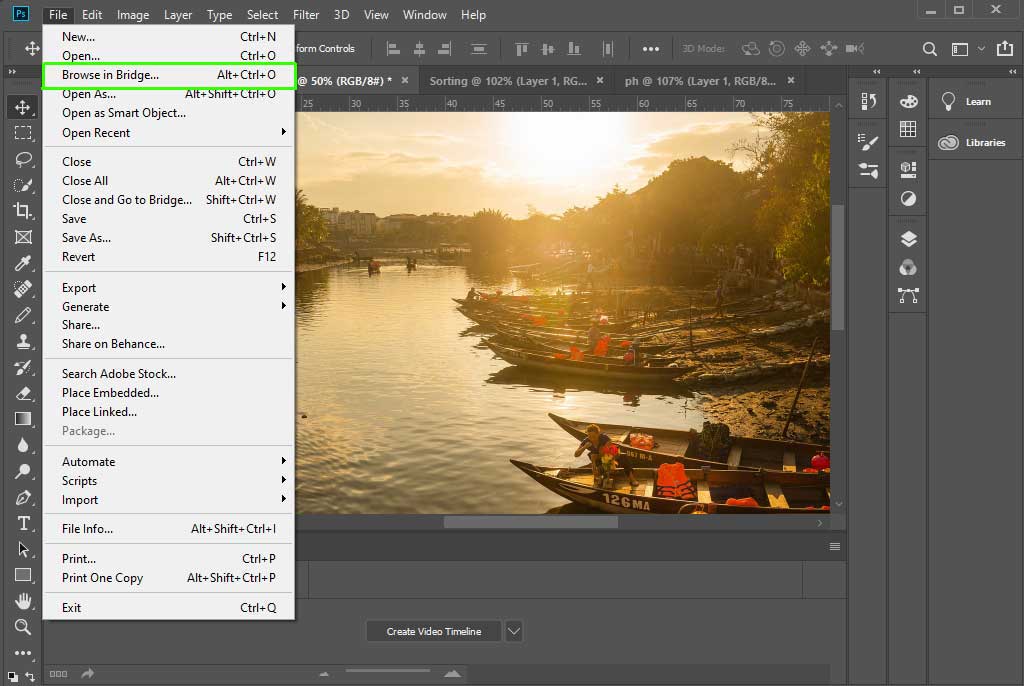
When working in Photoshop, you may find opening and browsing files irritating. Adobe Bridge makes it simple. You can browse your files in Adobe Bridge and work in Photoshop at the same time.
To use this function, go to the file option in Photoshop. Now choose the “Browse in bridge” option from the list. You can also use the shortcut Alt+Ctrl+O from the keyboard.
How to Install Adobe Bridge?
First, go to the Adobe Bridge download page following the link. https://www.adobe.com/products/bridge.html. Now click the download button from the page.
After clicking the download button, a bridge set up extension file will be downloaded. Double click or select the file and open it with the option “Run as administration.”
Now you have to sign in to your adobe account using email and password. If you don’t have an account, you can create a new one by clicking the “Create a new account” option.
After signing in, the installation progress will be starting automatically. When you finished installing the Adobe Bridge, launch it to manage all your digital assets.
Conclusion
Generally, creative visual asset designers use Adobe Bridge. They use it as a media manager or digital assets manager. Adobe Bridge helps to manage and organize all the digital assets in one place.
So, this is essential software for arranging files and working in Photoshop at the same time. If you want to know more details about Adobe Bridge, you have to use it first. I’m ensuring that you will find so much satisfaction by using it. So, let’s start managing your digital assets in Adobe Bridge from today.
Photoshop experts at Clipping Panda make perfect use of Adobe Bridge. We use it to excel our Photoshop services.
Adobe Bridge CC is file management software from Adobe Creative Cloud Suite. It helps to centralize all the files on your PC. The CC in the name Adobe Bridge CC stands for Creative Cloud. The upgraded version of this software is Adobe Bridge CC 2020.
You don’t have to buy Adobe Bridge as a single product. It is free with one of Adobe Creative Cloud’s major software. You can buy Adobe Photoshop CC, Illustrator, etc., and get Adobe Bridge free. The price range for Creative Cloud plans starts from $9.99 per month.
Yes, you can use Adobe Bridge without using Photoshop. You can use Bridge with other CC apps. Such as Illustrator, InDesign, or Premier Pro. You need to install Adobe Bridge separately.

