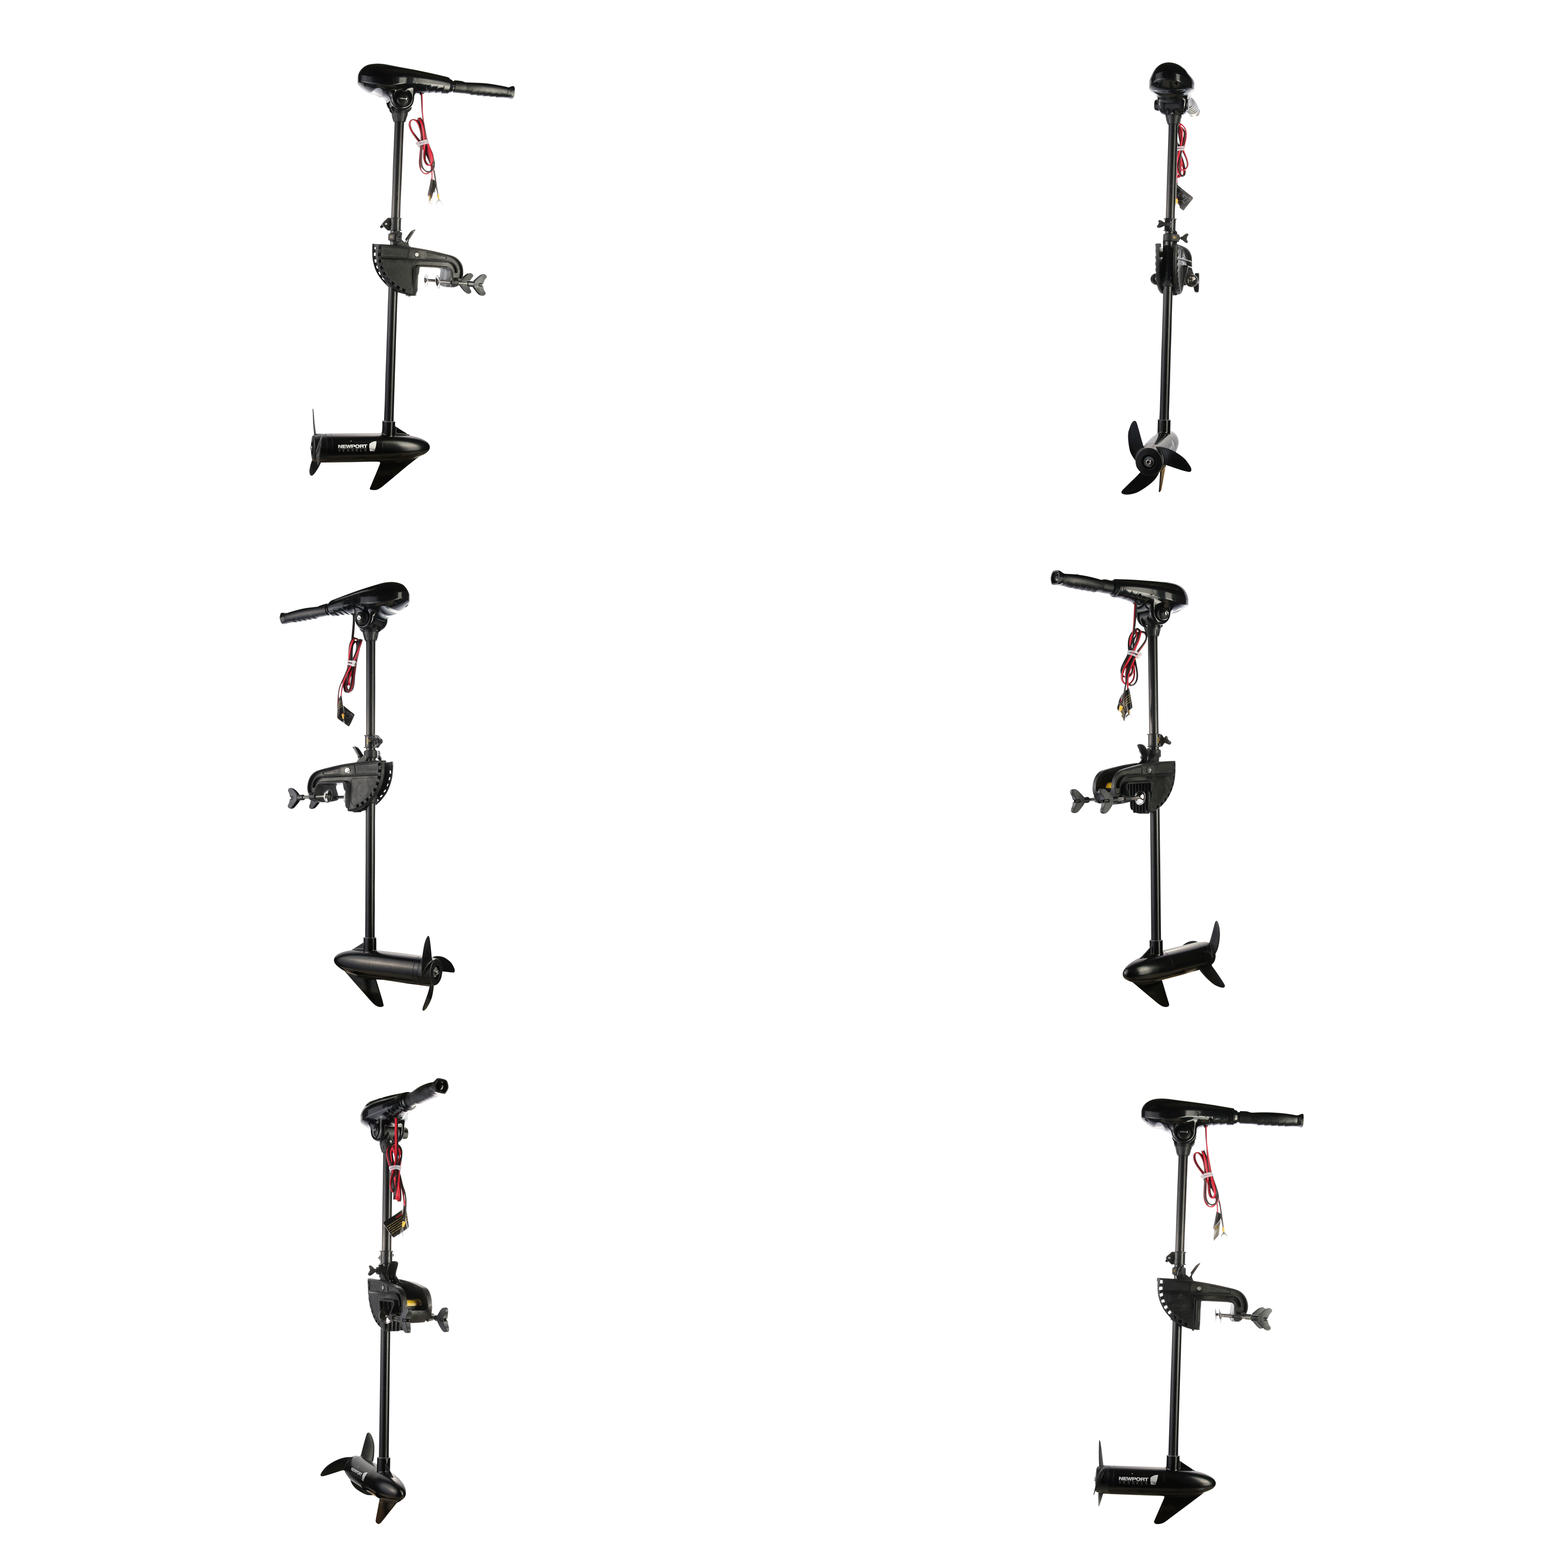
GIFs are a trendy commodity nowadays. It converts images into animation, which is a great medium to showcase product photos. GIF stands for “Graphics Interchange Format.” It means a compressed image file format that allows us to create animation. If you are a beginner, you probably don’t know how to make a Gif in Photoshop.
There are many ways to create a GIF. Even there are many online tools for that. With the image animating capability, Photoshop is the best tool for making Gifs.
Today we will show you how to make a GIF in Photoshop step by step. This guide is for those who don’t know how to make a gif in Photoshop yet. In today’s competitive job market, this is a must-have skill. Mastered the skill of making Gifs will give a high potential to your portfolio. If you’re trying to learn how to make a GIF in Photoshop, this the ultimate guide you could follow.
Step 1: Loading the Images into Photoshop
Before loading the images into Photoshop, you must edit them. Prepare them as how you want to rotate each frame. We took a different frame of a motor from a different angle and created 32 frames.
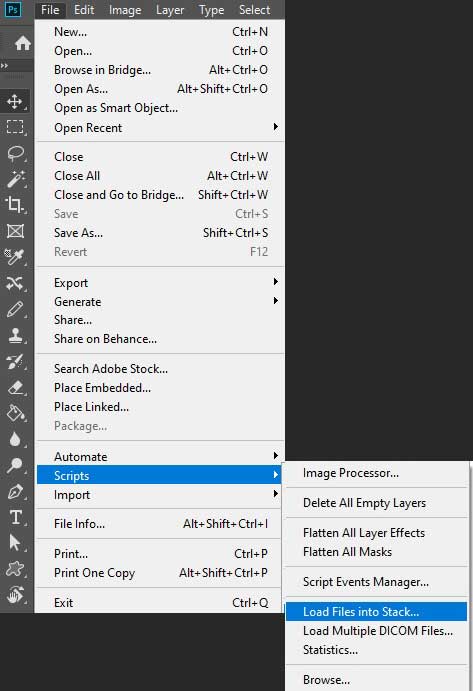
First, open Photoshop and go to the File menu. Then choose “Load files into Stack” from the “Scripts” options.
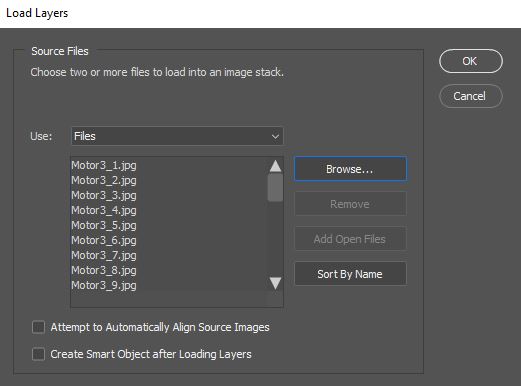
Now a pop-up window will be open. From the pop-up window, browse your photos from the computer. Here you can select more than two photos to make a gif. After selecting all the photos, now click Ok.
Step 2: Opening the Timeline Window
After loading the images into Photoshop, all the images will be loaded into layers. Now select all the layers. To do this, go to the “select” menu, then choose the “All layers” option.
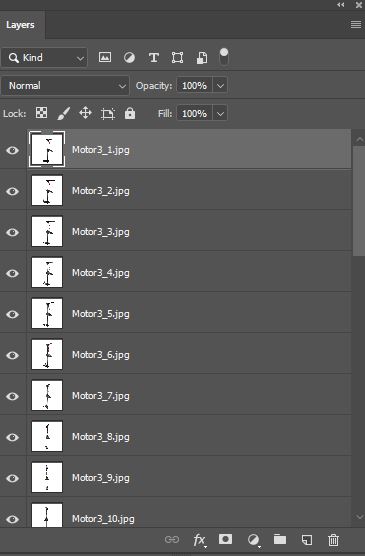
Now it’s time to opening the timeline window. Go to the window, then choose the “Timeline” option from the drop down menu. Then a new timeline panel for your image will open. From the middle of the timeline panel, choose “create frame animation.”

Step 3: Creating New Layer for Each Frame
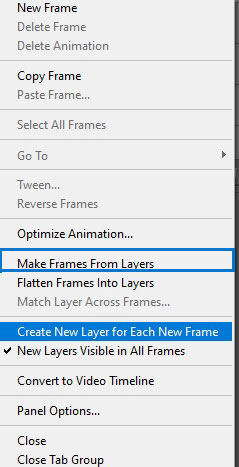
From the top right corner of the Timeline window, there is a three-bar option. Click on that and choose “Create a new layer for each new frame.” Now from the same options, choose the “Make frames from layers” option.
Step 4: Preview the Gif
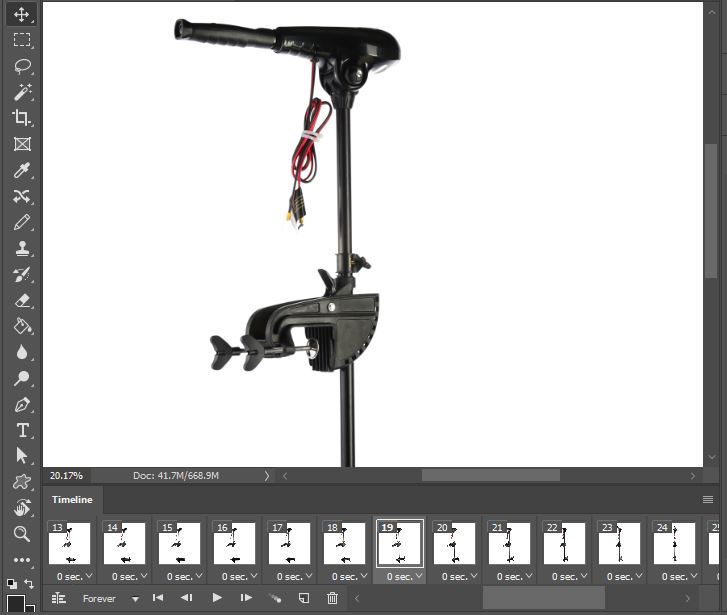
Now Photoshop will make frames from the layers, and you will be able to preview the Gif. Click on the Play button to see the Gif. From the timeline panel, you can also adjust the duration for each frame. You can choose the “forever” option to make the rotation continuously.
Step 5: Exporting the Gif
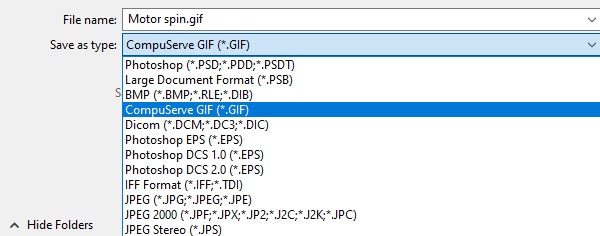
Now, this is the last thing we have to do in how to make Gif in Photoshop tutorial. Choose the “save as” option from the File menu or press Shift+Ctrl+S to save the Gif. Then from the file browser panel, choose the folder in which you want to save the file. Then type a name for the file and choose “Gif” for the file type.
But if you want to export your Gif file, then go to the File menu and choose “save for web” from “Export.” Then a new window will appear with various options. From the right section, select the file type as Gif and adjust the bottom’s image size. Now click “save” to complete the process.
Congratulations! Now you know how to make a gif in Photoshop. And you have just created your animated GIF. Now you can post it online or add to your portfolio. If you are looking for experts to make advance Gifs, contact us.
Conclusion
Making Gif in Photoshop is the easiest way than any other platform. We tried to show you how to make a gif in Photoshop in the simplest way. You can also make Gifs from video files. We will show you that in another tutorial. In the meantime, let us know if you have any questions about How to Make a Gif in Photoshop.
Yes, you can. There are several applications to make Gif in Android Phones. A top-rated app for the Android Phone is GIF maker.
There is no way you can add sound directly to your Gif. But you can convert your Gif into video files, then adding sound is very easy.

