In this article, we will discuss how to make a brush tool in Photoshop. Custom brushes can help you create beautiful effects from scratch in Adobe Photoshop. Graphic designing needs custom brushes to help creators turn their imagination into reality. Besides, if you are working with a graphic design agency then you must perform so many tasks for designing. But those tasks are boring and time-consuming. To make graphic designing easier and time-effective, you need to use custom brushes in Photoshop.
But how to make a custom brush in Photoshop? Well, in this guide, I will show you how to create a custom brush in Photoshop step by step. Follow the full tutorial to understand the process properly. If you read the tutorial carefully, you can create brushes from various images. So, let’s have a look at how to make a brush in Photoshop.
Step 1
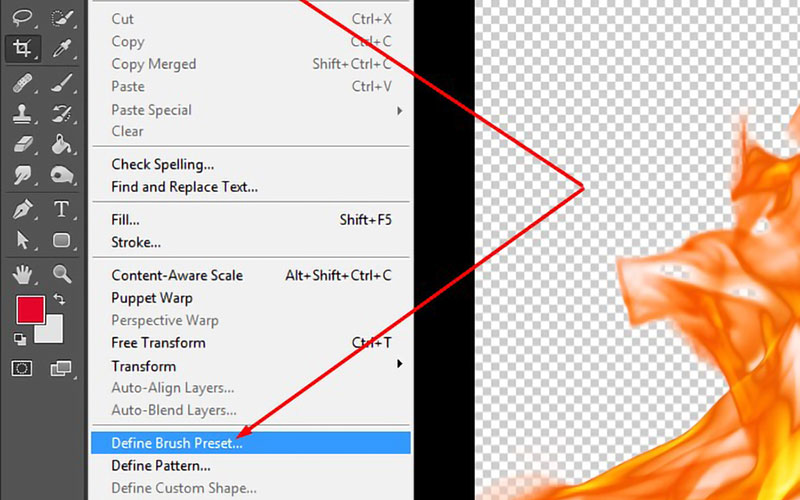
First, open a PNG photo to make a brush in Photoshop. You must select a high-quality image with a transparent background. You can use any image but it must be in PNG format. Vector images also apply here.
Now, go to Edit then select ‘Define Brush Preset’ from the top of Photoshop. You will find it from the drop-down menu.
Step 2
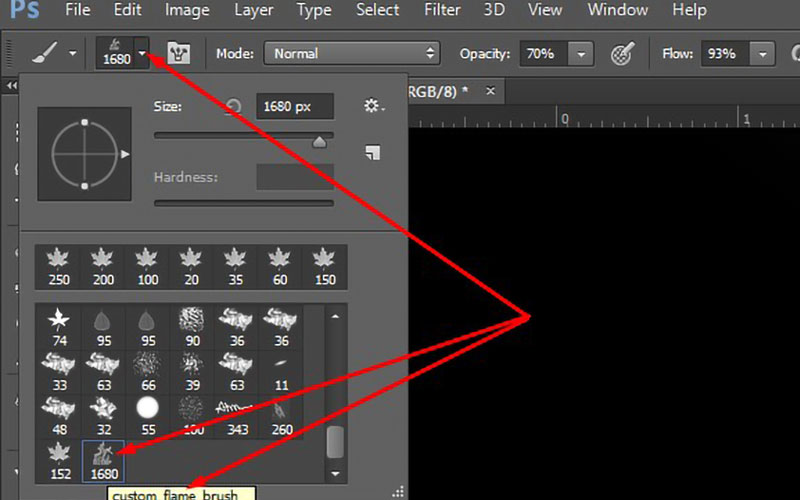
Now, give a name to the custom brush that you want to create if you want. You can give any name related to the image. When you will have made many brushes, the names will help you find specific brushes from a long list.
Click on the Brush tool from the toolbar after giving the brush a proper name. Now select your brush from the brush list. You will find it at the bottom of the brush list.
Step 3
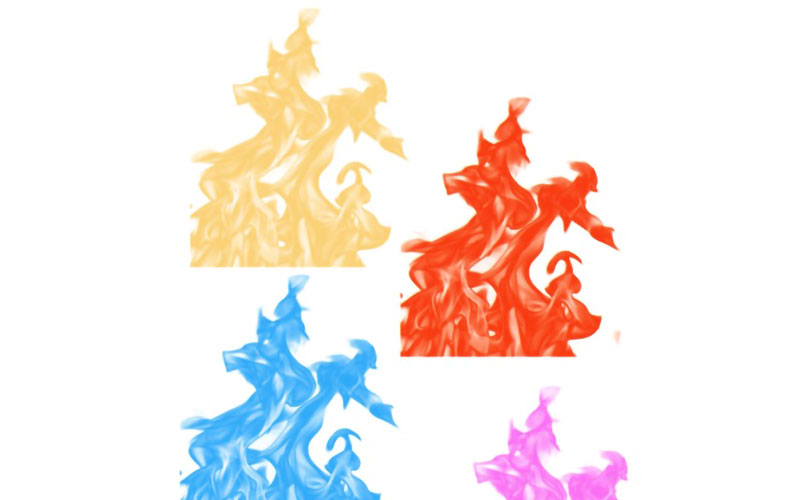
At this stage, create a new blank document from the file menu. Make sure your document has a white background. Now apply the brush you have just created. While applying try to use different colors. Have a look at the below image and you will have a better understanding.
In our daily work life, we need many text-based brushes such as signatures. From your curriculum vitae to filling any online form, you must use a digital signature. With the technique of making Photoshop custom brushes, you can also design your signature. Let’s make a signature brush in Photoshop.
- The first thing you have to do is sign your signature on a plain white sheet of paper. After that scan it at a high resolution. Now, save it into JPEG format.
- Open the photo containing your signature in Photoshop. Zoom in and select it with the magic wand tool.
- After selecting the signature completely, go to the edit menu and choose Define Brush Preset as you did before. Now, provide a name for the signature and click ok to save it. Go to the brush list and scroll down to the bottom. Here you will find your signature brush. You can apply this brush wherever you want now.
Conclusion
Making a custom brush in Photoshop is easy. By following some easy steps you can make your own custom brush. To master the process, practice with various structures from different photos. Make hundreds of custom brushes and apply them wherever you want.
Yes, you can download free custom brushes in Photoshop. In that case, you have to install them as a preset brush.