How to Cut Out an Image in Photoshop? Well, Photos are never one hundred percent accurate after shooting. Sometimes, there may be unnecessary objects that remain in the Photo. Again, our Photo is perfect, but the background is so distracting that we don’t want to keep it.
In that case, we all want to remove the background or cut out the image. We greatly need Photoshop then. Adobe Photoshop offers many ways to cut out an image. So, today we will show you how to cut out an image in Photoshop. In this tutorial, we will show you the two easiest ways to cut out an image.
In the step-by-step guide, we will use the quick selection tool and pen tool for two different photos. You can use other techniques if you want.
Cut Out Image Using Quick Selection Tool
1. Opening the Image:
First, open the Photo in adobe Photoshop then duplicate the background layer. In this How to cut out an image in Photoshop guide, we are using Adobe Photoshop CC 2019. You can use another version or the CS6 version if you want. But in all versions, the process is pretty much the same.
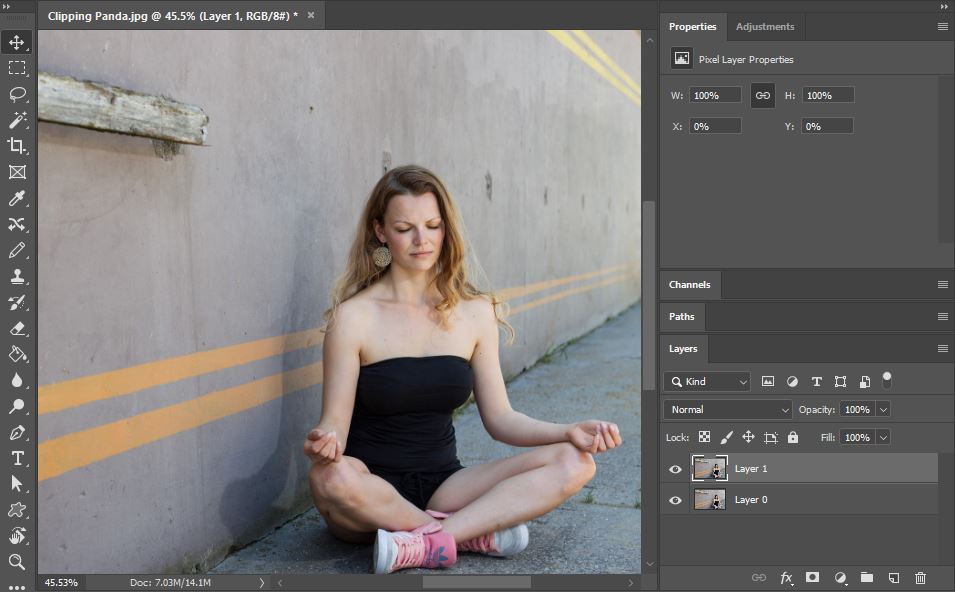
Step 2: Selecting the Quick Selection Tool
After opening the image, select the Quick Selection tool from the toolbar. You will find the Quick Selection tool under the lasso tool. You can also use the shortcut W to perform this. There, you will also find another tool, which is the Magic Wand tool. It is another great tool for selecting any object. But in this How to cut out an image in Photoshop, we won’t use it. We will make another tutorial about the Magic wand tool for you.

Step 3: Making the Selection
The third step of how to cut out an image in Photoshop is selecting the quick selection tool. Now make a perfect selection around the object. Drag the mouse on the object to select. Use the Shift key to add selection and the Alt key for subtracting any part.

Step 4: Select and Masking
Now go to the Options bar after making a perfect selection around the object. In the options bar on the top of Photoshop, you will find two options. One is “Select the Subject,” and another one is “Select and Mask.” First, click select subject, then “Select and Mask” option to access the refine edge option. In the previous Photoshop versions, you will find the refine edge option in the options bar. This is the most important step in how to cut out an image in Photoshop.

After selecting the Select and Mask option, a new window will open the refine edge features.
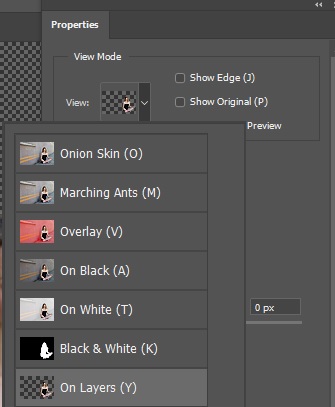
Now go to Properties > View Mode. After that, Click on Views. Here you will find many different options but choose the On Layers option. Now you will see your picture without background.

Step 5: Refining the Edge
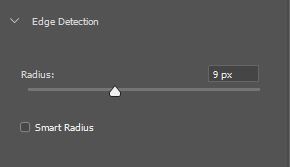
In the features panel, you will find the edge detection option. Now slide the Radius bar for a smoother selection. It works with your image’s pixels. So, slide it until you are satisfied.
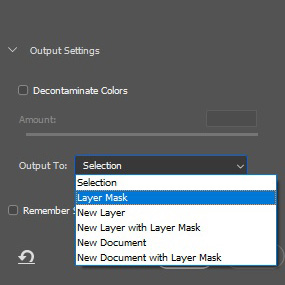
Now choose the Output option from the bottom of this panel. Now you will find the Output Settings. Select Layer Mask, then click Ok.
Now that your image is separated from the background, create a new layer for placing the image. Keep the new layer under the masked layer.
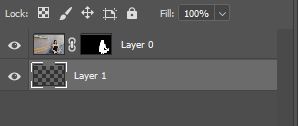
Now choose a color from the solid color option. In our Photo, we chose a white color to get a white background for the image.

Step 6: Replacing the Background
Now you can place an attractive background for your image. Open a new background image in Photoshop. Now Copy and paste it by selecting the masked layer. You can place the background by going to the File menu. From the File menu, choose the Place Embedded option. Now adjust your image in the new background as you like. Also, you can download white background images from pikwizard.

So, it was the first and easiest way to how to cut out an image in Photoshop. Now we will experiment with the next easiest way to cut out an image.
Cut Out Image Using Photoshop Pen Tool
Photoshop Pen Tool gives us the most accurate selection. You can also curve the selection with this amazing tool. So, let’s see how to cut out an image in Photoshop with the pen tool.
Step 1: Creating Path with the Pen Tool
First, open the image in Photoshop then Then choose the pen tool. Learn how to use Photoshop pen tool if you don’t know yet. But I will give you some basic tips about it now.
To make a perfect selection, create an anchor point, and drag the mouse to curve the line. You will find two handles for adjusting the line. With the Alt key holding, you can bend the handles to adjust the line. Hold the space bar and scroll the mouse to zoom in the image. Zooming will help you to make a better selection. After creating the path, add the endpoint into the start anchor point. Creating a path is complete now. Now the next steps will be very easy in this How to cut out an image in Photoshop.

Step 2: Making Selection
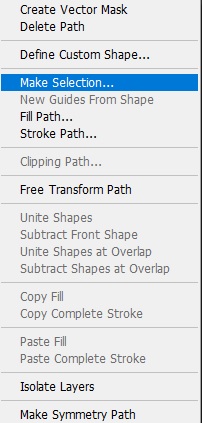
Now right-click with the mouse on the selecting area. Now choose the Make Selection option from the menu.
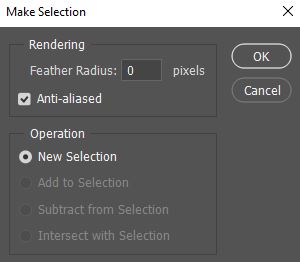
After that, a pop-up window will appear. In the Popo-up window, give the Feather Radius 0 is you don’t want blurry edges. In this How to cut out an image in Photoshop, we don’t need blurry edges at this moment.
Step 3: Refining the Edge
After making the selection, choose the Select and Mask option as we did on the previous method. Now you will find an edge detection option. Now slide the radius bar making a smoother edge.
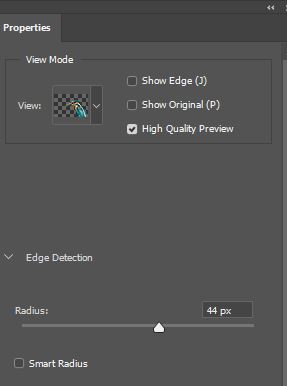
Now go to output settings and choose layer mask, then click Ok. Now you will find your image out of the background. Now you can move the image anywhere. This brings us to the end of this How to cut out an image in Photoshop tutorial.

Step 4: Placing the Image into a White Background
Now create a new layer and drag it under the original layer. Choose the Solid color option from the bottom of the layer panel.
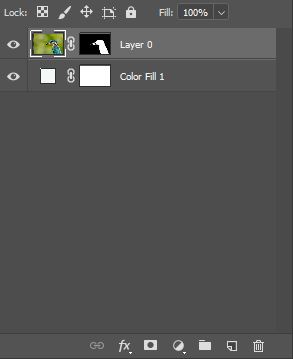
Then choose the foreground color from the color palettes and click Ok. Now you will find your image with a nice white background.

Conclusion
So, it was so simple to cut out an image in Photoshop. Most people follow these two easiest techniques to cut out the image. But there are many amazing ways to do that in Photoshop. Sometimes, you may need to combine different tools for perfect removal.
If you are new at this, you may find it difficult first. But with a little practice, you will become an expert in removing the background. But if you don’t have much time for editing, then you can get the help of our advance Photoshop services. We provide the best Background Remove services at an affordable cost. Please let us know if you have any queries about how to cut out an image in Photoshop?
To create a layer mask, select the layer that you want to mask. Now click the layer mask icon. It is rectangular with a black circle in the center. You will find it at the bottom of the layer panel.
Yes, many objects such as furry trees, rope bridges, bicycle wheels, etc. need more advanced tools. In that case, the quick selection tool is not enough. These types of objects need channel masking.


