Do you want to know how to add fonts to Photoshop? There are many ways to add fonts in Photoshop. You can add as many fonts as you want to Photoshop. Today, we will show you how to add fonts to Photoshop on Windows and macOS.
Before that, let’s know why we need to add fonts. Usually, the stock font in Adobe Photoshop doesn’t satisfy professional graphic designers. The stock fonts in Adobe Photoshop are also not that attractive. So, designers add custom fonts to type in a different style. In graphic design, texts are very important. So, designing a great infographic requires custom fonts and different text styles.
However, adding new fonts sometimes troubles many users. But it’s not so hard, as adding fonts in Photoshop means adding them to your computer. You can do it yourself using some easy steps.
If you have already installed Photoshop, then it’s great. If not, you can download Adobe Photoshop CC from here. Now, let’s see how to add fonts to Photoshop step by step.
How to Add Fonts to Photoshop on Windows
Step 1:
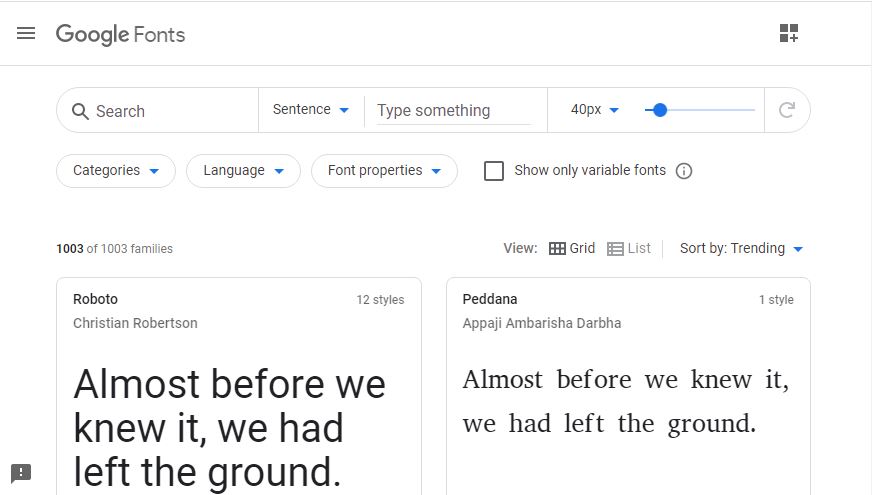
Download fonts from the internet. There are many websites for free fonts. You can buy custom fonts or download them for free on your computer. You can also download Google Fonts for free from https://fonts.google.com/
Step 2:
After downloading, extract the zip file containing the font. You will find your desired fonts for Photoshop with .otf, .ttf, .pbf, or .pfm format.

Step 3:
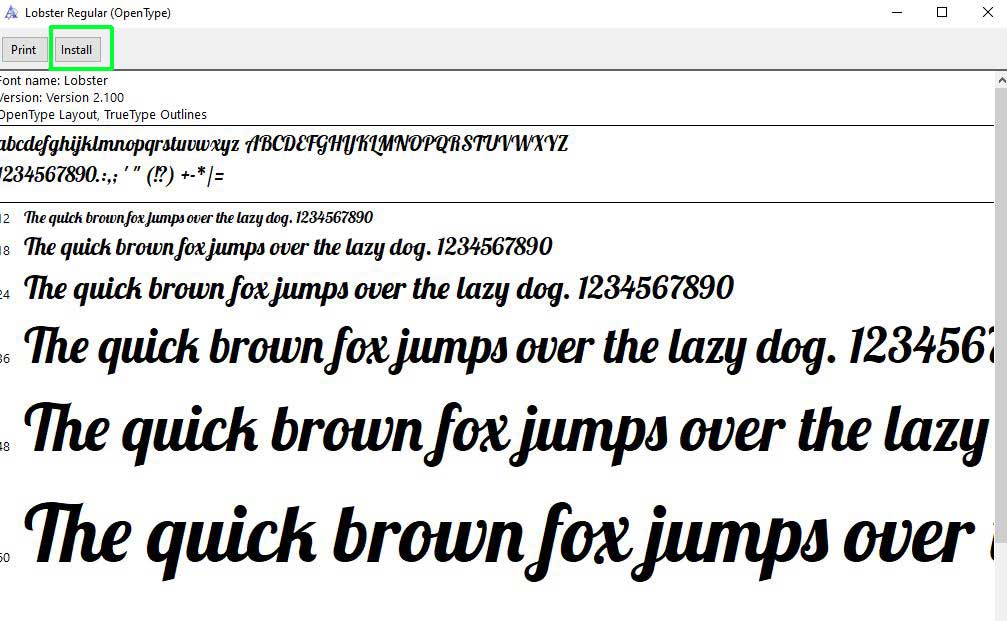
Now install the new font. To install, open the font file, then click install.
If you don’t find the install option, follow the steps to add fonts to Photoshop.
- Open “Control Panel” from the start menu.
- Choose “Appearance and Personalization.”
- Then click the “Fonts” option.
- Now select “Install new font” by right-clicking on the “font list.” Then press ok.
How to Add Fonts to Photoshop on macOS
Adding fonts to Photoshop on Windows was very easy. However, adding fonts to Photoshop on macOS may be difficult. However, if you follow the right process, it will be easy, too.
Step 1:
First, you have to download a suitable font for macOS. The availability of Mac font is lower than that of Windows. You can buy a font CD from any computer store. You can also download your desired fonts from the Apple Store. You will find some popular websites for macOS fonts if you search the internet well.
Step 2:
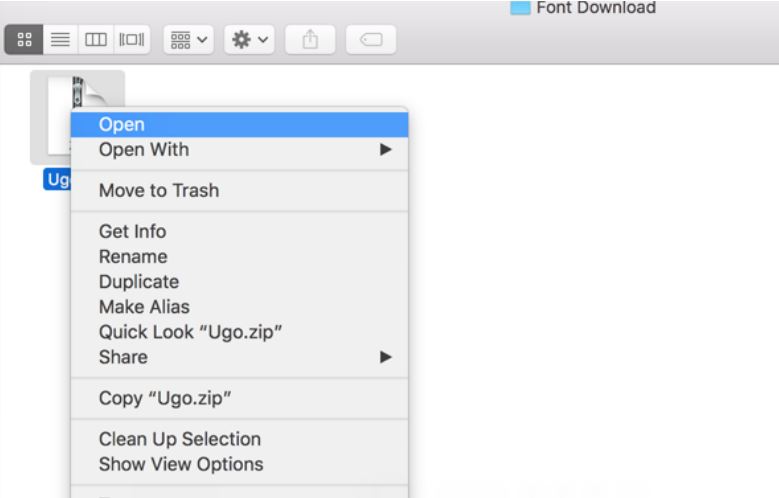
Every font file will be compressed into a zip file, so you have to extract them as you did on Windows. On macOS, you should extract the font file and close all applications.
Step 3:
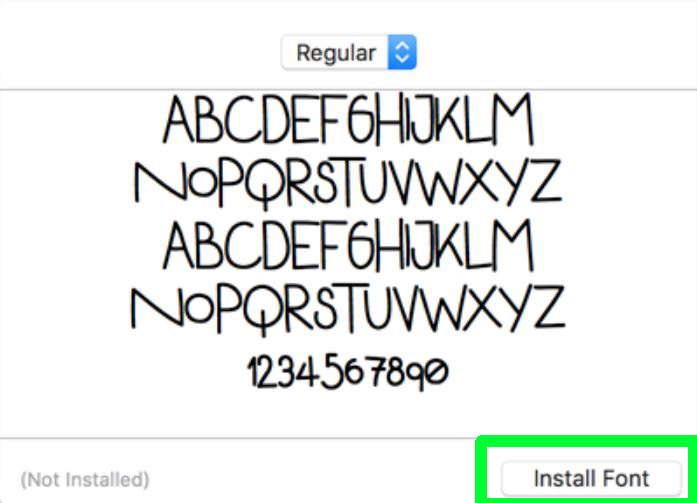
Open the font file by double-clicking on the font. Your font file will open in Font Book.
Step 4:
In the Font Book, you will see your downloaded font. Now click on the install button to install the font.
There are also two different ways to add fonts in Photoshop. You can put the font file manually. First, go to font libraries through Finder. You can put the fonts in the path /Library/Fonts/ or /Users/<username>/Library/ Fonts/. When you find that location, drag the font file there to add.
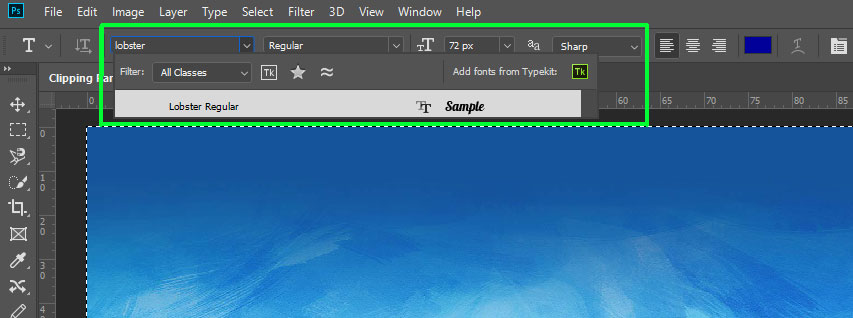
Now you know how to add fonts to Photoshop on Windows and macOS. So, start installing your custom fonts following the process. Use attractive custom fonts to write the texts in different styles in your design.
Conclusion
There are many ways to add fonts to Photoshop. The process of adding fonts is very easy. But sometimes, the downloaded font file stays corrupted. You can’t open those files. So, find the perfect font store to download fonts. Now, the question of how to add fonts to Photoshop won’t bother you again. It’s a very easy process if you read this article carefully.
If you download a corrupted font file, you can’t install it in Windows 10. Usually, the font file comes in the TTF format. Make sure you download the file in the right format.
You can see all the fonts on your computer by simply using a wordmark. It. Just type the text that you want to see, then press the Load Fonts option.
Yes, all Google fonts are free to use. Google released them under open-source licenses.