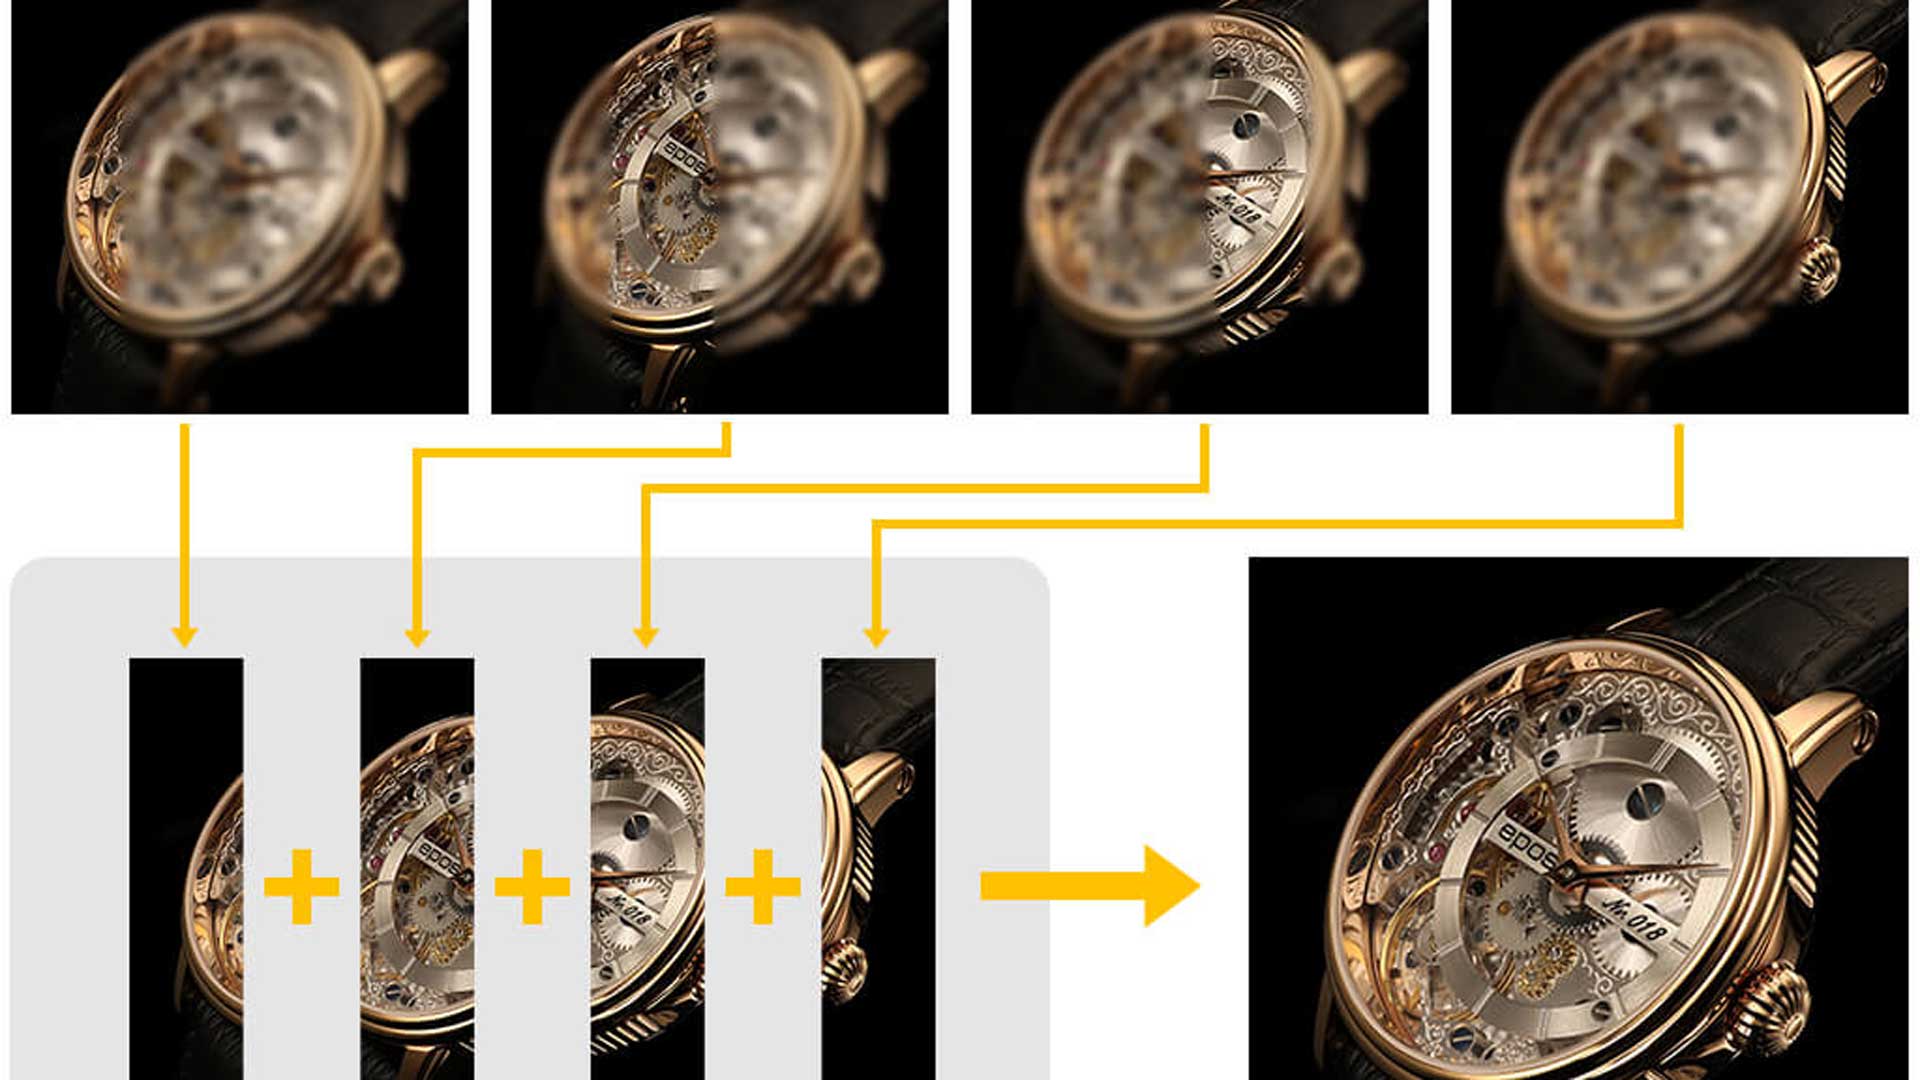
Photographers do not want out-of-focus images except for special effects. But sometimes, it becomes impossible to capture sharp images with every detail. In this case, a shallow depth of field can be an issue for taking sharp images. So, is there any way to shoot images with the best aperture and shutter speed combination that will give you sharp detail? Yes, the technique is known as focus stacking. Today, I’m going to tell you how to take extremely sharp images with the technique of stacking. So, let’s get started.
What is Focus Stacking?
When you look at a scene with your eyes, it looks different in the photo you capture. Using a longer focal length or a shallow depth of field is the reason for that. It is also responsible for why everything in a single image can’t be in focus at once.
Professional photographers use focus stacking to portray multiple objects in focus. They use this technique to shoot sharp images where everything is in focus. Focus stacking is a crucial tool in product photography, macro photography, landscape photography, and more.
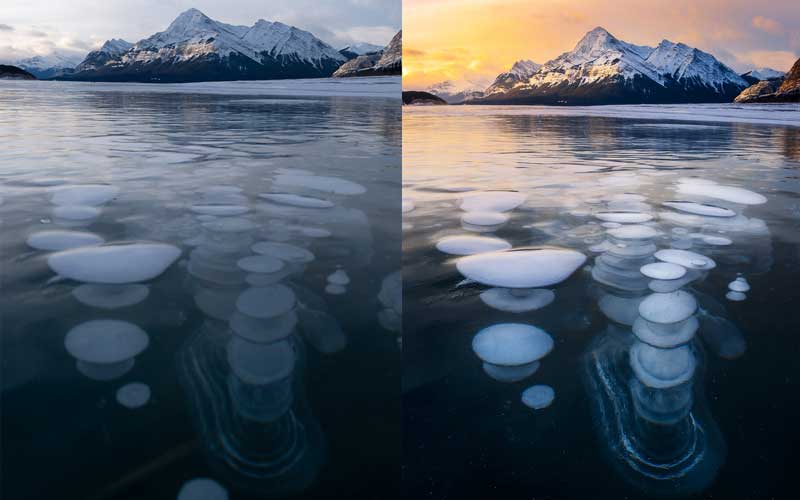
The purpose of focus stacking is to capture a photo of as many in-focus slivers as you can. After that, Photoshop matches them together into a fully in-focus composite image. Besides, in Adobe Lightroom, focus stacking is possible through Auto-Blend Layers on several images.
The Gear You Need for Focus Stacking
To apply this method in photography, you will need some necessary camera gear. Without this gear, it will be tough to use this technique. A tripod will help keep your camera stable.
- You will need a DSLR camera capable of shooting in manual mode. Manual autofocus is a must in this case.
- You can use a depth-of-field app, but it is not mandatory.
- You will need Adobe Photoshop or other focus stacking software for final processing.
Shooting Process for Focus Stacking
Focus stacking is almost the same technique as HDR photography. But in this process, you will shoot images first with different focus points then you will combine them in Photoshop. Thus, you can create an image with more DOF. Landscape and macro photography are the primary fields that benefit the most from using this technique.
Knowing a lens’s sweet spot before shooting helps you find the positions where the lens can capture the sharpest images. Usually, it can be found at about two to three stops from the wide open.
Landscapes Photography
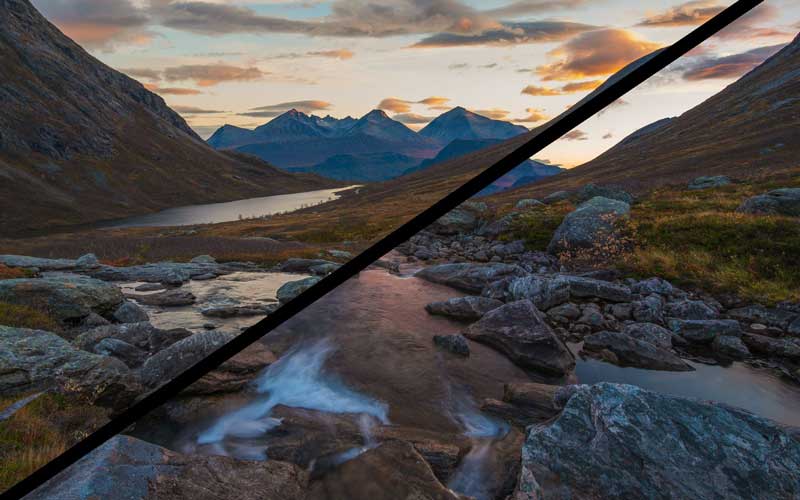
You will face two different cases when shooting landscapes that may benefit from focus stacking.
The first is when you are trying to shoot a close foreground object with a great background. In this case, you want to capture both foreground and background in sharp focus. The other is when using a telephoto lens and the subject covers multiple distances.
Let’s see some necessary steps for shooting landscapes for focus stacking.
- After placing the camera on a tripod, frame the subject and compose the shot.
- Set your camera to manual mode & fix the exposure. This way, you can ensure constant exposure for every image.
- The camera lives view option will allow you to preview the focus.
- After taking the first exposure, move the focus point to midway in the image and refocus. Then, take the next exposure.
- Again, refocus on the furthest object in the image. Then, take the third exposure.
Usually, three images are necessary for landscapes to create sharp focus stacking. But to ensure covering the whole scene, you can take additional images. Keep in mind that different images will take longer to process later. But you can get help from photography post-production experts in this case.
Macro Photography
As a macro lens has a DoF that is too shallow, macro photography benefits most from focus stacking. Let’s look at the steps for doing macro photography for stacking focuses.
- Use a tripod to set the camera. Then, frame the subject & compose the shot.
- The process is the same as the landscapes until you take the first exposure.
- After taking the first exposure, move the focus point to the furthest distance without moving the camera. Remember that DoF in macro photography measures differently than in landscapes. In this case, it will measure in inches.
- Repeat the above point to take as many photos as you need.
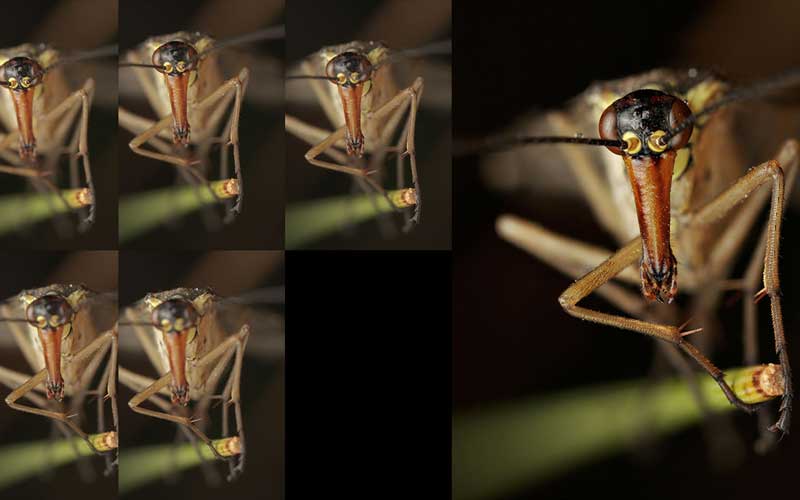
Focus Stacking in Photoshop
You will have your image focus-stacked through final processing. It is a challenging job, though. But you can save time processing the files in Photoshop. Let’s see the steps to achieve the final focus-stacked image in Photoshop.
Step 1:
Open your photos in Photoshop and get each image on a separate layer.
Step 2:
Go to the file menu from the top-left corner of Photoshop. Then, choose scripts > load files into the stack. Now browse the photos and select them all. And check the box that says ‘Attempt to Align Source Images Automatically.’
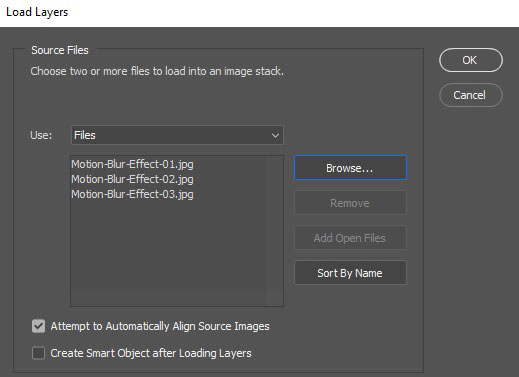
Step 3:
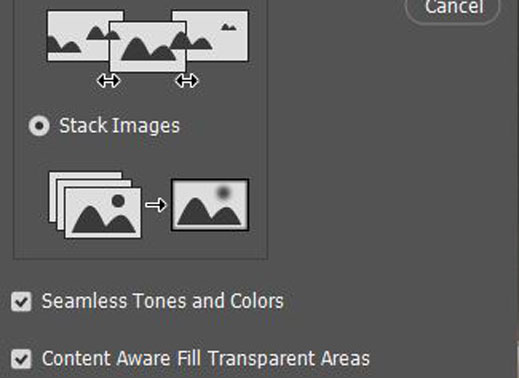
Click ok, then open the layer panel. Then, select all the layers. After doing all this, go to the Edit menu and choose Auto-Blend Layers.
Step 4:
Now check the box that says Stack Images and Seamless Tones and Colors. Selecting content-aware fill will help to fill any transparent areas with the same colors.
Step 5:
Now click ok, then select Layer > Flatten image to flatten the image. Now save it.
Conclusion
Everyone tries to capture the sharpest images possible. For that Focus Stacking can be a great technique to help you achieve sharp images—all you have to do is take enough focused images to create the final focus-stacked image. If you are confident enough, then give it a shot. Let us know if you have any confusion about focus stacking.
Focus stacking is not cheating. It is a standard technique to improve the signal-to-noise ratio.
Focus bracketing occurs when you take a series of photos for your scene at different focus distances. Stacking occurs when you blend them to create greater DoF.

