Internet is a free world, and there is a lot of things you can get for free. Professional companies and enterprises spend a massive amount of money on their brand marketing. However, it is necessary to grow a business. But why spend so much money if you can make your ads for free?
Yes, you can! Just use an online video editing tool to create your video ads for free. Can you imagine that? You can make high-quality videos without any effort and in less time.
InVideo is one of the tremendous online video-making platforms that you would love to use. This platform offers you a lot of free features to help you with your business ads. However, you can get the ultimate premium features by making a little payment.
But, you don’t need the paid features if you know InVideo well. And learning how to make video ads using InVideo, you will never require its paid features.
Here, let’s learn the step-by-step process of making video ads using InVideo so that you can create high-quality video ads without spending any money.
Step-by-step Process of Creating Video Ads Using InVideo
Did you know that video marketing is becoming exponentially more and more important for businesses? In addition, most of the customers prefer to learn about a product or service through videos in 2022. So, video ads matter, and I will show you how to make your video ads for social media.
After reading this guide, you will be able to make attractive videos without any video editing skills. But, first, let’s create your video ads with the tool inVideo.
Step 1: Go to InVideo Official Website
Video marketing is becoming extremely important especially, for social media platforms like Facebook, Instagram, Linked In, YouTube, and Tick-Tock for engaging with your audience. So, now let’s go ahead and create your video ads.
The first thing you will need to do is to open the InVideo website. Then, click the link, and it will directly take you to the platform. So, once you’ve entered into InVideo, the first thing you need to do is Sign up.
InVideo Official Website: https://invideo.io/
Step 2: Sign Up
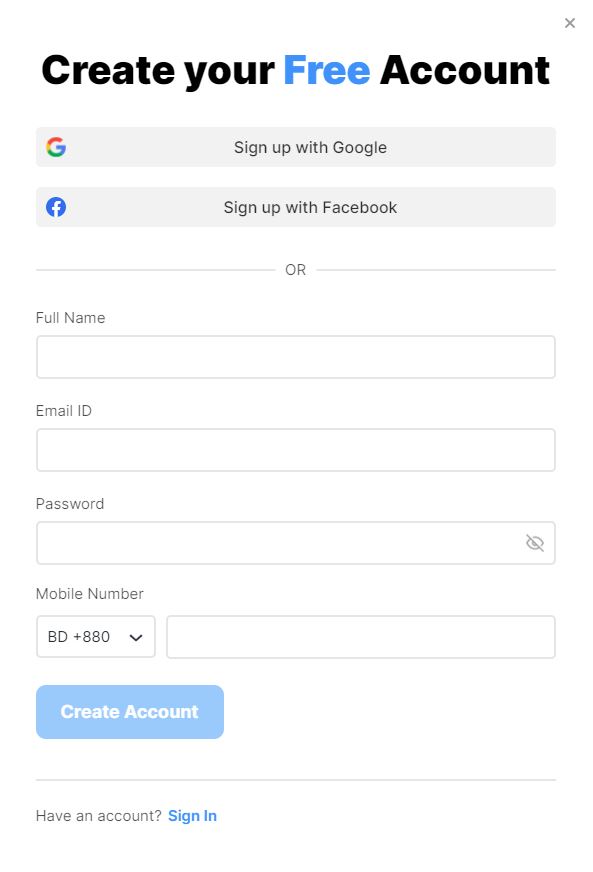
After opening InVideo, you will see two different options. One is Log in, and the other one is Sign Up. You can log in to the video platform after completing the signing-up process. So, head over to sign up, and here all you need to do is add your name, email address, password, and phone number or email. Of course, you can also use your google account to skip all these.
Once you’ve added your information, just come down and click sign up, and here you go. You’ve just created your free account. It means, if you decide to create a video, it’s going to have a branded InVideo watermark. You can upgrade your profile later to remove that watermark. But, right now, we will enter directly into the dashboard.
Step 3: Creating Video Ads Using Pre-made Templates
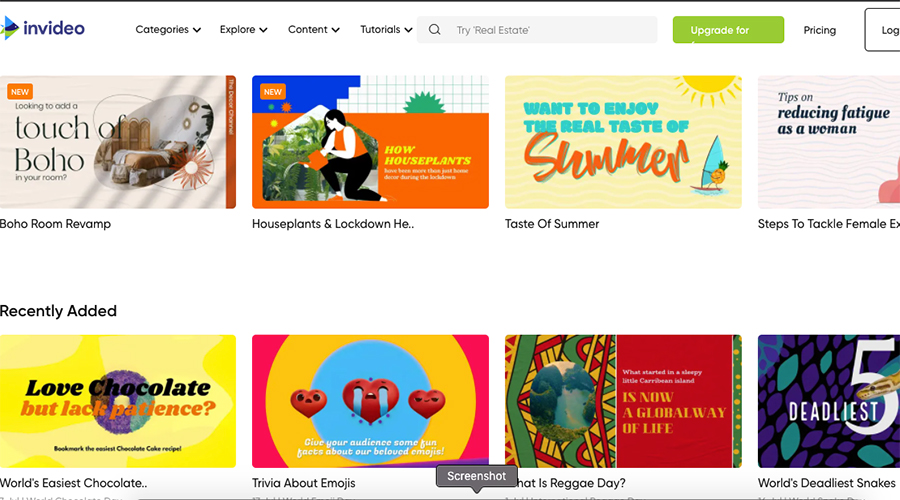
It is s a beginner’s tutorial, and there are two effortless ways to start creating your video ads. The first one is building from pre-made templates.
If you scroll down here, you can see hundreds of pre-made templates that you can build from. These are professionally designed videos that you can edit the way you like. You can essentially change the photos and the videos. You can also upload your images and elements by clicking the upload option.
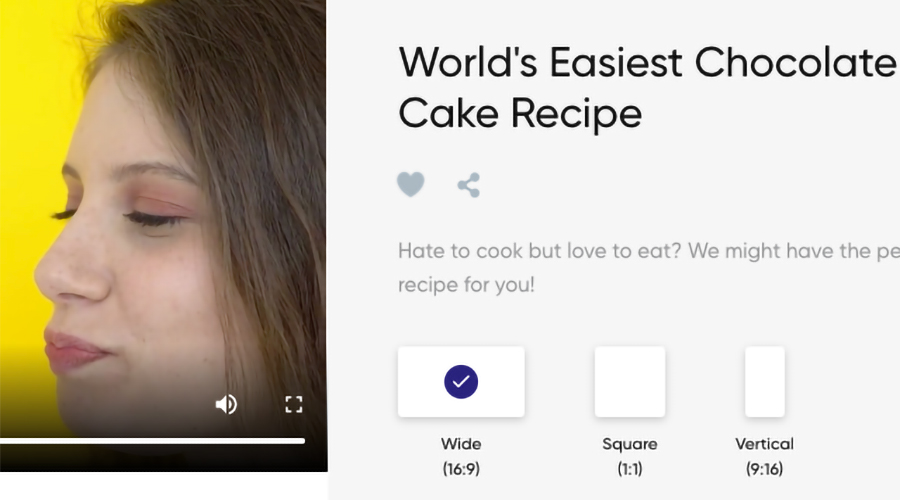
Step 4: Choosing the Layout
Suppose you have a particular social media channel you may want to create a video for. Then, you can choose the layout for that specific channel. For example, if you want to create a video for YouTube, Facebook or Instagram, you can find the right option.
So, click along and look for the best option based on what you want to create. Then what you can do is find templates that are related to your business. For example, if you want to make a video about real estate, then search for real estate templates.
Step 5: Customize the Pre-made Templates
Once you have selected a template, now customize it in the editing panel. For example, change the transitions of the animations. Again, you have unlimited options for your customizations.
Now, to view each video, all you need to do is hover over the video. Scroll across to find the video that you like, and then click on that. Here, you can watch the entire video and choose the different layouts.
Step 6: Using the Features and Elements
After choosing a template, you can now modify it by applying various features like effects, elements, texts, and more options. Start editing this video template now on the left-hand side. Use your uploaded videos and images if you wish. Or click on any element to see the preview. Then double click or drag the elements into your template. Here, you can add transitions, and effects too.
Step 7: Customize Transitions, Effects, Texts & Animations
You will see the different options to change the size, color, transparency, text format, and more on the right side. There you can also make the correct alignment for the elements. You can also add various effects and modify them from the layer panel.
So, on the left-hand side, we have everything we need to create our video. Then on the right-hand side, this is where we have the option to edit the video.
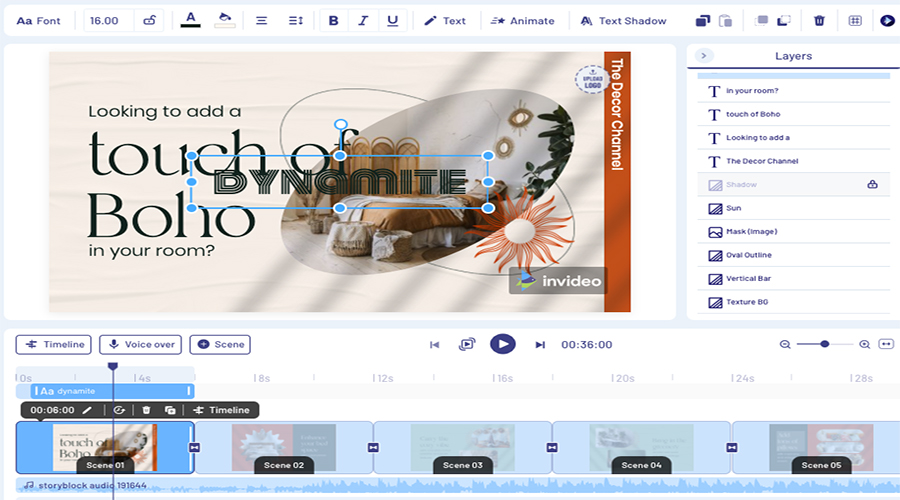
Step 8: Adding Music & Logo
When you are satisfied, it’s time to add some music to the video. In this case, it is the background music you would love to add. You can choose music from the collection or upload it from your device. If you go up in the music section, there you will find the volume option for music. Change the volume as you need.
The same goes for the logo. Upload your brand logo and put it where you want to. If you don’t have a logo, choose one from the collection then customize it as you need.
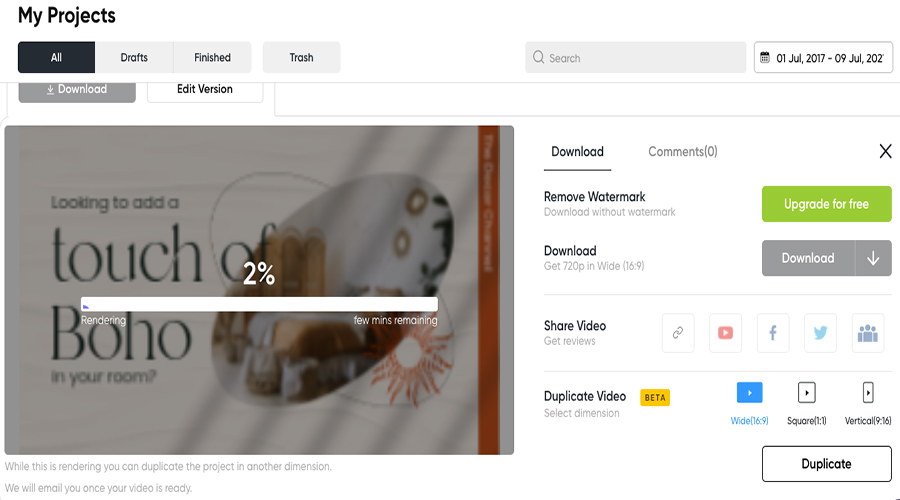
Step 9: Export the Video
In this stage of creating video ads using InVideo, all you need to do is play your entire video one last time. If you’re happy with it, then go to the top corner. There you will find the download and share option. Now click export from that. After that, you will have to wait for about one to two minutes for the video to render.
Then, you’ll be able to download the video when your video is ready to download. You can also share the video directly on different social media from there.
If this is the free version, then your downloaded video will contain a watermark. To remove that watermark, you will need to upgrade your account to premium.
Conclusion
As you can see, that was the pre-made template. You can also choose the ‘Text to Video’ and ‘Blank Canvas’ options. But, the basic editing process is the same. All you need to follow the steps every time you create video ads using InVideo. Just change all the different elements and customize it the way that you like. And make your video from scratch with the online video editing tool InVideo.
Related Post: Free Youtube Downloader
The storage limit varies between paid and free versions. On the subscription plan page, you can check the details. The individual file size limitation is 200/800 MB.
Yes, anyone can upload fonts. Follow the steps to upload fonts:
Step 1: After selecting a textbox, click the “Upload Fonts” options in the right panel under the “Edit” tab.
Step 2: Now click to choose your fonts, then upload them into your collection.