Good lighting is a must for portraiture. To use appropriate light to achieve an amazing look need a much deeper understanding. This guide will help you to understand the basic matters of portrait lighting. In this discussion, we are going deep to understand portrait lighting with examples.
What is Portrait Lighting in Photography?
Portrait Lighting features in cameras allow you to add studio-quality light effects. When you are shooting in the Portrait mode, you will see a portrait lighting option in the camera. Even photographers can add portrait lighting to the photos after shooting them.
In this guide, now we are going to explore the patterns of portrait lighting.
Portrait Lighting Patterns
In portrait photography, there are several things you need to keep in mind. To make a flattering portrait of a subject, consider lighting ratio, pattern, facial view, and angle. Following the guidelines about portraiture, you’ll be a pro at portrait photography.
Now we will show you everything about the lighting pattern of portrait photography. Let’s see what is it, how to use it, and why it’s important.
Lighting Pattern
The lighting pattern in portrait photography means how the light and shadows form together in the face to make different shapes. In a word, the shape of the shadow on the face defines the lighting pattern. Today we are going to discuss four common portrait lighting patterns such as-
- Split Lighting
- Loop lighting
- Rembrandt lighting
- Butterfly lighting
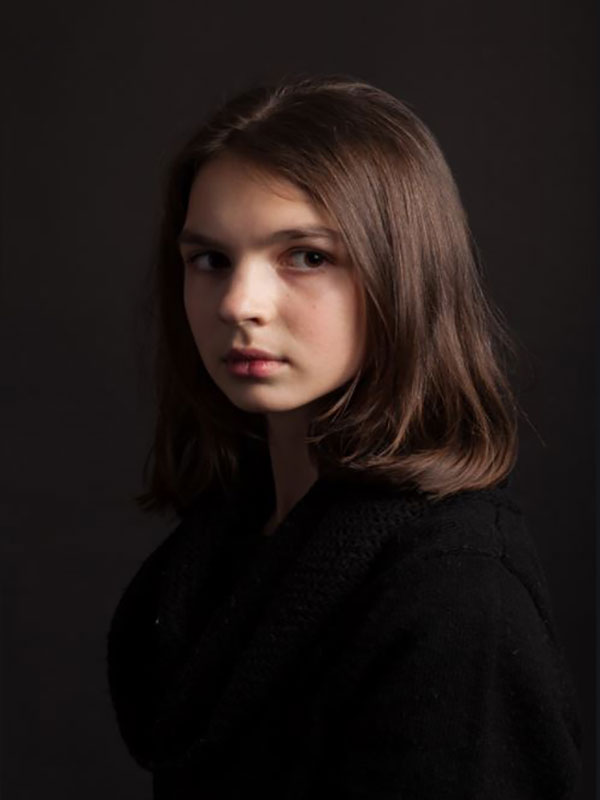
Split Lighting
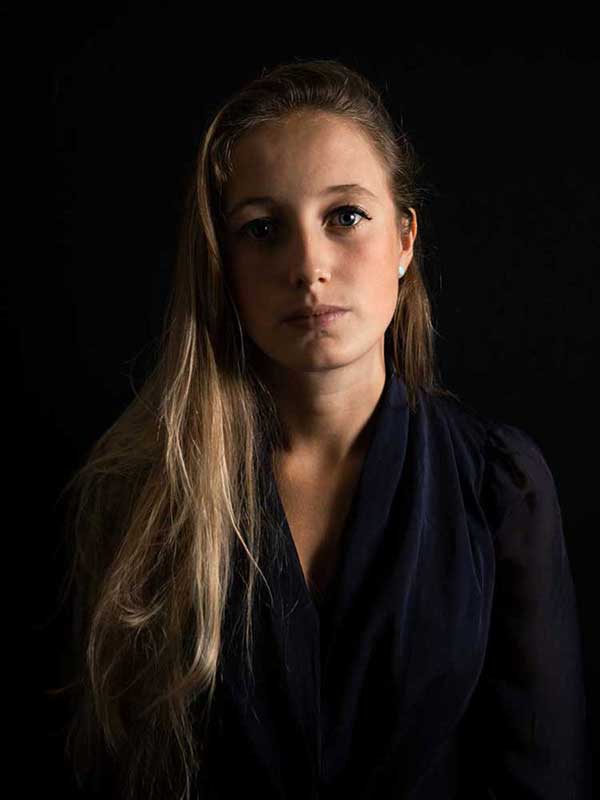
Split lighting pattern in portrait lighting is used to divide the face equally between light and shadow. If you divide the face into two different sides such as the left side and right side, where the left side remains in the shadow and the right side remains in the light. This is how to split lighting works. Many professional photographers use this technique to create dramatic images. To capture a portrait of a musician or an artist in a show, it is the most effective technique. Split lighting works more on men than women.
There are no specific rules for using split lighting but some guidelines will help you using it in a better way. Here are some important suggestions from professionals to use split lighting.
- Put the light source 90-degrees to the right or left side of the subject. If possible, keep the light a little behind their head.
- Adjust the lighting according to the light falls in the subject.
- The subject’s eye on the shadow will catch the light in the eye only in a true split lighting. When you rotate their face a bit, more light falls on their cheek.
- The light source must follow the face to maintain the lighting pattern.
- If the position of the head changes, the pattern will change. Then you have to adjust the pattern by rotating the head a little
- Remember some faces isn’t just perfect for split lighting
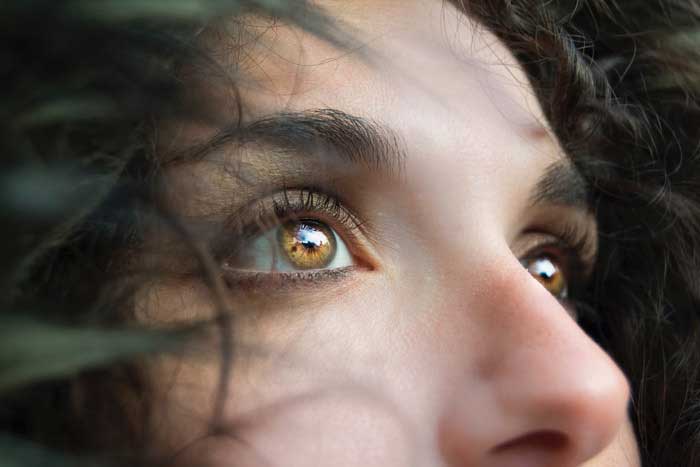
What is The Catch-light?
If you observe the subject from the photo below, you will see the light source in the eyes. You may see it as a white spot from the distance. But if you zoom the eyes, you will see light source exactly in the center of the eye. It is called “catch-light”. Without following this pattern, the eyes will appear dark and lifeless. When using split lighting, make sure at least one eye has a catch-light to make the subject livelier.
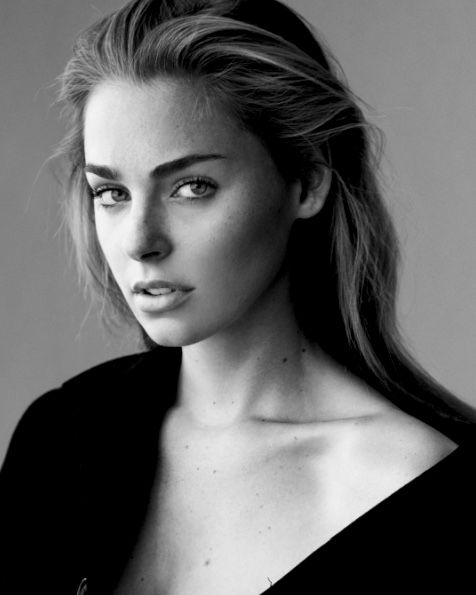
Loop Lighting
As a portrait lighting, the pattern loop lighting uses to the subject that is lit from 45-degrees in front or above. It makes a shadow from the nose which ‘loops’ down at a specific angle onto their cheek. It depends on the subject’s face. So, if you can read people’s faces, it will be an easy job for you.
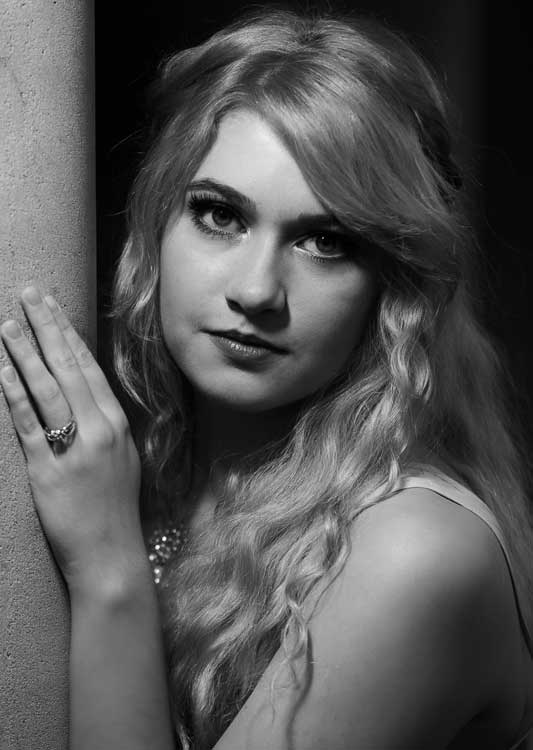
If you look carefully at the above image, you will see the nose shadow. Where and at which angle they fall? Well, making this type of shadows is a loop lighting pattern. Let’s see the guideline to make a loop lighting pattern in a portrait.
- The shadow of the nose and the cheek never touch. So, Keep the shadow small and slightly downward pointing.
- Be careful about the light source. If you keep the light source too high, it will create odd shadows. Thus, you will lose the catch-lights.
- Use a white reflector on the left or right side of the camera to bounce light back into the subjects’ faces
- Place the reflector somewhere around 30 to 45-degrees from the camera
- Keep the reflector slightly above the eye of the subjects so that the shadow falls downwards.
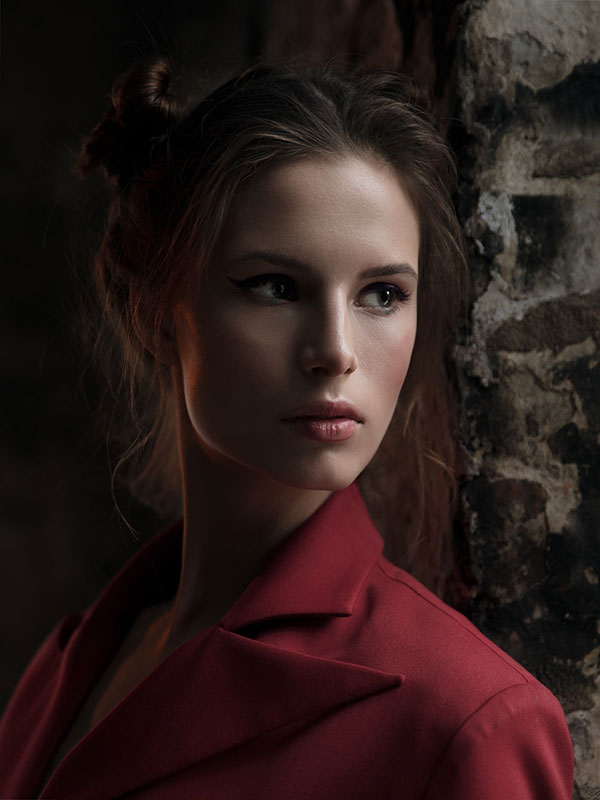
Rembrandt lighting
Rembrandt lighting pattern is a great technique for portrait lighting. It is used in studio portrait photography or cinematography. Using one or two light sources and a reflector, you can achieve this great pattern.
The name of the pattern came from the great painter Rembrandt. He often used this pattern in his paintings to achieve a triangle shape of light in the cheek. Here the shadow of the nose and cheek meet to trapped the light to make a triangle. To achieve more mood and dark feel in the images like split lighting, Rembrandt lighting is used.
Let’s see some guidelines to use this pattern in portrait lighting.
- The subject must turn away from the light source to make this pattern
- Keep the light above of subject’s head so that the shadow from their nose falls towards the cheek.
- It’s not necessary to make the pattern exactly.
- When you are using window light to achieve this pattern, is it going down to the floor? Then you may have to block off the bottom part to make Rembrandt lighting pattern.
Butterfly Lighting
This pattern in portrait lighting is used to create the butterfly-shaped shadow under the chin. When using the Butterfly lighting pattern, the main light source must be above and directly behind the camera. Photographers follow this pattern to capture glamourous shots.
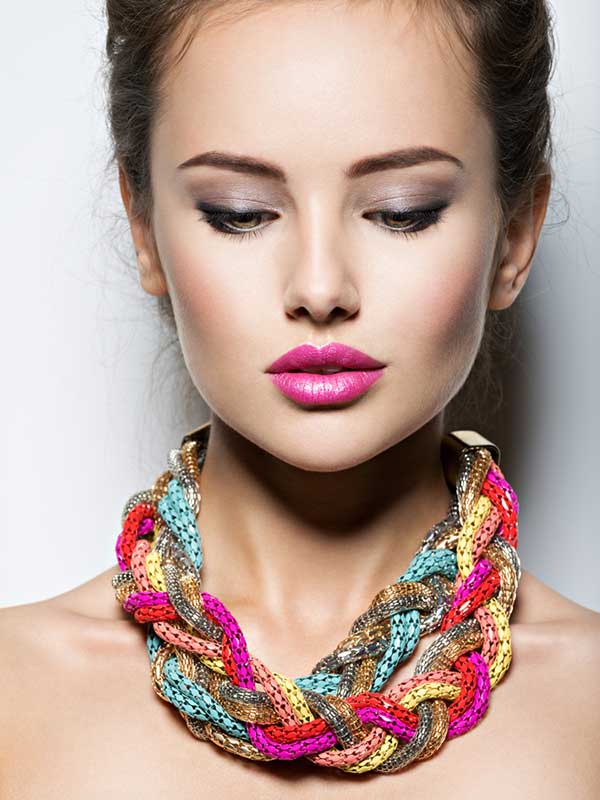
Following the guidelines, you can also take glamourous shots.
- To achieve a butterfly pattern, place the light source directly behind the camera and slightly above the eye or head of the subject.
- Place a reflector directly under the chin. Even the subject can hold the reflector in that case.
- You may have to use a harder light source like the sun to create an exact butterfly pattern.
There are two more important patterns in portrait lighting you should know. One is broad lighting and the other one is short lighting. Let’s see how they work in portrait lighting.
Broad Lighting
When the subject’s face turned away from the center then the face that is towards the camera becomes broader. Thus, it creates a large area of the face that is in the light and the other side becomes smaller. That’s how broad lighting is applied. It is used for “high key” portraits sometimes. If you want to make a person’s face broader then use this pattern. The face must be turned away from the center of the light source. Some people want to be slimmer. So, you can’t apply this pattern to them.
Short Lighting
It is almost the opposite of a broad lighting pattern. Short lighting puts the side of the face towards the camera. Usually, for making darker portraits and low key, the short lighting technique applies.
When using a short lighting pattern, keep the face towards the light source. The part of the face which is turned away from the camera would be lightest on it. And the shadows would be falling on the near side of the face.
In photography, there are so many things to learn. Photography is like understanding the nature. So, you should learn every aspect of photography as well as practicing. If you want to learn other rules of photography besides this portrait lighting, you can read our latest photography related blogs. Here you can learn the rule of thirds, how to do night photography, how to do long exposure photography and many more.
Conclusion
To use each of the lighting patterns, it is important to study the subject’s face. Thus, you will learn which lighting pattern will be best for the face. So, after knowing the patterns properly and how to use master quality of light, you can handle the challenge of portrait lighting.
Normally, 1-4 lights are used in portrait photography. But you can use 4 different lights for better portraiture such as key light, fill light, rim light, and the background light.
The LED lights use for video purposes. But you also use LEDs for still photography. Many LEDs are relatively low-output affairs. As the portrait used to take from a closer range, you can also use LED for a portrait.