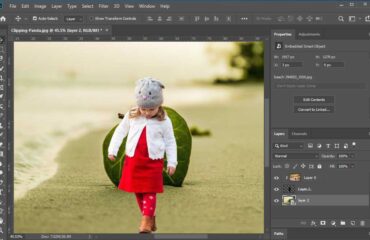
The Paint Bucket tool Photoshop is the most common tool in Adobe Photoshop. Photoshop users using this paint since the beginning of the Photoshop journey. The most uses of this tool are for rendering, publishing, and color editing. It allows us to fill any selection most easily.
The paint bucket tool Photoshop helps to fill a specific area in the image with the foreground color. When we want to create a background or a layout design, we need this tool. It fills up all the areas with all the connected areas.
The Location of Photoshop Paint Bucket Tool
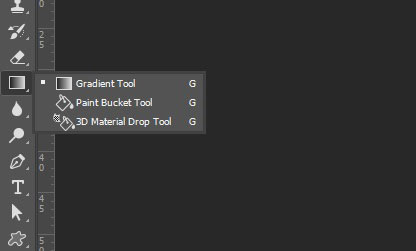
Other than Photoshop, many photo editing software has this great filling option. But, Photoshop works in a unique way. Anyone can find the paint bucket tool in Photoshop. After opening a project in Photoshop, you will see this tool just under the eraser tool in the toolbar.
The hotkey for the paint bucket tool Photoshop is Shift+G. By default, it is present in the gradient tool section. There is another tool, along with the Paint Bucket tool. It is the 3D material drop tool.
Experimenting with the Paint Bucket Tool Photoshop?
Now we will see how to use Paint Bucket Tool Photoshop in a few steps. For this, we are going to use this tool in the photo of a panda. When doing so, we need to select the move tool many times. To avoiding complications, we will use shortcut key V for the move tool.
So, let’s experiment with Paint Bucket Tool Photoshop on a panda.
Step 1: Opening the Photo
First, open the image in Photoshop. Now select Paint Bucket Tool or use shortcut Shift+G.
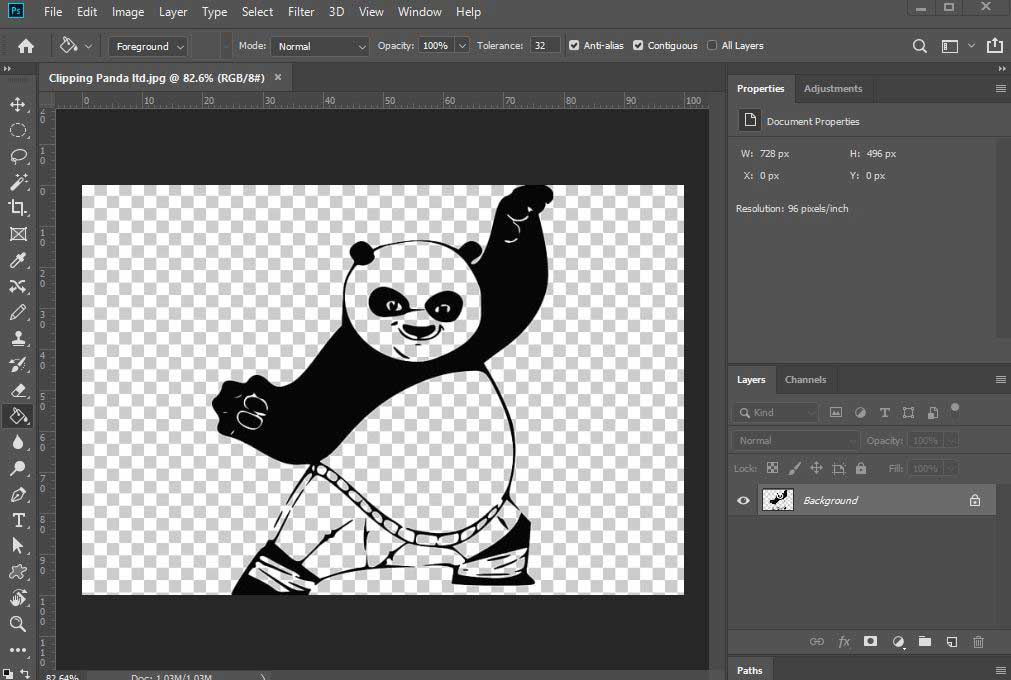
In the image, we want to paint the whole background with a white color. Then will change the color or background as need.
Now select the foreground option from the option bar. Then choose white foreground color from the color palette.
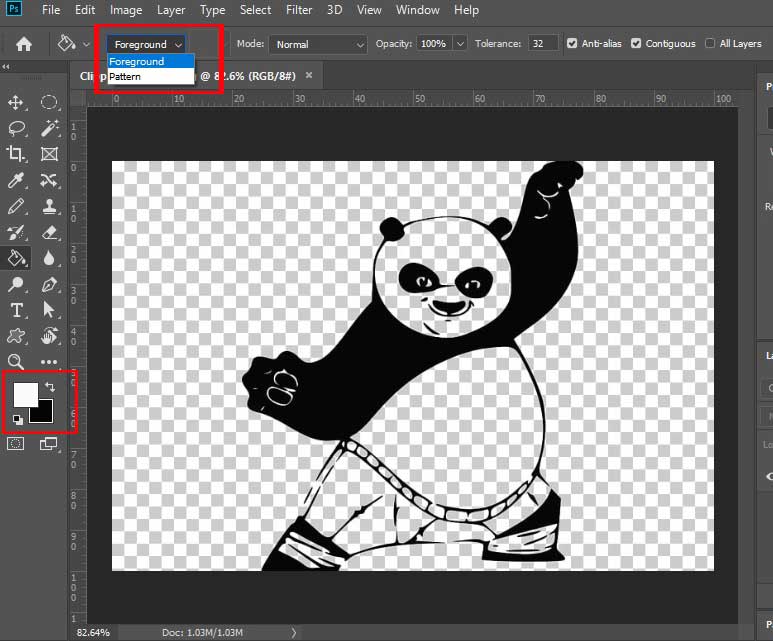
Step 2: Filling with Paint Bucket Tool Photoshop
Now start filling the all the grey box by clicking with the Paint Bucket Tool. After filling all the box, we will see the result as below.
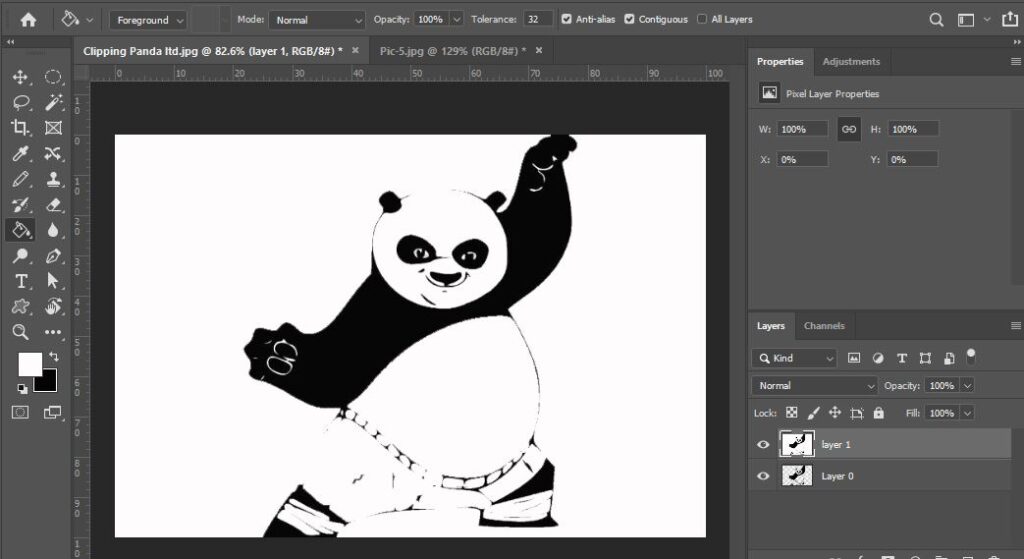
Step 3: Changing the Background Color
If we apply the bucket tool to change the background, it will also change the same colors on the body of the Panda. Because some colors of the body are connected to the background color. So, we need to separate them. To do that we will use the selection tool. In this case, the lasso tool or magic wand tool comes in a great advantage.
To disconnect the same color from the background, first, we will change the white color. Select a different color from the color palette. Now click on the background with the Paint bucket tool. Now it will look as below.
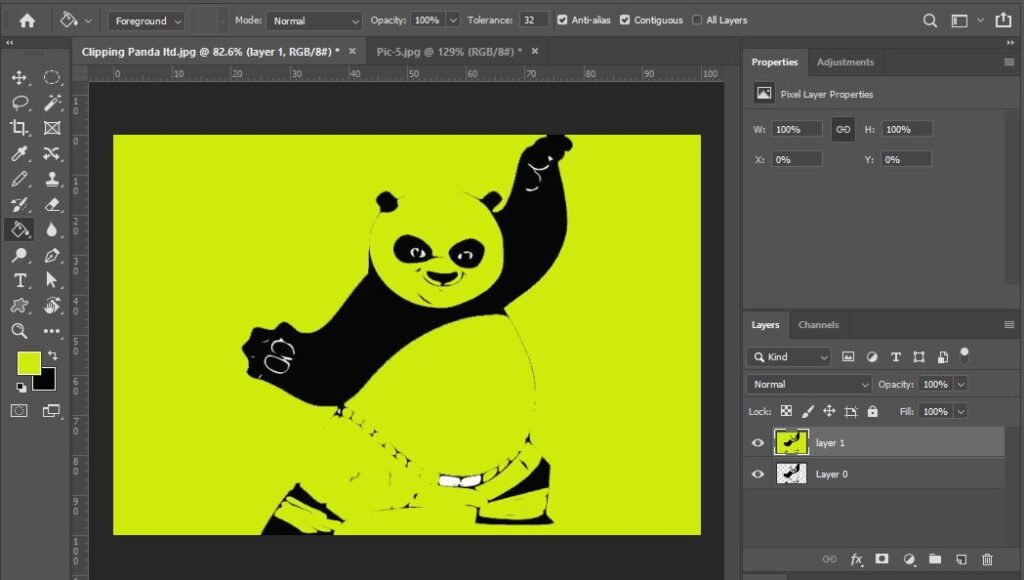
Now, with the lasso tool, we will change the body color. Draw the area that you want to fill with a different color. For a perfect selection, use the magnetic lasso tool. Now fill the selection with the paint bucket tool. Now see how it looks.
Pic-8
Step 4: Replacing with a new Background
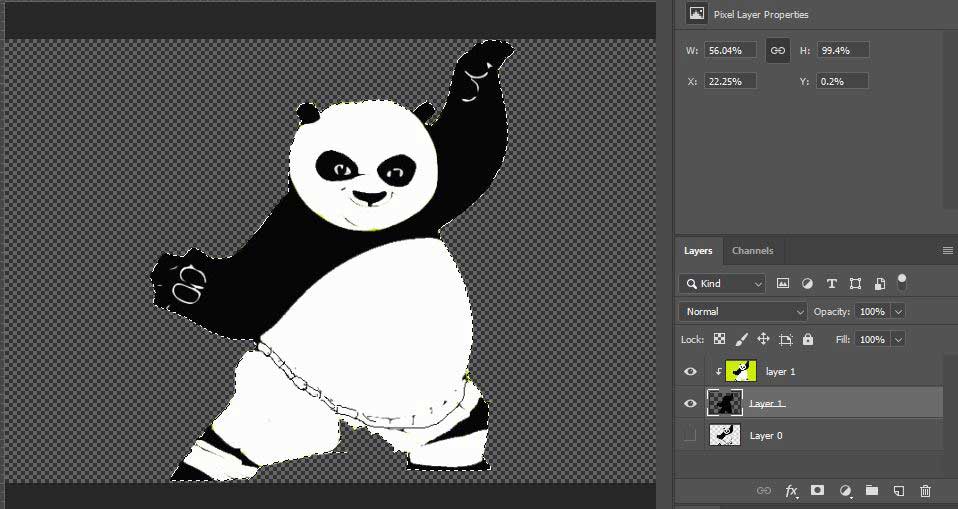
Now we will replace the whole background with a new one. First, we will remove the background with a Photoshop clipping mask. Then create a new layer and drag to place it under this layer. Select the Panda with the magnetic lasso tool with selected the new layer.
After the selection, fill it with black color. Choose fill from the edit menu. You can use the shortcut key Shift+F5 for filling.
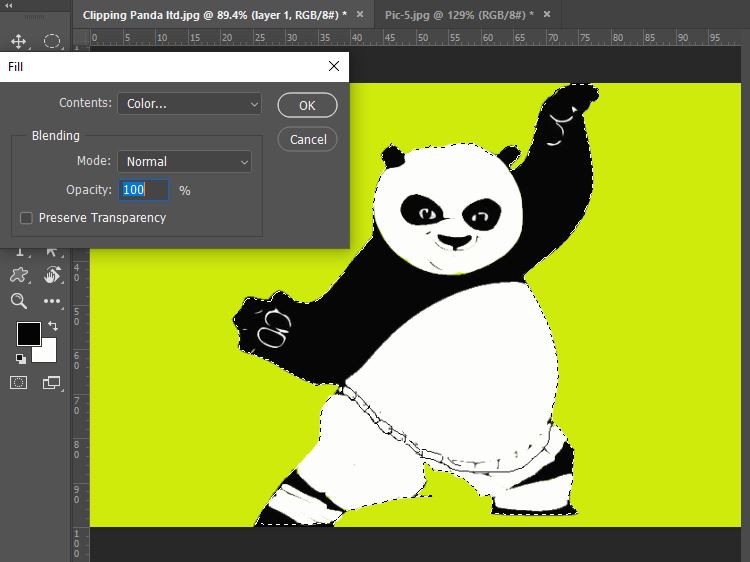
Now select Layer 1 and choose clipping mask from the layer menu.
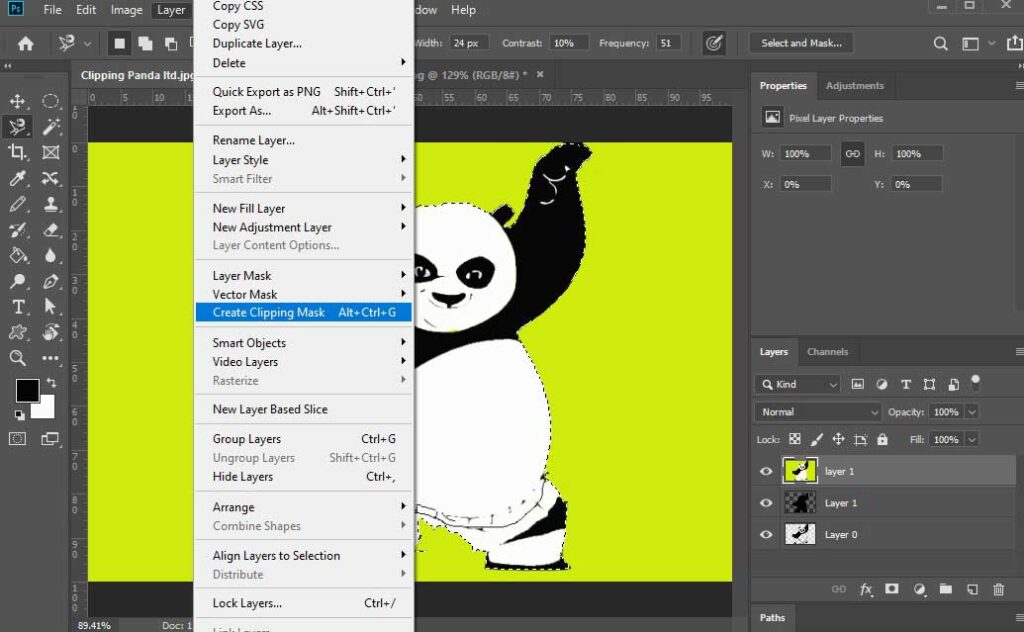
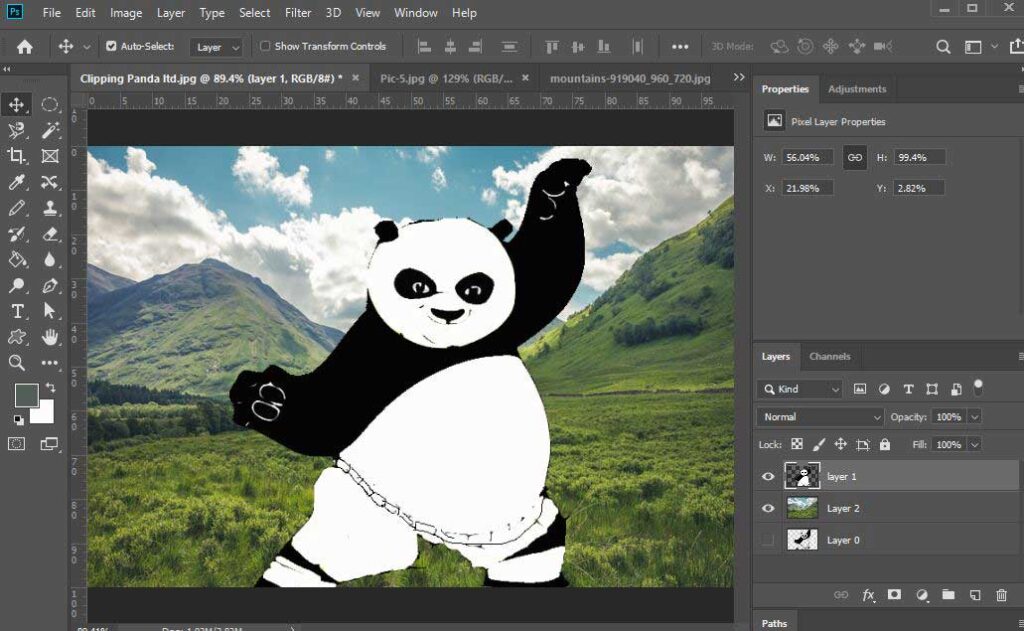
After creating the clipping mask, we can remove the background. Now it’s time to add background to the photo.
We will add a picture as a background where the Panda is practising Kung-Fu.
Using Pattern with Paint Bucket Tool
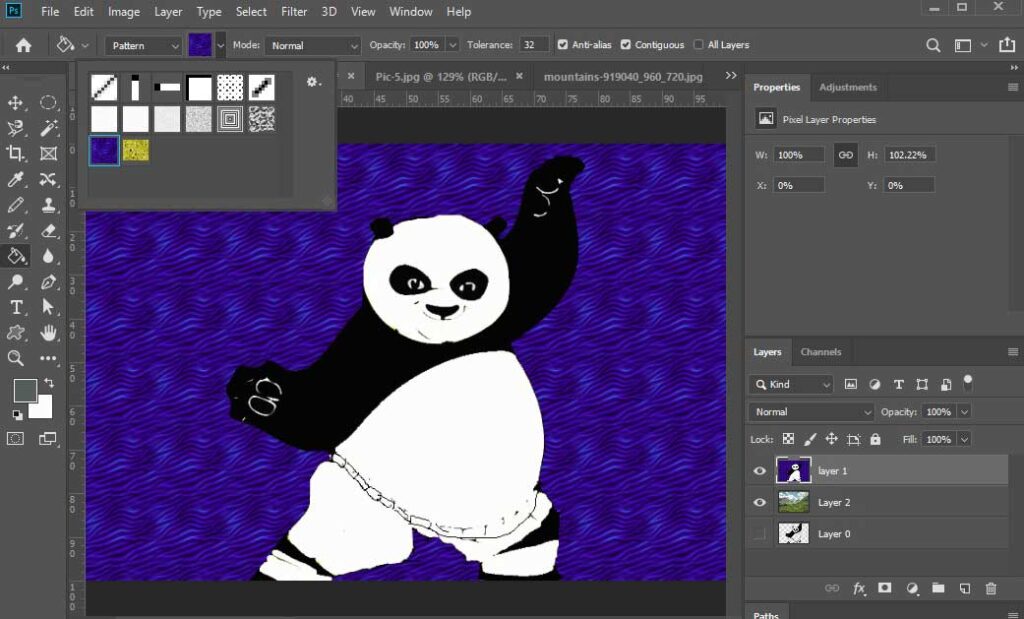
The paint bucket tool allows us to add a pattern background to the photo. To do that, choose the paint bucket tool from the toolbar. Now choose the Pattern option from the option bar. It is under the foreground option. The important thing is, Photoshop already included some patterns in this option. But you can also add a new patterns from settings.
Now choose a pattern that you want to use. Then click on the picture background. Now the pattern will be applied in the whole background. See the final result.
Conclusion
The Paint Bucket Tool Photoshop contains some great features. It can create something using blending options, tolerance, and opacity control. The support of this tool in our daily work is unquestionable. Follow this tutorial, then start editing photo color with Paint Bucket Tool Photoshop.
The Paint Bucket tool is the fill tool in Adobe Photoshop. It looks like an image of a bucket of paint.
Press Ctrl + Backspace to fill in Foreground Color. You can use Alt+ Backspace to fill in Background Color.

