Do you know how people shoot those great product photos you see in an online store? Photographers use a lightbox to shoot great photos of the pictures. Buying a lightbox from the market will cost you a lot of money. But you can make a DIY Lightbox without spending any penny. If you don’t have the necessary elements, then you have to buy them though.
In this tutorial, I will show you how to make DIY Lightbox step by step. Before that, let’s know why it is essential to have Lightbox for photography.
Why You Need a Light Box for Photography?
A lightbox is a perfect tool for any artist and professional photographer. Shooting your product photos in a lightbox will create a high contrast image. A lightbox also controls the lighting like a diffused mechanism.
It is essential, especially in macro photography. It keeps the stage illuminated to make the photographs bright and glare-free. For exposing every side of the photo, you need a reliable source of light. In that case, a lightbox can manipulate the lighting. You can make a DIY lightbox in some easy steps and it the best option instead of buying one.
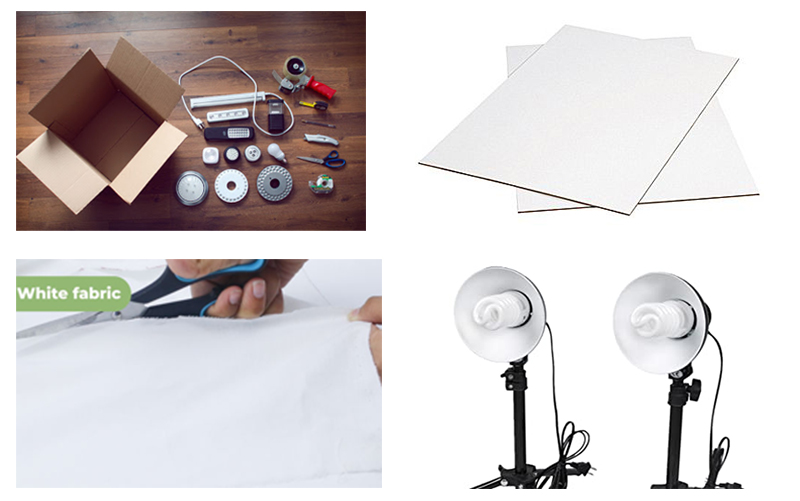
The Materials You Will Need to Make a Light Box
To make a lightbox, you will need some essential materials. Though they will cost you some money, it is very little. Within $5-10, you can manage those things. But buying a lightbox from the market will cost you $100-1000. Why spend money when you can make one? Let’s see what materials you will need to make a DIY Lightbox.
A Cardboard Box
To make a DIY Lightbox, you will need a square shape thick cardboard box. Usually, we all throw away these kinds of boxes. We also keep them in the storeroom. So, you may find one in your house. If not, then you may have to buy a cardboard box. Usually, when you purchase a computer, TV or other electronic things, you buy them with these types of boxes.
Fabric
Manage a white muslin fabric before start making a lightbox. You can buy a piece of fabric from a nearby craft shop. Remember the size of the cardboard when purchasing the fabric. The fabric you are purchasing must be enough to cover the whole cardboard box. You can use a white fleece, old white undershirts or nylon as an alternative. It is better to find shirts of the matching color for the best results.
Lights
Everything is not free. You have to invest sometimes to make unique things. So, go to a nearby hardware store and buy two-three light bulbs. If you have light bulbs already then, you don’t need to buy them.
Ordinary bulbs emit terrible yellow light. So buy some good quality bulbs. Try fluorescent light bulbs which cost no more than $7. To construct a lighting fixture, use your desk lamp.
White Bristol Board
Bristol board is a thick paper used in art and drawing. This board functions as the background and lines for your DIY Lightbox. One important thing you should remember before buying. You will need 2 to 3 sheets for lining the box & another for the background.
Miscellaneous Tools, Tape & Glue
You will need some handy tools to work smoothly. In this case, you will need a tape ruler, Ruler, scissors and knife. Glue and scotch tape is a must for making a lightbox.
Making a DIY Lightbox Step by Step
Now that you have all the necessary materials, follow the steps to make a DIY lightbox.
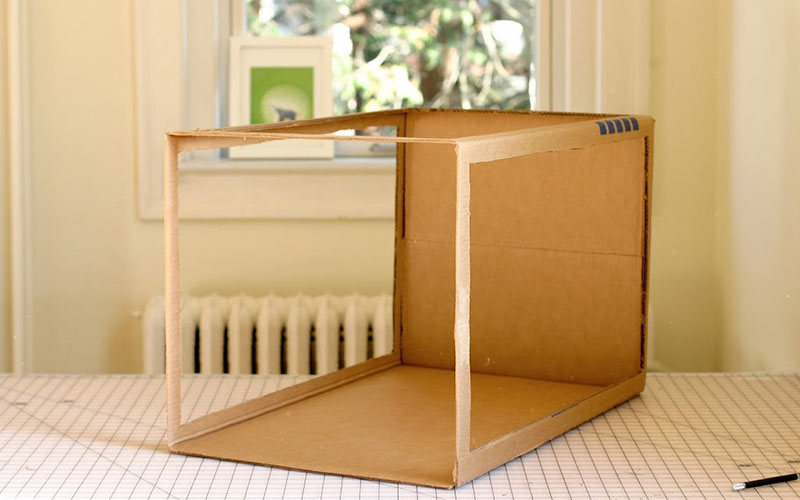
Step 1
Mark in the cardboard box 2-inch from the side with the tape ruler. Do it every side of the box. Also, make several points then connect the points using your straight edge to where you should have a nice looking rectangle in the middle of the box with a 2″ border around it. Leave the top and the bottom part of the box as you will only separate the sides.
Now cut the parts from the box you have drawn. Repeat it for every side. Also, cut off the top part of the box but keep the bottom intact.
Step 2
Now make lines with the Bristol board for every two inches 16 times. Then start cutting 16 strips with your cutter. After finishing that process, glue the paper strips into the box. Put the marker against the cardboard so that it cannot be seen.
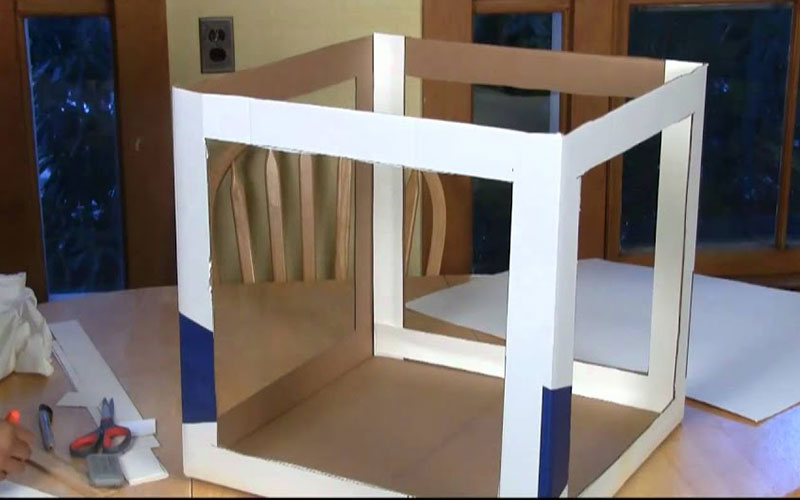
Step 3
Now take another piece of Bristol board. Cut it as the same size as the inside of the box. Also, keep the length longer than the box. Then place the long piece of Bristol board into the box. Make it curvy to the bottom.
Step 4
Now you will need the fabric. Cut it in a way so that it will cover the holes in of the box. Cut another big piece for covering the top part of the box. Use the scotch tape to attach the fabric to the box. Not the one that is facing the background.
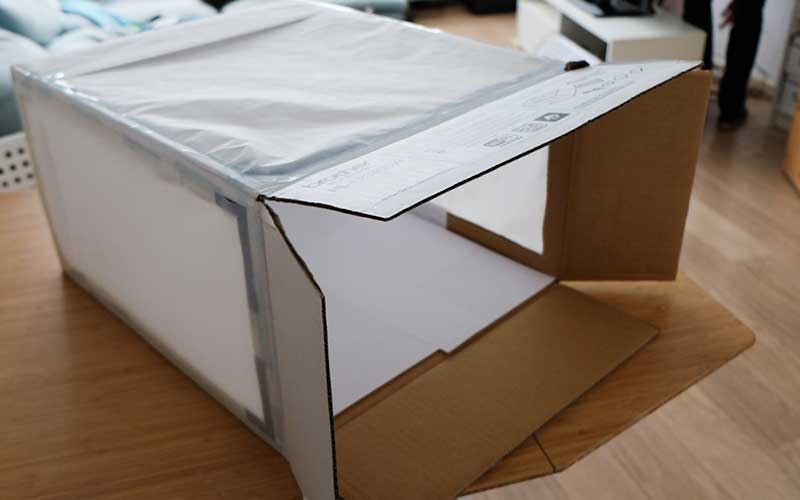
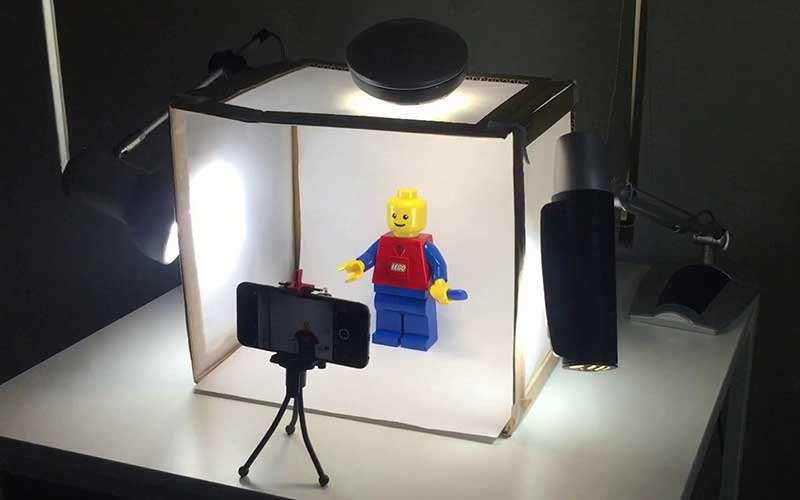
Step 5
Now only one thing is left, and that is adding the lights. Place the lights on both sides of the box. You can also use another light at the top. After doing all of this now start shooting your product photo like a professional photographer.
Camera Setting to Shoot in the Light Box
In the Lightbox, you will be taking photos of something that is so brightly lit. If you do not consider the settings such as aperture or ISO, your first shot might end up being too bright or with the wrong color. Consider changing the shutter speed and white balance as well. Too yellow or blue is the sign that your white balance is not right. Try adjusting the exposure if your photos are too dark or too bright.
Conclusion
I hope you have enjoyed this article about making a DIY lightbox. We recommend a lightbox to be a photography tool worth investing in it. You can use the Lightbox for different aspects of photography. Especially DIY Lightbox is an excellent tool for shooting product photos. So, do it yourself instead of buying an expensive one.
Artists can place the image and copy on the glass with the Lightbox. If you place the canvas on top of the Lightbox, the light will allow you to see the image clearly enough to trace it.
A flash diffuser is a light modifier tool that is designed to fit the upper part of a specific flash unit. It makes the light soften or spread the harsh.