Adobe Photoshop offers a powerful solution for saving valuable time through Photoshop Actions. In this article, we will derive into Photoshop Actions, how to create and export them and understand their practical implementation through a live project.
What is Photoshop Action?
Photoshop actions are a series of recorded tasks, or commands users create to automate repetitive processes. By recording a set of actions once and playing them back whenever needed, you can complete complex tasks with a single click, whether on a single image or a batch of files.
How to create Photoshop Actions?
Planning: Before you create actions, it is essential to have a plan in mind. Carefully outline the actions you want to automate. Proper planning can save much time while editing your photos.
Create Actions: To create Photoshop actions, go to the window menu from the top bar and select actions to open the actions panel. After that, create a new set and new actions.

Record Actions: Now, it’s time to record the actions. Photoshop will capture every step that we take while editing an image.
Practical Implementation with a Live Project:
For example, There are 35 images with different Dimensions, but all image has the same crop ratio of 1:1
The task is saving all the images in 1200X1200px with Photoshop Actions.
Manually resizing each image would be time-consuming, but we can complete the task within a few seconds with Actions.
Let’s Start
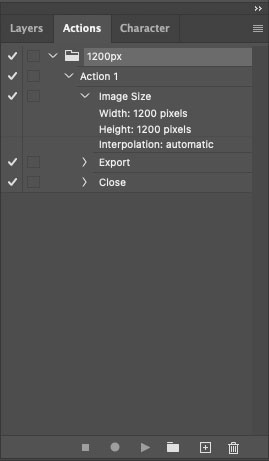
In this case, our first step is to correct the image size dimensions, width 1200px, and height 1200px.
As the next step, record the action to export the image in the desired format and location. Now our action is ready, and simply stop actions recording.
Apply the Action: Now we have selected the actions and play the actions for the rest of the images. Within a few seconds, we got the final output.
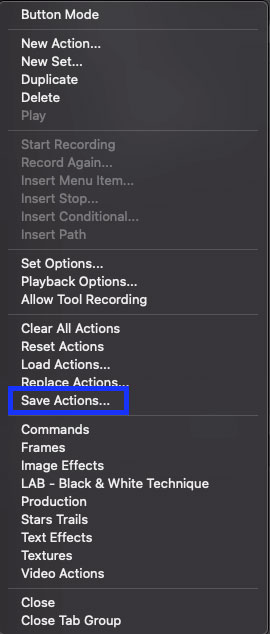
Saving or Loading Action: Photoshop actions can be used later. For later or other pc uses, we can save the actions.
We can save Actions for future use or transfer them to other computers for consistent editing across different devices. Choose the “Save Actions” option from the Actions panel to save Photoshop actions.
Loading actions on another computer is relatively easy. Just select the “Load Actions” option and import the action file.
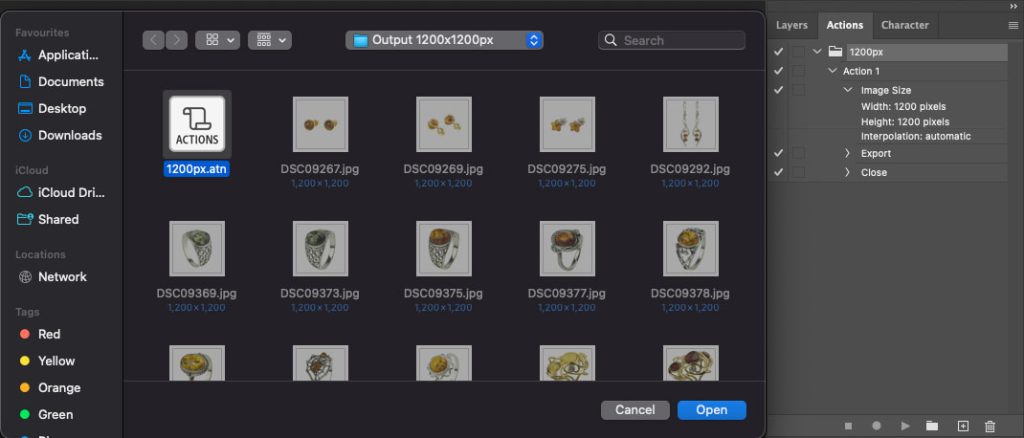
Action files should be in .atn format.
In conclusion, mastering Photoshop Actions can significantly improve workflow efficiency and save valuable time while editing images. By planning, creating, and utilizing actions effectively, you can automate repetitive tasks and focus on unleashing your creative potential.